Herbal Vinegar Hair Rinse

This wonderful vinegar rinse is great for the hair and will bring life back to your tresses. Herbal vinegar hair rinse can be made from different herbs depending on your hair type and color.

Choose the right herb for your hair type. Listed below are some of the herbs used in herbal rinses.

Blondes:

  • Chamomile
  • Lemon
  • Mullein flowers
  • Orange flowers
  • calendula
  • Turmeric

Brunettes:

  • Sage
  • Rosemary
  • Yarrow
  • Clove
  • Henna
  • Marigold

Red Hair

  • Marigold flowers
  • Witch Hazel Bark
  • Henna
  • Clove
  • Red Hibiscus

Dry Hair

  • Comfrey root and leaf
  • Red Clover
  • Geranium
  • Sage
  • Orange Peel

Oily Hair

  • Lavender
  • Lemon Balm
  • Rosemary
  • Lemon Grass
  • Lemon Peel

For Luster

  • Parsley
  • Basil
  • Rosemary

Before using any herb solution on the scalp, dap some on the inside of your arm and cover with a bandage and leave for 24 hours. If nothing happens, it is properly safe to used on your head.

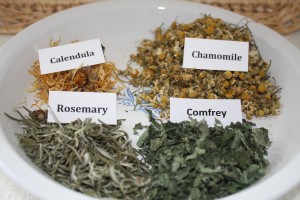
For the rinse featured in this blog, I used chamomile, comfrey, calendula, and rosemary. These herbs were chosen because I have blond, dry hair. The chamomile and calendula can be replaced with sage and rosemary for dark hair.

Chamomile and calendula are for blond highlights, rosemary for luster and hair growth and comfrey for dry hair.

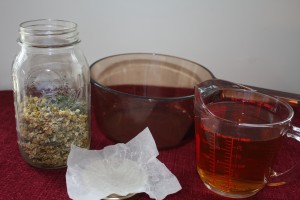
Herbs used in Hair rinse

Herbs used in Hair rinse

Chamomile Herbal Vinegar Hair Rinse

Ingredients:

  • About 1 cup of dried chamomile flowers
  • 2-4 Tbsp. each of rosemary, comfrey and calendula
  • 3 cups of apple cider vinegar plus more if needed to cover
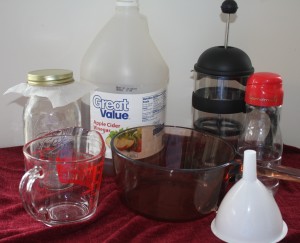
Equipment used in Hair Rinse

Equipment used in Hair Rinse

Equipment used:

  • Glass, enamel, or ceramic pot for heating vinegar, stay away from aluminum
  • Quart jar with lid lined with wax paper
  • Measuring cup
  • Funnel
  • Plastic container with plastic lid (Note: use plastic in the shower, glass might break)
  • Fine mesh strainer or cheesecloth lined strainer
  • Labels
Chamomile Hair Rinse

Chamomile Hair Rinse

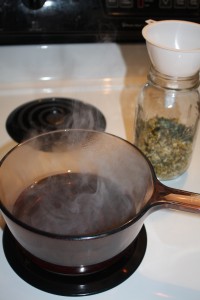
Heat vinegar in glass pot to almost boiling. It is good idea to stay away from aluminum pans, they react to the vinegar. Some suggest staying away from all metal, but I have used stainless steel.

Vinegar heated to almost boiling

Vinegar heated to almost boiling

Place herbs in glass jar.  Have lid ready and lined with wax paper. The wax paper is to prevent the vinegar from coming in contact with metal lid. Plastic lids works best, but they are hard to fine to fit glass jars.

Cover the herbs with hot vinegar and allow to cool before adding the lid. Don’t forget to label and date. Chamomile will soak up a lot of vinegar, so allow room in jar. May need to add additional apple cider vinegar in a few days.

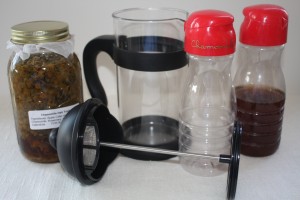
Hair rinse Ready to be stained

Hair rinse Ready to be stained

Shake every day for 1 to 2 weeks which allows the herbs to infuse with the vinegar. After the time has passed, strain the vinegar using a coffee filter lined mesh strainer. Squeeze out as much of the liquid as possible. Compost the herbs. Pour into plastic container with plastic lid to use in the shower. The part full container is what is left from the last batch I made. This size plastic container will not hold all the vinegar this recipe makes.

How to Use:

Mix about 1/4 to 1/3 cup of vinegar with 2 cups of warm water. After shampooing, rinse hair with vinegar/water solution and massage into scalp. Watch your eyes, vinegar will sting. I like to keep a plastic cup in the shower for mixing the vinegar solution.

The vinegar solution can be left in hair or rinse with warm water followed by cool water. Use about once a week to every other week.

Vinegar removes soap film and excess sedum oil from the hair. Sedum oil is needed in moderate amounts to promote healthy skin and hair.Too much can cause oily hair and skin.

Vinegar helps with all the abuse we put our hair through and it will help to restore, soften and condition the hair.

Beautiful hair is a result of what we put on our hair as well as what we put in our body. A balance diet and hydration will result in great hair.

 

A to Z of Herbal Remedies-Why most herbalist use herbs

Today and every Monday, I am starting a new series on herbal remedies for everyday problems. Folk remedies for anti-aging, arthritis, acne, and aches and pains are just a few topics this blog will covered. A to Z.

The remedies mentioned in this blog at any time are for the traditional, historical and folk uses of herbs. Always consult your health care professional before trying any herbal remedy especially for the first time. Some herbs may react with your medication and some people may have allergic reactions.

Today as well as yesterday, families created simple cures at home for a a variety of common ailments. With the advance of medicine, as a culture we have allowed our home remedies to lapse in favor of conventional treatments. But the popularity of herbs is coming back with a vengeance.

As a culture we go to the doctor for the simplest thing and the emergency rooms are filled. Learning to use herbs, we could treat many common ailments at home. And with the new health care laws who knows what going to happen in the future.

We add chemicals to our body and we saturate our liver and other organs and they can become overworked. Herbs are usually safer and don’t require a prescription, at least not yet.

Doctors are needed in our lives to help us to decide the best course of action for our health. Knowing what is wrong can help in this decision making process and what steps to take. Herbal medicine and conventional medicine can go hand in hand.

Break a leg, and you need a health care professional to treat your leg.  But if I get a cold, with knowledge I can treat it my self. With a little research and study you might the solution to common ailments. Learn the properties of herbs before using them, check their cautions and if they have any side effects. What has worked in the past, works today for the most part.

Interest in herbal medicine is soaring and more and more people want to take charge of their health and are checking out the therapeutic value of herbs. Herbs don’t change over the year, just the information and research. More and more research have been and is being conducted all over the world in the use of herbs.

Growing our own herbs in our home gardnes have gain in popularity, in fact gardens of all kinds are popping up everywhere. I think many of us are tied of our vegetables ect. traveling such long distances before reaching our supermarket shelves.

Cooking shows are using herbs in many of their dishes, and it seems almost every recipe contains some herb. Go to your local farmer’s markets and usually will find a vendor selling herbs.

There are dozens of ways of using herbs medicinally and in this series I will try and explain them.

What is an infusion?

An infusion is prepared like a tea and is used for herb leaves and flowers that easily give up there medical properties. When making an infusion it is better to use glass, china, or enamel teapot with a lid. Use pure water such as distilled or bottle mineral water. Most ‘city’ water contains chemicals which may inhibit the medicinal properties of the herb, such as water with a high lime content.

Use about 1/2 c. fresh herb (dried half of the amount) to a pot of tea. (about 2 cups of water)

Pour almost or boiling water that has stopped boiling over the herb, cover and allow to steep about 10 minutes. Stain and drink. Honey can be added for flavor and added health benefits.

Most medicinal teas are taken about 3 times a day. Store the remainder in a cool place.

Sk

Spicy Mug Rugs

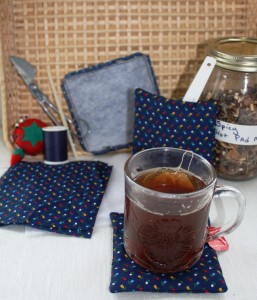
Spicy Mug Rugs Gift packet

Spicy Mug Rugs Gift packet

These fun little herbal mug rugs make a great gift anytime you need just a little something, such as a house warming present, teacher’s gift, mother’s day gift or friend’s gift.

They may great additions to a Gift Basket. Make up a basket with special teas, pretty mug, spicy mug rugs and other tea accessories.

Add a card to the mug rugs, explaining how to use. On the card I write:

SPICY MUG RUGS

Place a cup of hot tea on these spicy mug rugs to release the aroma. When not in use, store in plastic bag to retain the aroma for the next time. Enjoy!

Mixture:

  • 1 part cinnamon chips, cut into small pieces
  • 1 part. whole cloves
  • 1 part. nutmeg pieces or chips
  • 1 part. allspice
  • 1 part. rosemary needles

Or any mixture you like. This a great way to use up those old spices and dried herbs in your cabinet. Or you can just use cloves, or how about pickling spices? Stay away from ground spices unless you make a muslin liner to hold the spices, otherwise they might leach through the rug.

NOTE: Be careful and not leave these rugs on a wooden or cloth table, because again they might leach. Spices contain an oil that can affect your finish.

Equipment need for Spicy Mug rugs

Equipment need for Spicy Mug rugs

Equipment:

  1. 4 or 8 pieces of fabric 5-1/2″ square
  2. 4 or 8 pieces of low loft quilt batting 5-1/2″ square, can be a tad smaller
  3. Thread to match
  4. Sewing needles and pins
  5. Sewing machine or hand sew
  6. Scissors
  7. Spoon
  8. Spicy mixture
  9. Stylus for turning corners
  10. Ribbon for finish product

Cut fabric and batting into squares. If making two mug rugs, you will need 4 pieces of batting and 4 pieces of fabric. If making 4 finished mug rugs, you will need 8 pieces of each.

I like to use cotton fabric. Might add monogram initial to center for an elegant look.

Layer a piece of batting, place two squares of outer fabric, right side together, and top with layer of batting.

The finished piece has the batting on the inside with the right sides of the fabric facing out.

Pin together and place pins around with one end having two pins showing where to leave an opening for turning, it should be about 2 inches apart.

Sew around using a sewing machine or hand sew leaving the opening, Back sew at opening to reenforce the turning hole. Iron.

Trim off the excess batting next to 1/4″ stitching line and trim the corners for ease of turning. Check the back mug rug in above picture. Turn inside out and use the stylus to ease the corners. Iron.

Using a spoon small enough to fit inside the hole, add about 2 Tbsp. of the mixture between the batting layers. Fill over a paper to catch any spills.

Pin the opening close and whip stitch or top stitch around. Be sure opening is closed so the mixture will not fall out.

Move the spices around to evenly distribute the mixture.

To use: Place a hot cup of tea on the mug rug and smell the spicy aroma. It may need a little crunching to release the aroma.

To help retain its fragrance, store in a plastic bag or a box lined with plastic.

Note: It is not a good idea to leave the Spicy Mug Rug on a wooden table, because the oils from the spices may leach out.

Happy Crafting!


Orange All Purpose Cleaner

This orange All Purpose herb cleaner is easy to make and great for the environment, and does not contain harsh chemicals. So it is great for a greener world.

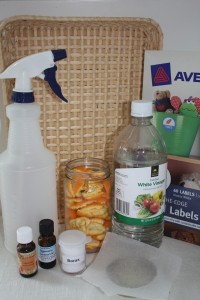
Ingredients for Orange All Purpose cleaner SK

Ingredients for Orange All Purpose cleaner SK

Ingredients:

  1. Orange peels, any kind
  2. White distilled vinegar
  3. Water
  4. Borax
  5. Essential oils 5-10 drops each Peppermint and Lavender
  6. Spray bottle
  7. Glass jar with lid
  8. Wax paper
  9. Labels
  10. Jar or container with plastic lid

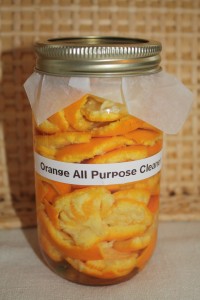
Tear pieces of orange peel and place in glass jar and cover with white distilled vinegar. Using a small piece of wax paper place over jar opening between the vinegar and the lid. Attach lid.

Infused Orange White Vinegar

Infused Orange White Vinegar

The wax paper helps to keep the vinegar away from the metal lid. Vinegar will cause the metal to break down after a period of time. Using a canning lid does seem to offer more protection than a regular lid. A pickle jar might work well for this because at one time it contained vinegar.

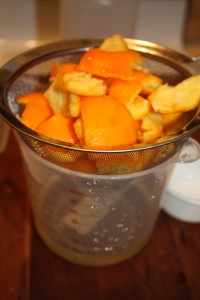
Shake each day for two weeks. Place it somewhere you will see it every day such as in the bathroom. After two weeks stain the vinegar and compost the orange peel.

Draining orange peel

Draining orange peel

Heat two cups of water and 1 tsp. borax and whisk until melted.

Borax and Water

Borax and Water

This step is important when using a spray bottle to keep the sprayer from clogging.

Allow the water to cool and pour into spray bottle.

Mixing the cleaner

Mixing the cleaner

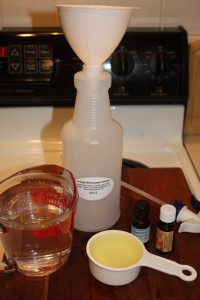
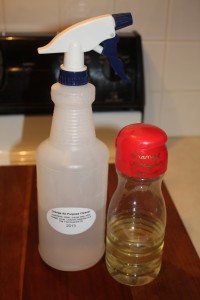
Mix in the infused orange vinegar and essential oils. Mix in five to ten drops each of the essential oils. Don’t forget to label. Pour the remaining orange infused vinegar into a bottle with a plastic lid, label or write on the bottle the contents.

Finished cleaner

Finished cleaner

This cleaner works great on most surfaces which can handle vinegar. Avoid surfaces such as soapstone or other porous surfaces.

Orange is antibacterial, and vinegar’s acidity cuts through grease. It cleans stove tops, microwaves, cutting boards, dirty dishes, bathroom surfaces and more.

Lavender and Peppermint are the two essential oils I used in this cleaner. Lavender essential oil is an aromatic, antiseptic, antibiotic, antiviral, and antibacterial.

Peppermint essential oil inhibits microorganisms and it smells good too. We have a tendency to put off cleaning, at least with this cleaner it smell good.

Borax cleans, deodorizes and helps to remove stains.

Happy Cleaning. HA HA. SK


Castor Oil Pack

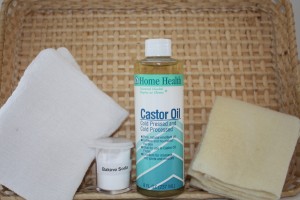
Castor oil pack equipment

Castor oil pack equipment

The following books were used to research this subject.

  1. Dr. John R. Christopher Herbal Home Health Care
  2. William A. McGarey, M.D. The Oil That Heals

What is a castor oil pack?

A Castor oil pack is an oil soaked cloth preferably flannel wool with no color dyes laid on the skin over an ailment and cover with moist heat.  It is usually left for about one hour. Repeat several times until the ailment has cleared. It also can be placed on the skin and left overnight which is my preferred method.

According to both books, the castor oil should be massage into the skin above the ailment in a circular motion clockwise.

Dr. McGarey recommends massaging on the left side of the body clockwise and on the right side counter clockwise. He also list castor oil’s chemical makeup which consists of triglyceride of fatty acids. Ninety percent of the fatty acids contains Ricinoleic acid and small amount of seven other acids.

According to Dr. McGarey books: Edgar Cayce’s works list several ailments castor oil helps: These historical uses include.

  • Increases eliminations
  • Stimulates the liver
  • Dissolves and removes adhesion
  • Dissolves and removes lesions
  • Relieves pain
  • Releases colon impaction
  • Stimulated gall bladder
  • Reduces inflammation
  • Increases relaxation
  • Reduces swelling
  • Stimulates organs and glands

Following are the two methods I have used over the years. If you dislike the feel of wool, use 100% cotton with no dyes. I like to use cotton diapers.

Always test for allergic reactions when using anything on the skin for the first time.

Castor oil packs work for me but not everyone will achieve the same results. Our body makeup is different from our neighbors and nothing works for everybody for everything.

Equipment

  1. 100% soft wool or 100% soft white cotton. 2-4 thickness
  2. Castor oil
  3. Plastic Wrap
  4. Ace bandage
  5. Bath towel
  6. Hot water bottle
  7. Baking soda with warm water

Overnight Method:

Pour castor oil on your choice of cloth and place over the area affected, cover with plastic wrap and cover this with some type of holding material. Cloth should be folded 2-4 thickness and large enough to cover area.

If you are using on the upper body, it sometimes can be held in place with a old snug tee shirt or some areas will work using an Ace bandage.

This may take a little experimenting to find the best way to hold the pack in place while you sleep. In the morning remove the pack and wash the area with 2 tsp. baking soda mixed with about 1 quart of warm water. This will remove the toxins the castor oil has brought to the skin’s surface. I like to repeat this method until the problem has resolved itself.

The castor oil pack can be used again until the cloth starts to change color. When this happens it is time to throw the cloth away and start with a fresh cloth. Some may be more comfortable with using the cloth only a few times before disposing. I usually use it for about a month.

Caution: This may stain your sheets and if this is a problem try the One Hour Method. I use old sheets on the bed.

One Hour Method:

Use the same pack of oil and cloth covered with plastic wrap, but add a warmed bath towel and cover the towel with a hot water bottle. Be careful don’t get burned. Lay still for about an hour. Wash the area with the baking soda wash. Repeat this as often as need to resolve the problem.

I have used these methods for a number of years. I use it on my knee when it starts to act up and I use the overnight method. I have known friends who have used the pack  for lumps until they can get a doctor appointment.

Dry patches: Massage the castor oil on dry patches on your skin or any where you have a wart. If you want to leave the castor oil on the wart for a time, use a bandage with a few drops of oil.


Roasted Garlic Potato Soup

This is a great way to used roasted garlic. I found this recipe in Weight Watchers New Complete Cookbook. Over the years I have change it somewhat. Adapt it to your taste. Yukon gold potatoes works in this soup as well. I usually don’t peel the potatoes for added flavor. If you want a creamier potato soup, use peeled Yukon gold or russet potatoes, they mash better than red.

  • 2 c. reduced sodium chicken broth or vegetable broth
  • 1-2 Tbsp. Olive oil
  • 1 medium onion, chopped
  • 5 c. Red potatoes, cut into small pieces about 1″ cube
  • 1 1/2 c. buttermilk
  • 1 to 2 pieces of Canadian bacon, chopped into small pieces
  •  1 whole bulb of roasted garlic, squeeze from paper skins and set aside
  • 1-2 Tbsp. chopped fresh Italian parsley
  • Salt and pepper to taste

In a large Dutch pan, add the olive oil and heat until warmed, add chopped onion, saute onions until they are tender and have some color. Add chicken broth and scrap up bits from the bottom of the pan. This adds additional flavor. Add potatoes and simmer until potatoes are tender, about 15 minutes. Add the roasted garlic and with a potato masher, roughly mash the potatoes and garlic until a few chunks remain. Add the buttermilk, Italian parsley and Canadian bacon, heat through. Add salt and pepper to taste. Serve with a few sprigs of chopped fresh parsley to garnish. Enjoy.

I like to used low-sodium broth to control the salt added to recipe and Canadian bacon also contains salt so taste before adding salt.

Happy Cooking: SK

How to Roast Garlic

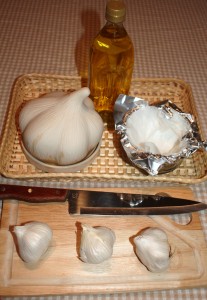
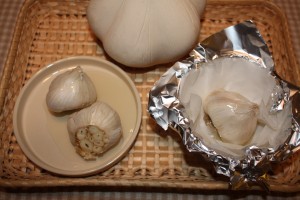
Items need for roasting garlic

Items need for roasting garlic

Roasting garlic is fun and easy and makes the whole house smell wonderful while it is roasting. The taste is mild and buttery. Use in potato soup, on fresh bake warm bread, or in salad dressing. These are just a few ideas, you can use it in so many ways.

Ingredients: Simple

  1. Whole bulbs of garlic
  2. olive oil
  3. foil
  4. parchment paper
  5. knife and cutting board
  6. oven safe dish
  7. or garlic roaster
Ready for the oven Garlic

Ready for the oven Garlic

In an oven safe dish line it with foil and place a piece of parchment paper about 8″ square over the foil. Cut off the top of the garlic for easier removal of the garlic pulp. This step is optional.

Place a garlic bulb inside the parchment paper and use a few teaspoons of olive oil to cover the blub. Fold in the packet and bake at 350°F for 30-45 minutes. When the bulb is soft it is done, don’t let it burn.

If you have a garlic roaster follow the directions with the roaster, or bake at 350°F for about 30-40 minutes. Place garlic on base of the roaster and add a few teaspoons of olive oil and cover.

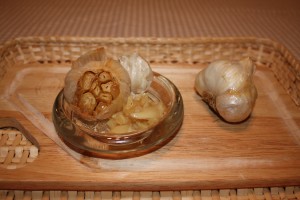
Garlic after roasting

Roasted Garlic

To remove the garlic from the paper lining, just squeeze and it will come out sticky and creamy.

Garlic is used in almost every types of cuisines and add flavor to all foods. I have even had some garlic cake once.

Check out my post on Herb butters under Cooking with Herbs. This works wonderful in herb butters by itself or mix with other herbs. Roasted garlic taste wonderful in cheese balls to add a new dimension.

Happy Cooking Sharon K


Nuts and Seeds! Herbs?

Nuts and Seeds

Nuts and Seeds

This is a web site about herbs, so why am I blogging about nuts and seeds on an herb blog. One reason is we use herbs for our health and well being, as well as to flavor our food. Or it could be ‘those herb people’ are just obsessed about herbs of all kinds.

Well technically nuts and seeds are not herbs, or are they?  If you read definitions of herbs in books it changes with every book. The usual definition of herbs as being anything herbaceous. Did it tell you anything about what is an herb? Didn’t think so!

According to one of my research book which I use frequently Rodale’s Illustrated Encyclopedia of Herb, “A tree can’t be an herb, can it”…”What makes a plant an herb is an oft-asked question, and one that an encyclopedia of herbs should answer”…”A plant or plant part valued for its medicinal, savory, or aromatic qualities.”

The Herb Society of America calls an herb “any plant that may be used for pleasure, fragrance, or physic.”

OK did it answer your question “What is an Herb?”? Yea! not really. So nuts and seeds can be an herb or not.

Nuts and Seeds

Nuts and seed are almost equal to dried beans and peas in their protein content. Soybeans have more protein than nuts. Mix nuts and seeds with beans, peas, or soybeans and you have a healthy mixture. The fat content in this healthy mixture is unsaturated fat, still has calories but is a better kind of fat for the body. This type of fat is good for digestion and heart health especially if mixed with rosemary and spices like cayenne and peppercorns.

Nuts and seeds provide get-up-and go and will fill you up and help in avoiding those bad snacks we all love so much.

Attention Mothers! if your kids like peanut and butter sandwiches, great especially if it is on whole grain breads and made with pure peanut butter. Just be sure they are not allergic to peanuts.

Peanuts are technically a legume, not a nut, but hey what do we care, they still taste great. Almonds, pecans, walnuts, and other nuts are the dried fruit of the tree. Sunflower seed, pumpkin seeds and sesame seeds are softer than nuts but still pack a punch of nutrition.

Seeds are better, for the most part, in their whole form with the coating intact. Some seeds such as anise, cardamom, and caraway will become rancid after they have been crushed if not soon. Keep the seed whole until ready to use.

One of my favorite appliance in my kitchen is a coffee grinder, which has never seen a ground of coffee. Used it to grind seeds, and dried herbs. Mortar and Pestle works great as well.

Warm climates with humidity will affect the life of your seeds and spices. Best flavor is attained when you crush just enough for your recipe. Old seeds lose their flavor, so once in a while BUY FRESH!.

Here are few facts:

The protein content of most nuts and seed is 10% to 25% protein by weight.

  • Peanuts, (legume) are 26% protein and 48% fat by weight.
  • Walnuts are 15% protein and 64% fat by weight
  • Sunflowers seeds are 24% protein and 47% fat by weight

The protein in nuts contains no cholesterol and it has been said the fat content in these good fats will lower your cholesterol level. Lentil (bean) are said to lower it by up to 50% in just a few months. Do your research and you may fine some surprising facts about these wonder foods.

Nuts have a good balance of amino acids and when combine with whole grains have complete protein, better than a steak.OOOOH! Americans lover our steaks. Hey I grew up on a cattle ranch actually we called it a farm, but our main focus was cows.

Good Health

Sharon K


Relocating Perennials

Early spring when the ground is thawed, is a good time to move your perennials. Before they get too big because this is hard on the plant. This year I plan on not waiting until they get ‘toooo’ big and it stresses the plants. Some times just moving them a few feet can mean the difference in how they will preform in the future. Perhaps they received too much sun or not enough.

Another reason to relocate is too many plants in one area, or we just want to change the garden around. I have a bed the construction of the bed is not working, so I need to move everything and find a new home until the bed can be re done.

Try not to plant too many plants in one location, give them room to grow. I know a fuller bed looks nice but when it comes to herbs they have a tendency to get happy as one of friends like to say of spreading plants.

Plants like to have room and dividing them makes the plant healthy and happy. Not the same kind of happy as the above comment. It may take a year for the plants to bloom, but next year the blooms will be better than ever.

Some plants can have the bloom period extended by cutting back. Try cutting back half of your purple cone flower (Echnicea) and or yarrow, some will boom now and some will bloom later. Zinnias, even through they are annuals work great using this method of cutting half back to bloom at a later time.

If you have a garden tour plan for late summer, cutting back will give you booms that might not otherwise be present. Be sure and do this before they bloom for the summer. Most perennials will only bloom once a year. Now their are exceptions to every rule and Stella De Ora will sometimes bloom both in the early spring and throughout the summer if it is not too dry.

To relocate a plant, dip it up carefully, try not to disturbed the roots too much. Some can take it more than others. Dig a hole slightly larger than the clump. Water the hole before planting and allow to drain completely, and fill again to make sure the hole is thoroughly watered. This will help the ground from wicking the water away from the plant. Carefully place the roots the same way there were growing and at the same depth as before.

Now an exception to the above rule about not disturbing the roots. Purple cone flower can have the dirt mostly removed and replanted. In fact I usually cut off some of the roots if the plant is at least three years old, and use the roots in a tincture. Be sure the plant is old enough because you can loose the plant if not careful. I usually don’t take all the dirt off the plant unless I want it for a tincture.

Some herbs are hard to kill as I mentioned in a previous post, I just want to restate be sure you plant it where you want it, because even a small root can spread.

Happy Gardening SK


Bouquet Garni and Fine Herbs

In a previous post,”Fresh Herbs in the Kitchen”, I mentioned herbs used in Bouquet Garni and Fine Herbs. What exactly is bouquet garni and fine herbs blend? I hope the following will answer the question.

Bouquet Garni is a small bunch of aromatic fresh herbs and spices tied together and used in stocks, soups, stews, and sauces.

The herbs are tied together to keep the herbs contained so the flavor not the bits of the herb  will infuse the food. Fresh herbs have a tendency to look bad in the dish if they have cooked for longer than 10 to 15 minutes. Plus all their flavor is gone after the long cooking time. Both dried and fresh herbs along with spices can be used. If using dried herbs use method two.

Method #1: Tie two or three sprigs of Italian parsley (flat leaf) with one or two sprigs of thyme, and a bay leaf. You can include marjoram, French tarragon, rosemary, or sage in one or two sprigs each depending on the flavor desired.

Try tucking the herbs between two stalks of celery before tying for additional flavor. Some bouquet garni contain peppercorns, whole allspice, and whole cloves. Once the dish is cooked, remove the bunch of herbs.

Method #2: The bouquet garni is place in a small square of cheesecloth or clean muslin. The herbs are chopped and usually dried with this method. Bring the corners together and tie with a string with a tail long enough to hang over the edge, (not too long, you don’t want it to catch on fire) or tie to the handle of the pot. This makes it easy to remove. The dried herbs can also be placed in a tea ball instead of cheesecloth.

The bouquet garni can be made ahead from either fresh or dried. The fresh can be frozen and added to the pot straight from the freezer. The dried can be place in an airtight container for future use.

Fine Herbs blend: are usually added to the dish in small quantities in vegetables, eggs, chicken, soup, salads, sauces and fish dishes. Add the last few minutes of cooking to retain their flavor.

Fine herbs include finely chopped in equal amounts of chervil, chives, tarragon, and parsley.

A jar of dried fine herbs make a wonderful gift to anyone who enjoys cooking.

To make the gift jar of Fine Herbs blend: Fine a pretty jar or container with a tight fitting lid and add the dry herbs in equal amounts listed above. Include a few of your favorite recipes to the jar. Tie with a pretty bow. Don’t forget a label for the jar with the date the herbs were dried. Herbs loose their flavor after a certain amount of time. Six months to a year.

Happy Cooking!