Harvesting and Drying Fresh Herbs and Flowers part one

Harvesting and Drying Fresh Herbs and Flowers is an easy way to extend the harvest of your herbs and flowers. Basically it is providing an environment for your herbs to remove the excess water and easy to store for future use. The herbs should be dried in a way that allows the herb to retains its flavor, fragrances, and shapes as much as possible.

Several methods can be used to preserve the herbs which include:

  • Drying using a food dehydrator
  • Drying in the refrigerator
  • Air drying
  • Hanging to dry
  • Drying using the microwave
  • Drying use the oven
  • Freezing the herbs
  • Making herbal vinegars
  • Freezing in oil

When to Cut: Cut the herbs just before flowering on warm, dry morning after the dew has dried and the sun has warmed the herbs which help to bring the essential oils to the top but before they began to evaporate.

It is best to stick to one variety at a time to keep the flavors from mixing and well– keep it organized. Almost every herb can be dried but some herbs have better flavor if frozen. This blog will give you lots of advice on which herbs to dry and which to freeze, but sometimes it takes experimentation. Drying herbs will react in different ways in different parts of the country. In humid areas it takes longer for the herbs to dry and in dry areas the drying time will be shorter but may result in unattractive herbs.

Some herbs will change their color dramatically, or their shape while others will retain their original color and/or shape. Keeping an accurate notebook will help the harvest in the following seasons. Notes should include the date, weather conditions, the harvest methods and the results.

Start with harvesting the herbs. If the herb has a small leaves such as thyme or marjoram, the stems and leaves should be left intact. With medium to large leaves, I cut the stems and place gently in a gathering basket or tub and as I pick over the leaves, I cut them away from any thick stems, depending on your drying method.

The herbs can be cut back about once a month. Perennials should only be cut back about a third, and annuals can be cut back about half and cut back completely at the end of the season. The last cutting should allow the perennials to recover before the winter.

Avoid picking damage leaves or leaves chew up by insects, avoid leaves with powdery mildew or mold. Be sure and pick more than you expect using, the herb will shrink.

Washing: There are two schools of thought when it comes to washing your herbs before drying. Some books say don’t wash, other say do wash. I always wash, because I see what is left in my tub when I am through washing.  Herbs with small leaves leave on the stem for drying.

I use two clear tubs and wash from one tub to the other until the water runs clean. As I wash I pick over the leaves, cut off large leaves from the stems and check for any foreign objects.

I always wash the herbs the same whether I am using them as culinary, medical or crafts. I like to know I can use them however I want without worrying about how they were cleaned.

Drying herbs

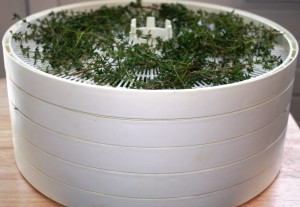
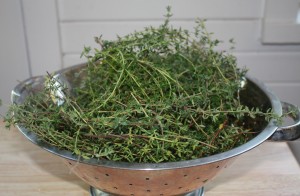
Thyme is air dry in a colander for a couple of hours

Dehydrator Drying: Place the herbs in a colander and allow airing dry for a couple of hours. Once most of the water has been removed I place the leaves in a single layer in a food dehydrator with a temperature setting between 90° and 110° F. To maximize the essential oils in the herbs, they should not be dried above 110° F. Allow the leaves to dry until crispy and store in a glass jar with tight fitting lid. I have been using my dehydrator for many years and it is my favorite method.

drying herbs

Dehydrator used to dry thyme

Check after a couple of days to make sure there is no condensations in the jar, if it has only been a couple of days re-dry and if it has been longer, start over.

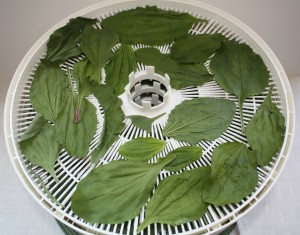
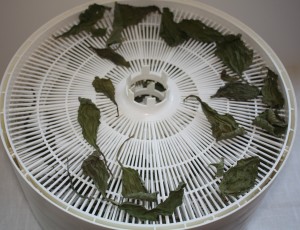
The next two pictures show a rack before drying and after drying.

Drying plantain

Plantain ready for drying at 100 ° F

After drying is complete

Rack after drying is complete. Plantain

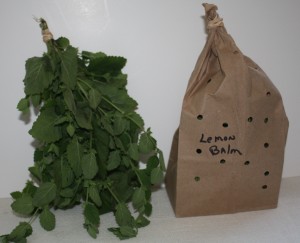
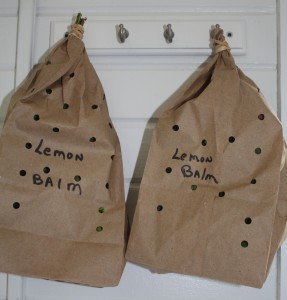
Air-Hang Drying: For smaller plants, gather a few sprigs together about 6 to 8” long and place inside of a brown paper bag that holes have been cut into to allow air drying. Gather the stems together and tie the bag close with a rubber band, catching the stems with the rubber band.

Hang the bag either on a metal clothes hanger or hook and hang up to dry in a cool, well ventilated area.  It may take about 2 weeks. Check every couple of days for crispness and to turn the sack around.Once dry place the jar in a dark cupboard to retain freshness. Use within one year.

hang air drying herbs

Herbs bunch to place inside paper bag

Herbs with larger leaves can be hung to dry but they take a lot of room and a large grocery paper bag. For years herbs were hung in the rafters, but most people leave them too long and they become dusty and unusable. Herbs such as bronze fennel look wonderful hanging in the rafters but this is used mostly as decoration.

Drying herbs

Herbs hung on hooks for air drying

Air-drying: Lay the single layer of herbs flat on either a plastic tray with holes in the tray (such as those sometimes used as nurseries) or flat baskets or screens. Place these trays on rack used for drying clothes or on shelves with circulation all around. Check every day and once dry place in jars.

Try not to crush the herbs until they are ready to use, because the essential oils and aroma are release when crushed. The inside of your jar does not need the flavor of the herb, your food or medicine does.

Check out part two for information on Harvesting and drying fresh herbs and flowers for drying seeds, flowers, roots and other methods of drying and harvesting herbs.

Growing Yarrow

Growing Yarrow is a perennial and works great in dry places with full sun. It grows in zones 3 to 10 and has showy bright flowers.  The white yarrow can be found along roadsides and fields.

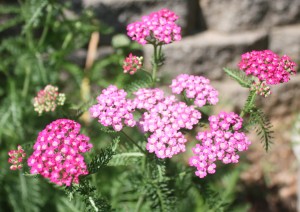
Pink Yarrow

Pink Yarrow, A bit of a spreader and shorter

Yarrow fossils were found in caves which were in existence for 60,000 years. Yarrow was used to stop solders wounds with the leaves and the Native Americans used the plant for most injuries and ailments. Yarrow can be found growing wild in many areas of the US.

Medical: The medicinal yarrow has white flowers, and is rich in chemicals and great for allergic problems such as hay fever. The flowers should be harvest in the peak of their flowering cycle.  The essential oil is used for anti-inflammatory and good mixed with carrier oil for chest rubs to combat colds and influenza.

The leaves of the (Achillea millefolium) encourage clotting and can be used for bleeders. When dried the plant is great used in digestive tonic to encourage bile flow in the gall bladder, and good for circulation and high blood pressure. The plant will promote sweating which may bring down a fever.

Ways of using the plant include teas, used as an inhalation, as a poultice for cuts and bruises and to increase circulation for varicose veins. The white yarrow can be made into a tincture or added to salves or your very own skin lotions. You can make your own skin lotion or added to commercial.

Just a note: Products used on the skin, I prefer to make my own because in most cases the commercial products have ingredients I can’t even pronounce.

Chew a fresh leaf to stop the pain of a toothache and drink a tea to aid in digestion. Mouthwash made with yarrow is used for inflamed gums. Yarrow is known to help cleanse the body.

In some cases yarrow can cause a skin rash and large does can cause sensitivity to sun. It should be avoided by pregnant women, actually include most herbs.
Growing: It grows about 1 foot to 2 feet tall and is considered a weed in many cases. Likes full sun but will tolerate light shade and likes a well-drained soil. Yarrow can grow in dry areas. Remove faded blooms to increase bloom time. The seed is small and tear shaped.

The plant should be divided in the fall because the roots can be invasive.

Don’t confuse Yarrow with Queen Anne lace or hemlock. Be sure and check with a field guide before picking any plants in the wild.

Culinary: The young yarrow leaves can be added to salads, or mixed in herb butter or herb cheese.

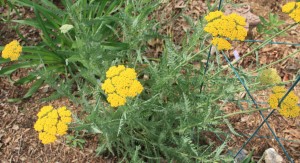
Other cultivars: The most common ornamental yarrow is yellow which is great for dry flower arrangements or adds a long living flower in the garden. Other colors of yarrow include bright pink, pastel, gold, salmon, peach and red.

Yellow Yarrow

Yellow Yarrow, ornamental

Dye: The yellow flowers yield a yellow dye to wool when it is mordant with alum. The whole plant will dye an olive green when mordant is iron.

Yarrow will attract beneficial insects and likes to be grown near other herbs.  The root of the plant activates a disease resistance for the nearby herbs. Cut the plant back and add to the compost pile to increase composting time. The compost pile only needs a small amount of leaves to make a pile of compost.
Yarrow looks great mix with purple cone flower and other perennials. Yarrow starts blooming usually a bit before the purple cone flower but will continue blooming as the purple cone flower bloom.  Some varieties will grow lower to the ground while other stand up tall. Have fun with yarrow in your garden. It is a work worth having.

Happy Gardening!

Dandelion, an herb or a weed?

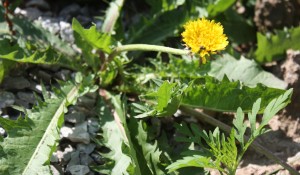
This little distinct yellow flower (dandelion, taraxacum officinale) with its tooth shape leaves is usually consider a pest, a weed, a nuisance, but in the herb world, it is considered an herb.  Dandelion has a flat daisy like bright yellow flower with bright green leaves and a huge, fleshly taproot.

When you want to take a picture of dandelion don’t wait until after the lawn is mowed, which is what I did, so I had to find a part of my garden that needed weeding.

History: In the 7th century it was mentioned in Chinese herbals and in Europe it appeared in the 15th century when a surgeon compared the leaves to the teeth of a lion and coin the name of the plant which came from French dents de lion. In the 16th century, dandelion was known as Herba urinaria because of the strong diuretic effect.

Dandelion was brought to the new world by the early colonists. Some of the common names include fairy clock, blowball, piss-a-bed, lion’s teeth, priest crown, puffball, white endive and swine snout. According to some experts, dandelion was the first green food Adam ate, after he was banished from the Garden of Eden.

When you were a kid you properly blew the round seed heads to watch the seeds fly, which is one of the reason dandelion is so prevalent. Believe it or not but some people actually grow dandelion in their garden as an herb and salad green. The whole plant can be used from the flower to the root.

Growing: Dandelion grows in cool to warm climates and like rainfall with full sun. If you look around you and find the plant it usually grows in any kind of soil, but the better the soil the less bitter the leaves of the herb. In the early spring dandelion is more prevalent than in the hot sun.

The roots will grow extremely deep and if you allow the seed heads to develop they can become an invasive weed.

Harvest: Fresh spring leaves can be picked when they first start to grow and are young. The older the leaves the taste can become very bitter. To help reduce the bitter taste, soak the leaves in water mixed with salt, or sauté the leaves in oil. The leaves are better fresh rather than dried.

The roots can be dug up and roasted or dried to use in a variety of ways. For lasting freshness store the roots in the freezer like you would fresh coffee.

To make the dandelion “coffee”: Use either dandelion or chicory root. Wash the root carefully, try not to damage the roots, and spread out on a large cookie sheet and place in the oven at 180 to 200 degrees F. for up to four hours. Turn the roots to ensure even and consistent drying. When the roots are completely dry and cool, store them and grind fresh each time you make a cup of “coffee”.  Some like to mix half and half, half coffee and half dandelion roots. One level teaspoon per cup.

As a Dye: The whole plant will dye wool a magenta color and the flowers can be used to make yellow.

Culinary: Add the spring leaves to garden salads and smoothies for cleansing and for diuretic action. The roots which are cleaned, chopped and roasted until dark brown, are ground and used as a healthy caffeine-free coffee substitute. Dandelion coffee has the opposite effect of caffeine coffee. Use the flowers in jelly, beer and homemade wine. Try adding dandelion greens when cooking green beans.

Medicinal: As an herbal medicine, dandelion root has been held in high esteem in Europe for centuries. Folklore has using the sticky white sap of the dandelion to remove warts. Dandelion root coffee is known to help with sleep and is good tonic for the kidneys and liver. It is considered cool, bitter, and sweet. Dandelion contains vitamins A, B, C, D, potassium salts, iron, thiamine, niacin, calcium, sodium, pectin and carotenoids.

The roots will promote bile flow and is mildly laxative. As a diuretic, the leaves are high in potassium. Because of this potassium content it is said to be good tonic for the heart as well. The whole herb is used to clear heat and toxins from the blood and used for boils and abscesses.

The root can be made into a tincture or a decoction. Dandelion helps to remove poisons from the body and is known to be good for diabetics and for someone suffering from anemia. It is considered a natural spring tonic for the liver and gallbladder. Dandelion is considered a good blood cleanser and especially in cases of skin diseases. Dandelion makes a good digestive tonic for constipation.

When searching for medicinal recipes using dandelion, many of the recipes will include other herbs. A blood builder recipe mixes equal parts each of dried comfrey, fenugreek seed, along with dandelion. Dandelion sleep remedy contained equal parts of dandelion root, chamomile, and valerian.
For the above recipes, steep one heaping teaspoon of herbs per cup of boiling water for 10-20 minutes, strain and drink with lemon and honey.

So is dandelion an herb or a weed, well it depends on what you plan on using it for. If you want the perfect lawn, then dandelion is a weed, if you want to improve your health by making tinctures, dandelion teas, adding to salads, making jelly or many of the other uses culinary and medicinal then dandelion is an herb.

Dandelion

Dandelion herb or weed?

Why I haven’t been blogging

To all my friends reading my blog, I apologized I haven’t been blogging in several days. It is not my intention to go so long between blogs. We had a big family reunion on Memorial Day which kept me busy as well as working in my garden.

I have included some pictures of my garden. As my garden changes and things start growing, I will keep you up to date.

Hostas

Hosta’s gardens

These hostas I want to move because they really get too much sun, I want to plant more herbs in this area.

Garden

My newest garden

This is just above the hostas and to the right and is my newest garden. I want to move my thyme here and allow it to hang over the retaining wall.

Day lilly bed

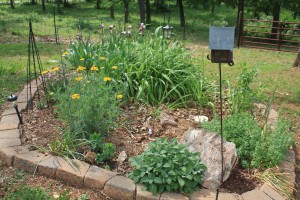
My oldest garden

This is my oldest garden and I have planted lots of different herbs in this bed, some reason I have trouble growing. In front you can see sage and the yellow is yarrow. To the right of the rock is oregano. The plants in the middle are daylillies.

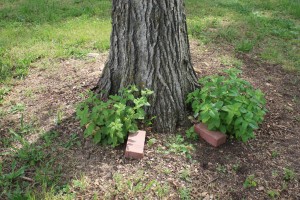
Mint bed

Mint bed

I like to plant mint all by itself so it can be mowed around and will not spread in the garden. I put the brick around the mint because, last year it was attacked by the weed eater. My weed eater uses thought it was a weed. Mints will mixed in flavor so it is better to plant one kind.


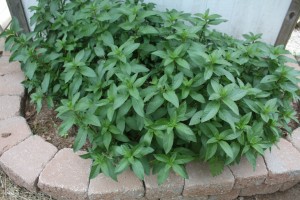
chocolate mint

Chocolate mint

Here is another example of mint in a bed by itself.

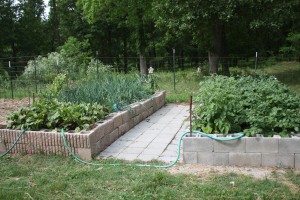
raised beds

Raised beds with vegetables

This is a picture of two of my raised beds with vegetables. The one on the left has beets and onions and the one on the right has potatoes and peanuts.

vegetable gardem

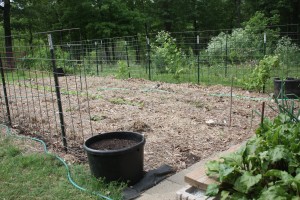
vegetable garden

This is the vegetable garden with grapes in the background. The large black pots will have plants good for companion planting.

Tomatoes

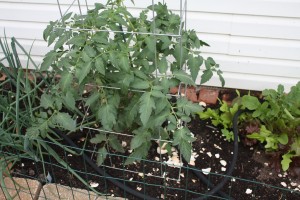
Tomatoes

What is any garden without tomatoes. This tomatoes is planted near onions as companions.

beets and onions

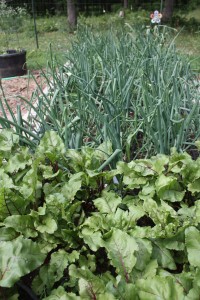
closeup of beets and onions

I hope you have enjoyed a tour of part of my garden. This is not all.

I have a garden tour plan soon, and need to get most of the weeds out of the garden. I tell everyone I grow fruit, vegetables, herbs, flowers, and weeds.

Stick with me because I plan on several new blogs. I want to teach you how to make your own herb remedies from making a cup of tea to tinctures.

Crafts will include leaf printing, paper making, potpourris and perfumes. Lots of new recipes for using herbs in your cooking.

Other things I have planed include making all types of cosmetics and cleaners for your home as well as ideas for using herbs in your home.

One of my latest passions besides herbs is art printing on fabric and I want to try and use some of these ideas on my homemade paper. I won’t know if they work until I try some of the ideas I have been reading about.

I will teach you how to dry and freeze your herbs and what the herbs are good for and what to watch out for.

Medicinal subjects will include herbs to slow down aging, herbs good for indigestion and all kinds of everyday ailments. We will talk about food allergies and herbs to take to help with inflammation which can cause pain. For example, I heard the other day on the Dr. OZ show, that almond milk, Swiss chard, and tart cherries for anti-inflammatory. There are herbs that can be used for this as well.

If anyone wants to learn something special just leave a comment and I will try and research the subject. Sharon


How to make Face Moisturizers, sweet orange or lavender

Following is step by step on how to make face moisturizer. This wonderful sweet orange face moisturizer is great for the face. Always check for any allergic reactions to this or any homemade moisturizer. If you are not sure if you are allergic to sweet orange or orange water, mix a couple of drops in small orange water and place on the underside of the arm and cover with band aid and allow to sit for an hour or so. If no reaction occurs, it should be safe to use these products.

This moisturizer can be made with lavender essential oil and lavender water or rose essential oil and rose water. Just check for allergic reactions.

According to “The Essential Oils Book” by Colleen K. Dodt

You should avoid the sunlight for at least six hours when using citrus essential oils. “These oils contain components that may cause reddening and blistering or darkening of the skin when exposed to sunlight.”

Summer months try either lavender or rose essential oils.

Wash your face and smooth a small amount on your face. Any time you use orange or any citrus essential oils, they can react with the sun. Check with your manufacturer of essential oils.

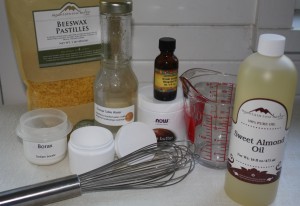
face moisturizer ingredients

Ingredients for face moisturizers

Equipment:

  • 2 heatproof glass mixing bowls or large glass measuring cups
  • Small sauce pan
  • Wooden spoon and whisk
  • 4 small storing jars, sterilized
  • Labels

Ingredients:

  • 2 tsp. borax
  • ¾ c. orange table or flower water
  • 4 tsp. beeswax granules
  • 5 Tbsp. almond oil
  • 1 oz. cocoa butter
  • 10-14 drops of vitamin E oil
  • 5 drops sweet orange essential oil

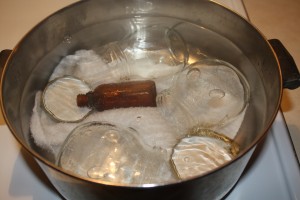
If using glass jars for storing the sweet orange face moisturizer, sterilized the jars in boiling water for 10 minutes.  I like to keep my food utensil separate from my cosmetics utensils. This is a choice and not necessary. You should only put on your face and skin what you would not be afraid of absorbing into your body.

Sterilized jars

Sterilized jars for 10 minutes

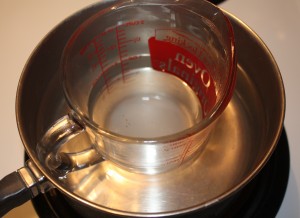
Have your labels ready with both date and ingredients. Gather you utensils and have them ready. You do not want the borax water to cool while looking for either equipment or ingredients. Heat two pans of water ready to use as a double boilers.

  • Place a glass measuring cup in the water as a double boiler and fill the measuring cup with borax and flower water.
  •  Heat gently stirring the borax and water with a whisk until borax is dissolve. Set aside keep the glass cup in the warm water to keep the mixture warm. It is important to keep warm so it will not cause the beeswax to harden too soon.
Dissolving water

Dissolving borax and flower water

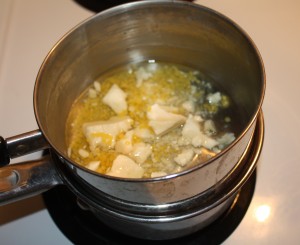
  • Put a bowl or glass measuring cup over simmer water and add the beeswax, cocoa butter, and almond oil. Warm, stirring gently until all the ingredients have completely dissolve.
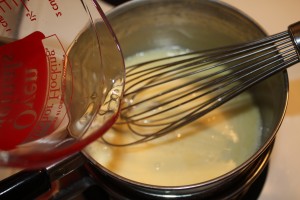
  • Take off the heat and slowly pour the borax and orange flower water into the mixture of wax, whisking all the time. Watch the magic happen when the two mix.
melting beeswax and oils

Melting beeswax and oils for face cream in double boiler

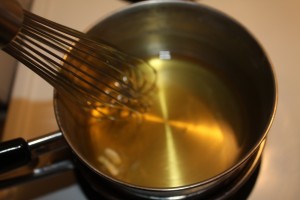
 Melted beeswax and oils

Melted beeswax and oils

  • Continue to whisk until the mixture has cooled somewhat about 2 minutes.
Mixing oils and borax

Pouring borax and floral water into melted oils and beeswax

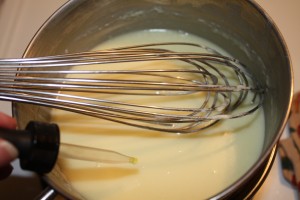
  • While whisking, add the essential oils and vitamin E oil, and continue to whisk. This is the tricky part because if you do not whisk long enough it will separate when completely cooled.
Adding essential oils

Add essential oil and vitamin E oil to face cream

  • Pour into 4 small jars and store all unused jars in the refrigerator.
  • Don’t forget to label.
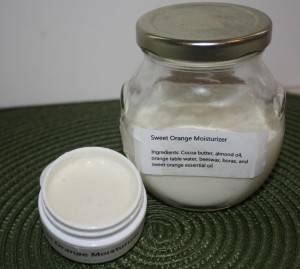
Orange moisturizer

Sweet Orange Moisturizer face cream

Use within 6 months to one year as long as it is store in the refrigerator.  Enjoy your wonderful sweet orange moisturizer.

When making cosmetics never use aluminum, copper, or non-stick pans, as their chemical content can affect the ingredients beneficial properties. Commercial beauty products contain artificial chemicals and these chemicals do penetrate the skin.

We are absorbing substances through our skin we would never dream of putting in our mouths. Natural products help protect our skin and our health. Most recipes are easy to make, but may require some experimentation to find the one that works best for your skin type.

Spicy Hot Pad for under the Tea Pot

Spicy Hot Pad for under the Tea Pot

Place this spicy hot pad under a warm teapot or hot casserole. The heat releases the aroma of the herbs and spices used inside the hot pad. As an added bonus the quilted fabric will protect your table form the heat of the teapot.

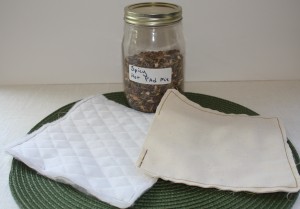
Spicy hot pad

Making spicy hot pad

Equipment:

  • Scissors
  • Sewing machine or needle or thread
  • Iron
  • Bowl or jar for mixing spices and herbs
  • Measuring spoons
  • Plastic zip bag
  • Two 8” pieces of quilted fabric
  • Two 7-1/2” pieces of muslin for lining
  • 1 Tbsp. cinnamon sticks, crushed
  • 1 Tbsp. rosemary needles, dried
  • 1 Tbsp. whole cloves
  • 1 Tbsp. allspice berries
  • 1 Tbsp. anise seeds
  • 1 Tbsp. lemon thyme, dried

Optional ingredients: Dried crushed lemon peel, or orange peels, or make the mixture you like. Try just one of the ingredients such as cinnamon, allspice or cloves to fill the pocket.

I used quilted fabric I purchased from the fabric store, or you can quilt it yourself. To make a quilted piece: Just lay a piece of outer fabric on a low loft batting and pin and mark the fabric in one inch squares. Sew on the lines for your own quilted fabric. Repeat the process for the other piece of fabric.

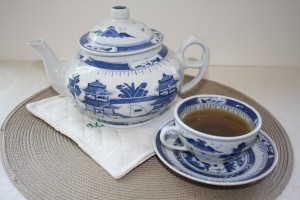
Spicy hot pad with tea

Tea pot on top of spicy hot pad

Quilted Top: Lay the two quilted pieces right side together and sew around leaving an opening for turning. Clip the corners to reduce the bulk. Turn inside out and work a pointed stylus in the corners to pull them out as much as possible. Iron paying attention to the opening and turn under the edges for easier closing.

Pocket: Lay the two muslin pieces together right side together, if they have right sides, and sew repeating the process above. Don’t forget to iron once they have been turn right side out. Top stitch around three sides of the piece before filling, it makes it easier to top stitch the last side after filling.

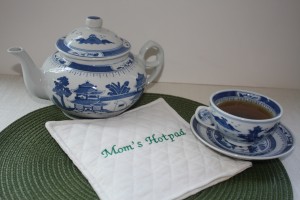
Spciy hot pad and tea pot

Hot pad ready for your tea pot

Filling: Mix the spices and herbs in a glass jar and shake to mix. Cap the jar and allow the filling to intermingle the fragrances.  You will have enough filling to make two spicy hot pads.

Fill the pocket with about 3 Tbsp. of filling.  Before stitching, lay the spicy hot pad flat and check to see if it is too full to allow the tea pot to stay flat. May need to crushed the filling a bit more.  Top stitch the fourth side of the spicy hot pad close. The stitches should be fairly close together to keep the powder the filling may create inside of the pocket.

Place the pocket inside of the quilted pieces and top stitch close on the forth side. I found I need to hand stitch the opening close before top stitching, because of the quilted fabric. Try and catch the pocket inside with the top stitching to keep the pocket from bunching.

Store the spicy hot pad inside of a plastic zip bag to keep the aroma fresh and to show off your work.

To Use: Place a hot tea pot on the spicy hot pad and allow the aroma to be release. Use an aromatic herb tea and the whole room has a wonderful fragrance with a spicy undertone. The spicy hot pad should not be washed. If the pad gets dirty sponge the stain off and allow to dry. You may use a small zipper in the quilted piece to remove the inside pocket to wash the quilted cover.

Spicy hot pad

Mom’s Hot pad ready for mother’s day or birthday

Enjoy!

Hair Loss, A to Z of Herbal Remedies

Hair loss is not just for men anymore, women suffer from hair loss as well. We lose hair due to pregnancy and childbirth. But if it continues, it may be a serious problem. Hair usually grows back when the child is six months old.

Our hair grows about 25 feet in a lifetime and on average we lose about 100 hairs a day from our scalp. Most of our baldness is attributed to hereditary factors. In other words we inherited it.

Causes:

It is normal for women going through menopause to have thinning hair and the hairs grays. Menopause thinning hair usually has a hormone link and they are ways to prevent or reverse it.

Radiation around the head or chemotherapy for cancer will cause hair loss, but should re-grow after treatments are finished.

Outside of the above reasons, sudden loss of hair loss in women’s hair in large numbers or in patches is called alopecia and can be cause by a number of things.

Deficiency in nutrition, vitamins such as B-Complex, poor scalp circulation, illness or surgery, diabetes, too harsh shampoos, hair dyes, hot dryers, fevers, heavy metal poisoning, anemia, alcohol and smoking can be factors in hair loss.

Glandular imbalances are found to be major reason women lose their hair, such as an imbalance in the adrenals, thyroid or pituitary glands. Imbalances can be caused by stress, emotional or physical trauma or shock.

Treatments:

To counteract, add a multi vitamin and B-complex to your daily vitamin routine. Take about 50-100mg of B-complex three times a day. Your vitamin routine should also include pantothenic acid.

Minerals and amino acids are important to hair growth such as calcium/magnesium, biotin, folic acid, zinc, and iron.

Essential fatty acids which can be found in evening primrose oil, fish oils, or wheat germ oil are good for both growth and helping your hair retains its natural color.  Try adding kelp to the diet, which is great for thin, falling or brittle hair.

To help control hair loss, avoid harsh shampoos that contain dyes and chemicals, avoid using hot dryers, harsh brushing, and harsh conditioners.

Other herbs good for hair is horsetail which is rich in calcium and silicon. Sage tea is used for dark hair and chamomile tea is good for blond, comfrey is good if you hair is dry and lavender for oily hair.

Good hair nutrition includes whole foods, fish, onions, garlic, eggs, greens, carrots, nuts and seeds such as sesame seeds and wheat germ. These foods contain the necessary vitamins and minerals to help with the problems of hair loss.

Herbs known to help with hair loss include:

  • Dried nettle
  • Yarrow
  • Rosemary for light hair
  • Black walnut for dark hair

Hair Loss formula:

Mix the three herbs according to your hair color, make a strong tea by bringing the water to a boil, pour over herbs and allow to cool completely. Strain out the herbs and place the liquid in a pint plastic container, adding just enough water to fill. Use as a hair rinse every time you shampoo. DO NOT RINSE out the mixture.  This mixture is known to encourage growth; make the hair shine and control dandruff. Over a period of a few months it may even re-grow your hair.

When washing hair, alternate using both hot and cold water ending with cold, do this three or four times.

According to James A. Duke the author of “The Green Pharmacy” Sal palmetto for men helps with baldness and tincture of stinging nettle can help prevent balding in those with thinning hair.

Oil Treatments:

Rubbing an oil in the scalp can help to stimulate the hair frolics, these include; castor oil, aloe vera gel, olive oil, or wheat germ oil. Rub oil in your scalp the night before you plan on shampooing your hair. Wrapping your hair with a turban before bed will help to prevent the oil from staining your pillowcases.

According to Dr. John Christopher, massage the scalp with castor oil and apply hot wet toweling over the head and leave for thirty minutes. Leave the oil on the head until morning and wash with tar soap or a good bio-degradable soap and rinse. Repeat a second wash and rinse with a tea made of sagebrush, chaparral and yarrow. Leave the rinse in the hair. Repeat this same process except one night use olive oil and the next night use wheat germ oil.

Folk Treatments:

Another oil treatment is make an olive oil infusion with garlic and rub this formula on the scalp and leave overnight, repeat this for several weeks until the hair has stopped falling out or you just give up. Or make a rosemary olive oil infusion and use on the hair.

Mix onion juice with honey, ¼ c. to 1 Tbsp., and massage it into the scalp every day. Make an infusion with olive oil and rosemary and rub this mixture in the scalp every day.

Mix 2 tsp. of cayenne pepper with 1 c. olive oil. Massage into scalp every day.

One formula I found mixed onion, garlic, cayenne, and honey, rub into scalp and rinse with rosemary tea.

Rub the bald area with apple cider vinegar using a soft brush two times a day. Vinegar is good for the scalp and can be used for all kinds of problems with the hair.

Southernwood is a traditional remedy for hair loss. It can be taken internally in a tincture and made into an infusion as a hair rinse.

Hair loss especially in women can be a traumatic and affect the ways we feel about ourselves. Some of the remedies may sound a little far fetch but the problem is not. Maybe some of these will help you, and if nothing else, by increasing nutrition in your diet you will feel good even if you don’t like the way you look in the mirror. All of us have some problem or other we are self conscious about.

Here to your good health! Sharon K

Making Face Masks and Astringents

Making face masks and astringents is a great ways of making your face feel wonderful and clean.

When using herbs for these homemade cosmetics, use the powdered form and pass it through a sieve to make sure all large particles are remove.

Following are several recipes. Make sure you are not allergic to any of the ingredients. Try different ones until you find the right combination for you and your skin type.

Directions for each mask: With a blender, mix all the ingredients well. Make only enough to use for one mask. About 1 Tbsp. for each is enough for one mask. Apply to clean face and leave for about 10 minutes. Rinse thoroughly and use moisturizer afterwards. Any leftover masks store in refrigerator.

Mint Face Mask, equal parts each

  • Spearmint
  • Oil such as almond oil, grape seed oil, apricot kernel oil or olive oil
  • Raw honey
  • Add a couple of drops of lavender oil, or patchouli oil, or chamomile oil

Yogurt Facial Mask

  • ¼ c. plain yogurt
  • ½ tsp. honey
  • ½ tsp. green clay, or white clay
  • 3 drops of lavender essential oil
  • 1 Tbsp. Finely chopped cucumber
  • 1 Tbsp. Yogurt
  • 1 Tbsp. Finely chopped parsley or calendula powder

Almond face Mask, equal parts each

  • Almond meal
  • Calendula powder
  • Chamomile powder

Herbs good for oily skin include:

  • Lady mantel
  • yarrow

Healing herbs for the skin:

  • Fennel
  • House leek
  • Marshmallow
  • Comfrey

Cleansing Herbs:

  • Chamomile
  • Fennel
  • Lady’s mantle
  • Lovage
  • Nettle
  • Parsley
  • Plantain

Herbs for Acne:

  • Burdock
  • Clover
  • Horsetail
  • Lavender
  • Southernwood

Chamomile is a great skin cleaning herb, and rosemary will increase circulation. Elder flower, horsetail, and spearmint will tighten the skin at the same time it will stimulate the skin.

Astringents can be made from any of the herbs listed below by adding dried herbs to apple cider vinegar and allowing steeping for two weeks. Strain and dilute 2 Tbsp. vinegar in a pint of water.

Vinegars will help both dry and oily skin and will tighten skin pores. It establishes a natural acid balance and softens the skin. Use unfiltered apple cider vinegar. Add about 1 cup of fresh leaves and stems for each pint of vinegar and allow steeping for two or three weeks. Shake every day and strain and re-bottle in glass bottle with cork or plastic lid. Save your vinegar bottles. Use this in a diluted form for astringents and facial steams.

Astringents are used for cleansing and a refreshing feeling.

Astringents herbs:

  • Bay
  • Chamomile
  • Comfrey leaf
  • Elderflower flowers
  • Frankincense
  • Lemon
  • Mint
  • Myrrh
  • Nasturtium
  • Raspberry
  • Rose
  • Rosemary
  • Sage
  • Witch hazel
  • yarrow

Astringents for oily skin:

  • Sage
  • Yarrow
  • Plantain
  • Lemon balm
  • Lemon grass
  • Rose
  • Witch hazel
  • Lavender

Astringents for normal to dry skin:

  • Chamomile
  • Comfrey
  • Elderflower
  • Fennel

Herbs to help stimulate the face:

  • Bee balm
  • Calendula
  • Elderberry flowers
  • Lavender
  • Lemon verbena
  • Mint
  • Nettle
  • Plantain
  • Raspberry
  • Rosemary
  • Sage
  • Savory

Sage astringent recipe:

  • 3 Tbsp. dried sage, powdered
  • 3 Tbsp. apple cider vinegar
  • 3 Tbsp. witch hazel liquid
  • ¼ tsp. borax powder
  • 1/8 c. glycerin

Finely minced sage and added to apple cider vinegar and allow steeping for two weeks. Stain. Dissolve borax in the witch hazel. Stir into apple cider vinegar and mix in glycerin and add to a glass bottle with tight lid. Shake before use.

Change the herbs in the above recipe to match your skin type. If your skin is oily, or dry will dictate what herbs to put in the above recipe.

Always check to make sure you are not allergic to any of the herbs before adding them to your face. Mix small amount of crushed herbs with water and put on the underarm and cover with bandage and keep in place for 24 hours. If no reaction occurs from the herbs you properly are not allergic.


Homemade Laundry Rinse

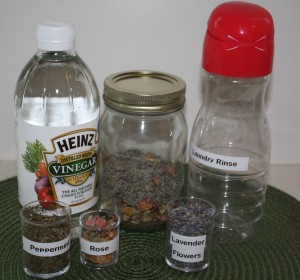
Ingredients and Supplies for making homemade laundry rinses

  • 1 part each of dried lavender, peppermint, and rose petals
  • 1-1/2 cup of white distilled vinegar
  • Stainless steel pan or glass pan
  • Jar with lid, I used a pint
  • Wax paper
  • Funnel
  • Measuring cup, preferably glass
  • Strainer lined with coffee filter or cheesecloth
Homemade laundry rinse

Homemade laundry rinse ingredients

About ingredients:

White distilled vinegar has 5% acidity and the smell of vinegar will dissipate in the rinse cycle. White distilled vinegar is good to clean the washing machine as well as help to remove mildew, and to soften fabric.

The dried herbs I chose are mild and if your baby is not allergic to any of these herbs, will help to refresh baby clothes. The vinegar will naturally break down uric acid and soapy residue thus leaving the clothes fresh smelling and soften. Lavender is known to help with sleep.

Rose is relaxing, and has a great smell. Peppermint is cooling and refreshing and smells wonderful.

Clothes rinsed using white distilled vinegar in the rinse cycle will help to dissolve soap buildup and maintain the color in your clothes, and reduce or eliminate deodorant stains on clothing.

Cotton towels and blankets rinsed in vinegar will yield fluffier results and less lint. The vinegar removes the soap and leaves them fluffy as new.

Vinegar is also better for the environment than many of the chemicals found in purchase fabric softeners. Saves money as well, a gallon jug of vinegar can be purchase for just a few dollars and it will make numerous products for the home. Check out some of my previous blog on cleaning with herbs and hair rinses.

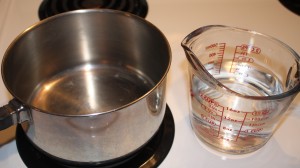
Heating vinegar

Heating vinegar for laundry rinse

Method:

Vinegar and herbs

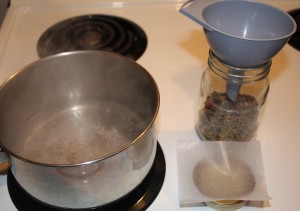
Pouring boiling vinegar over herbs

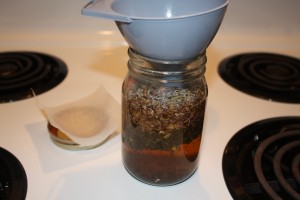
Measure out about ¼ cup each of the herbs, and pour boiling vinegar over the warmed jar using a funnel.  Cold glass jars may break. Allow the vinegar mixture cool before capping. If using a metal cap, line the cap with a piece of wax paper before capping. Leave the mixture alone for 24 hours at least, before straining into a jar or jug for use in the laundry. I like to use plastic, to eliminate danger of broken glass. Save your old vinegar bottles for this laundry rinse.

Herbs and vinegar

Laundry Rinse herbs and vinegar

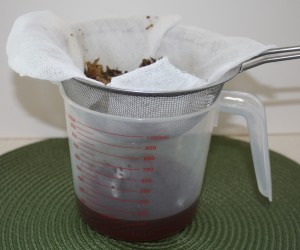
Stain using a fine mesh strainer lined with coffee filter or cheesecloth. Compost the herbs. This is a strong mixture so I fill up the rest of my bottle with white vinegar.  Gather up the herbs in the cheesecloth and squeezed as hard as you can to release as much liquid as possible. Use this vinegar in the rinse cycle of the washing machine.
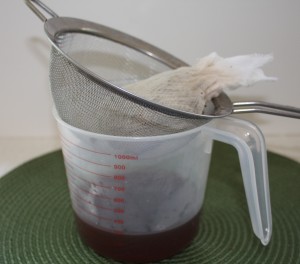
Straining herbs

Strain laundry rinse using mesh stainer & cheesecloth

Laundry rinse liquid

Squeezed herbs for laundry rinse

Use about ¼” of the infusion vinegar with laundry such as towels, pillowcases and sheets. This may not a mixture you may want on your personal clothing. Plan distilled vinegar maybe better.
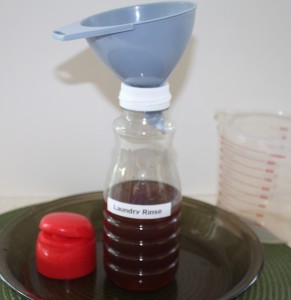
 

Laundry rinse

Laundry rinse

Just a note I fill the bottle up with white distilled vinegar to finish the rinse. Use about 1/4 c. with each load.

Rosemary Orange Coffee Cake Recipe

Rosemary Orange Coffee Cake Recipe

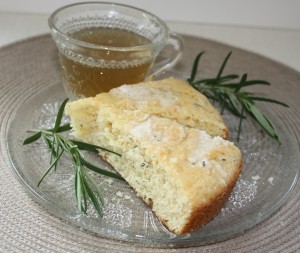
Coffee cake and tea

Orange and Rosemary Coffee cake

  • 1-1/4 c. all-purpose flour
  • Rounded ½ tsp. baking powder
  • Rounded ¼ tsp. baking soda
  • 1/8 tsp. salt
  • ½ c. sugar
  • 1-1/2 tsp. fresh finely minced rosemary
  • 3 Tbsp. cold unsalted butter
  • Juice and rind of one medium size orange
  • 1 egg, large
  • ½ c. buttermilk

Preheat oven to 350 degrees. Cut a piece of parchment paper to fit the bottom of  8” cake pan. Spray with vegetable spray.

Mix the flour, baking powder, baking soda, salt, sugar, rosemary and orange zest. To grate orange zest, use a fine grater or rasp and grate only the orange part of the outside of the rind. Avoid the white part, it is bitter. Need about 1 to 2 tsp. of orange zest.

Add the cold butter in small pieces and cut in with two knives or pastry cutter. When the mixture resembles small pebbles or coarse sand, set aside. Save about ¼ cup of this mixture for the crumb topping.

In a small bowl mix the buttermilk, egg, and orange juice (should equal about scant ¼ c.). Beat the egg mixture until blended. Add the wet ingredients to the dry and mix. The batter will be lumpy.

Pour the batter into prepared pan. Add the save topping and spread over the top of the cake before baking.

Bake cake about 25 minutes to 30 minutes depending on the amount of orange juice used. Allow to cool a few minutes in the pan before turning out. Place on pretty cake plate and cut into wedges depending on if you used a round pan or square pan.

Garnish with fresh sprigs of rosemary and slice of orange.

I have made this several times and I love the mixture of rosemary and orange. This combination of orange and rosemary also makes good herbal jelly. If all you have is dried use about ½ of the fresh amount. Check out my blog on growing rosemary. You can grow rosemary in pots and brings indoors if you live in a cold climate with ice and snow.