St John’s Wort used for depression.

St John’s Wort   Hypericum Perforatum

Parts Used: Flowers, stems and leaves

Primary uses for St John’s Wort: Mild depression, anxiety, insomnia, fatigue, Anti-viral, used for PMS ,pre-menopausal and menopause. External: wounds, bruises and first degree burns.

Comes in: Tea, tincture, tablets, capsules, salves, creams and oil

Suggested dosage: capsules or tablets take 300 mg 3 times a day. Tinctures 10-15 drops a day

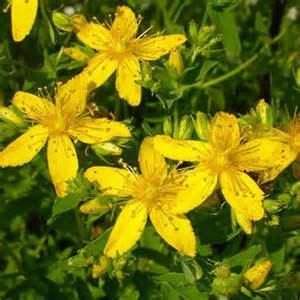
Flowers: Are used to make St John’s Wort blood red infused oil. The oil can be used topically for mild burns, wounds and inflammations. Harvest just when the buds began to open on a sunny day. To tell if they are ready, press a bud between your fingers, if there’s a spurt of purple or deep red they are ready to pick, if not it is either too early or too late. Check every day. St John Wort blooms bright yellow flowers the middle of summer and early fall. The flowers are edible.

Growing: This short term perennial grows 1-3 feet tall, with branching two edge stems and loads of flowers. The leaves are pale green, oblong and covered with tiny pinholes which are oil glands. The flowers are lemon scented. Zone: 3-9. Tolerate most soils in sun and light shade. It is considered an invasive in Missouri. It grows from runners; cuttings and it will self sow. Be sure and use the Hypericum Perfortum variety, if using for medicinal purposes.

Medicinal: For treating mild depression, anxiety, stress, tension, nerve damage, and seasonal affective disorder (SAD). It needs to be used over a period of time for full effect 2-4 weeks. To treat chronic stress and depression it should be used over several months. It is antibacterial, antiviral, and anti-inflammatory, which make it helpful for treating bacterial and viral infections such as shingles and herpes. It is also being studied for its capability to hinder the AIDS and HIV virus, but research is still ongoing. Use correctly, St Johns Wort is very effective antidepressant, and over the past 30 years its efficacy has been proved by extensive clinical and scientific studies.

History of St John’s Wort: it has been used as a wound healer since 500 BC. When John the Baptist was beheaded, where his blood spilled it is said that St John’s Wort grew from the blood.     European peasants burnt the plant on June 24, which is John the Baptist birthday, to dispel evil spirits. Because the plant “bleeds red” it was used for wounds during the crusades. During ancient times the way to know what a plant was good for it should look like, or act like the ailment it was treating.

To make St John’s Wort oil: As the flowers start to bloom you will need to squeeze the flowers and if they bleed red they are ready to pick. If they don’t have the red/purple liquid then it is either too early or too late. You need to check every day. Shake off any dirt, and pat dry. This is one of the oils that should be made with fresh material. Most oils are made with dry to prevent mold. They should be picked on a sunny day, but it might be a good idea to wear gloves to prevent any dermatitis. Put one cup of fresh yellow flowers in a quart jar and cover with cold process olive, or safflower oil. Place jar in window or a warm spot and shake daily. Check often for mold. (If mold occurs, throw away.) After two or three weeks, the oil will turn red, strain off the oil, bottle, label and store in a cool place. When staining, line a fine mesh strainer with cheesecloth and squeeze as much oil out as possible. You can tie off the cheesecloth and place in a wine press or coffee press to get the last few precious drops.

St John's Wort Hypericum Perforatum

St John’s Wort

Precautions: do not used for severe depression, do not use if pregnant or planning to get pregnant. Do not quit all at once, taper off. SJW can cause photo sensitivity in some individuals, (sensitive to sun). If you are taking antidepressants medications and want to substitute or complement them with SJW, check with your health care provider. The University of Maryland Medical center has a whole list of medications to avoid if taking SJW. Do not take a week before or after surgery.

This information is for informational and educational purposes only, not intended to treat, cure, diagnose or prevent any disease. Sharon

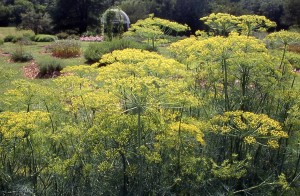
Dill is easy to grow and should be in every garden.

Dill (anethum gaveolens)is a hardy annual and one of the easiest herbs to grow. It can be planted indoors and well as outside in cool weather. Try the variety ‘Bouquet’ for a high leaf yield.

Use in cooking

Annual culinary herb

Ancient Egyptians recorded dill as a soothing medicine, and the Greeks used it for hiccups. Dill was brought to America by the early settlers. The children would chew on the seed during long sermons.
The herb obtained its name from the Old Norse word ‘dilla’, which means to lull. Today herbalist still used it for colic babies, and is used commercially to scent soaps
Dill likes full sun, protected from the wind, and the soil should be rich and well drained.

Sow in the seed directly in the ground a couple weeks for the last frost. Cover the plants with light dusting of compost. Keep moist until germination which should be about 10-15 days. Plant every couple of weeks for continuous crop. Seeds can be stored for 3-10 years and should remain viable. Store the seeds in the refrigerator in an envelope and label with year and variety.

Dill grown in pots need room for deep roots and room for stakes, and can grow up to 3 feet tall. Fennel, dill and carrots all compete for moisture, so it is good idea to plant in different areas.

Black swallowtail larval love to feast on fennel and dill, so don’t be surprise if the plants are stripped down to the stem. Parsley can also be host to butterflies. It is good idea to sew dill seeds in different parts of the garden and enough to share with the butterflies. The plants should be spaced 10-12” apart.

Harvest the leaves when young, pick the flowering tops just as fruits begin to form and gather the seeds after flowering head turns brown. To collect seeds hang the seed head over a cloth to collect the seeds.
Dry or freeze the leaves or used in herbal vinegar. When making vinegar add the flowering seed heads to a sterilized canning jar and cover with apple cider or white wine vinegar. Allow to set for two weeks. Strain out the plant material and use a bottle with cork or plastic lid. Metal will react to the vinegar.
Use the whole seed or ground in soups, fish, cabbage, pies, dill butter, breads and of course pickles.
The crushed seed can be infused as a nail strengthening bath. Chew the seeds to sweeten breath.
Dill is rich in mineral salts, and is good for indigestion, flatulence, hiccups, stomach cramps, insomnia and colic. Infuse ½ ounce crushed seeds in 1 cup of boiling water, strain. Add one tablespoon to water for best results.
Do not confuse the plant with the water hemlock and position hemlock. They are part of the same family Apiaceae.

Salad

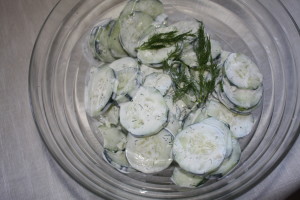
Dilly Cucumber salad

Dill Cucumber Salad

¾ c. sour cream
1 small clove garlic, crushed
1 tsp. honey or Stevia to taste
½ tsp. salt
¼ tsp. pepper
¼ tsp. dried dill weed or 1 tsp. fresh
2 med cucumber, thinly sliced and seeded

Mix sour cream, garlic, honey, salt, pepper, and dill weeds. Stir in cucumbers and sprinkle with fresh dill.

Dill dip recipe

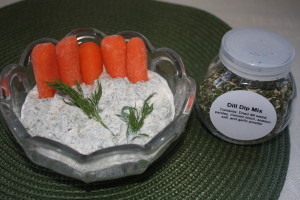
Dill Dip and dill mix

Dill Dip Mix

¼ c. dried dill weed
2 tsp. garlic powder
¼ c. dried minced garlic
¼ c. dried minced parsley
2-3 tsp. season salt

Mix and store in airtight container.

To make the dip:
½ c. sour cream
½ c. mayonnaise
1-2 Tbsp. dill dip mix

Mix all ingredients together and chill for several hours. Garnish with fresh dill and parsley.

Hope you enjoy these recipes and have fun growing dill.

Orange zest, Thyme and Rose Body Scrub

This wonderful combination of orange zest, thyme and rose along with almond meal and oatmeal is a great exfoliating body scrub that can be used instead of a loofah on the skin. It is wonderfully aromatic, mild and satisfying to the skin.

To use: Just before showering, rub the scrub gently onto damp skin, avoiding any tender areas such as the face, then shower off or rinse with cool water.

Ingredients:

  • Peel or zest of two oranges
  • Old fashioned oats
  • Dry thyme
  • Dry rose petals
  • Almond meal
  • Measuring cup
  • Measuring table spoon
  • Coffee grinder or spice grinder
  • Storage jar with tight fitting lid
  • Labels

Directions: Using a vegetable peeler, remove the skin of two oranges. Cut into thin strips.

Place the orange peels on a paper towel and place on a microwave safe plate and at half power microwave for one or two minutes adding 30 seconds until the orange peels are crisp and brittle.

Hint: Stir after each microwave time to stop burning of orange peels in the middle.

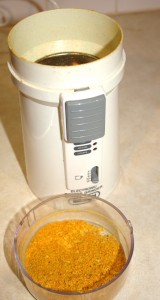
Grind the orange peels in a spice grinder until fine.  Grind rest of ingredients, using the coffee grinder, until each achieved a flour like consistency.

Grinding orange peel

Grind orange peel to a fine powder

Measure out 1 cup oat flour, 3 Tbsp. rose petals, 3 Tbsp. almond meal, 1 Tbsp. thyme and 1 Tbsp.  orange peel.  Thoroughly mix and add to an airtight jar and label.

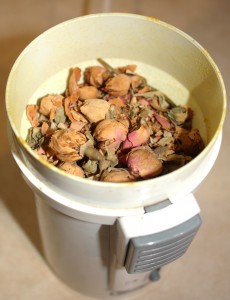
Grind rose buds

Rose petals and rose buds in grinder

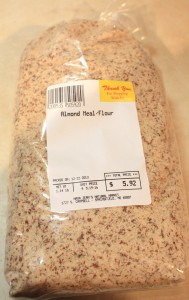
Note: Almond meal can be purchased or grind chopped or slivered almonds.

almond  meal

almond meal

Orange zest and Oatmeal will soften, cleanse and heal the skin, leaving a wonderful feeling after each use of the orange zest, thyme, and rose body scrub.

Almond is good for dry skin and those rough patches we get in the winter.

Thyme will stimulate circulation, and is an astringent. Rose petals will soothe and perfume the skin, and is especially good for mature and sensitive skins.

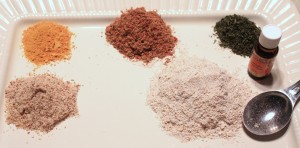
body scrub ingredients

Mixture of ingredients for body scrub

Be sure and check for allergic reactions before using any body product. Just add a small amount to the underside of the arm and leave on for several hours. If no redness occurs you properly will not have any allergic reactions.

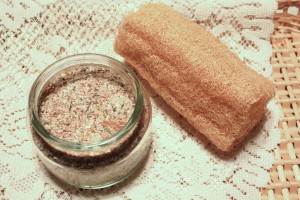
Finished body scrub

Finished body scrub

Optional: Add essential oils of your choice, some options might include lavender for a cooling, relaxing scent, lemon for a fresh citrus scent, or patchouli for a stimulating, musky scent and is considered rejuvenating to the skin. Add just a few drops of essential oil to the scrub and mix thoroughly. This scrub can also be mixed with almond oil and used within two days. Add about a Tbsp of sweet almond oil to each 2 Tbsp. of scrub.

If giving as a gift, add a label with the directions for use, and decorate as desired.


Garlic, nature’s medicine

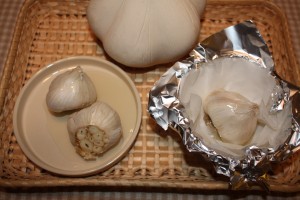
Ready for the oven Garlic

Garlic

Garlic, nature’s medicine (allium sativum, a member of the lily family) is fairly easy to grow and offers satisfaction when one small clove will grow a bulb of garlic.

Check out my previous blog on how to roast garlic.

Following are the historical and traditional medicinal uses of garlic. Not meant to prescribe or treat any diseases.

Every heard of an apple a day keeps the doctor away, well the same thing can be said for garlic.                “ A garlic a day helps keep the doctor at bay”

Few facts about the health benefits of garlic:

  • Fresh garlic can prevent arteriosclerotic changes and blood thickening.
  • Helps to normalized blood pressure
  • Good for cardiovascular diseases, to help prevent strokes, and shortness of breath
  • Garlic has been used for yeast, bacterial and viral infections, colds and reduces allergic reactions
  • For a cough, grate garlic and mix with honey
  • Helps with heart and circulation problems, 1-3 cloves of fresh garlic a day for about 3 months
  • Garlic may help to reduce cholesterol levels and other fatty sediments in the arteries
  • Use for sinus congestion, headaches, stomachaches, dysentery, gout and rheumatism
  • Research shows eating garlic on a regular basis may prevent heart attacks. It renders the blood platelets less sticky, making it harder for blood to form clots, a principal trigger of heart attacks
  • Garlic may lower blood sugar levels
  • Treat toothache and earache
  • Folk lore suggest using it to treat cancer
  • Some of the cancers include, stomach, skin, breast, oral and colon cancer
  • Garlic contains a mineral call gernanium, which helps prevent cancer cells from reproducing and the body to produce cancer fighting interferon
  • In the past they used garlic to ward off the plague
  • Garlic regulates the action of the liver and gallbladder
  • It is helpful for all intestinal infections such as cholera, typhoid and intestinal bacterial

Now all this garlic does have a side effect, it can produce bad breath which can be helped with chewing parsley or fresh tarragon.

Following is a list of vitamins found in garlic:

  • Potassium
  • Vitamin c
  • Vitamin b
  • Vitamin b1
  • Selenium
  • Sulfur
  • Calcium
  • Manganese
  • Copper
  • Iron
  • Zinc
  • About 17% protein

In both World Wars it was applied to the soldier’s wounds to prevent septic poisoning and gangrene. Garlic can cause some irritation to the skin when applied directly.

It was used for ringworm, acne, skin parasites, tumors and warts. The cloves are cut and the juice is applied directly to the skin. Oil of garlic can be used to lessen the irritation on the skin.

There has been some talk about garlic in oil and the fact it could mold. Keep all infused oils in the refrigerator and use within two weeks.

To make oil of garlic, peel fresh garlic (4 or 5 cloves), mash it and put it into a small jar. Cover with cold-pressed olive oil until all the garlic is covered. Close tightly and allow to set for 3 to 7 days. Shake daily. Stain, label, date, and store in the frig.

Some herbs are water soluble and some herbs are better in oil or alcohol. Garlic is one of those herbs that releases it essence in oil.

One of the benefits of garlic, it’s quite tasty and is great in almost any savory dish. Sauté garlic in oil and add herbs such as rosemary, parsley, oregano or your favorite savory herb. I even tasted a cake made with garlic at an herb festival. It was surprising good.

Almost any dish that includes onions can properly benefit from garlic. Just don’t let it burn, or you will have to start over. Burnt garlic is indescribable and you won’t forget the smell or the taste.

Depending on what part of the county you are from, some say add the garlic first, other say add the onions and then the garlic.

Check out my next blog on how to grow garlic with a few recipes included. Here’s to your good health.


Skullcap herb

If you are having a bad day, skullcap herb (scutellaria spp.) is one of the more recognizable herbs used for nervous disorders in today’s herbalism. It is considered an antispasmodic, antibacterial, cooling, diuretic, and promotes bile flow.

It was used by the Native Americans for treatment of rabies, menstrual problems and to bring on menstrual period, quiets cramps, soothes breast pain, and ease kidney problems.

Scutellaria lateriflora, also known as Blue Skullcap, Hoodwort, Virginian Skullcap, Mad-dog Skullcap is a hardy perennial herb native to North America. It is a member of the mint family.

  • Height: 1-3 feet, with branching stems and oval toothed leaves.
  • Flowers: Pretty tiny blue flowers emerge along the stem in mid-summer.
  • Roots are stringy and yellow and should be at least 3 years old before harvesting.
  • Cultivation: Grows in ordinary well drained soil in sun or light shade.
  • Propagation: Sow seeds in late winter, and divided root in early spring.

Medicinal: The whole plant is considered medicinal. Scullcap nourishes and revitalizes the nervous system, thanks to the minerals it supplies, which include calcium, iron, potassium and magnesium.

It is good in times of stress, easing tension headaches, stress, anxiety, exhaustion and depression. May help to promote sleep, and won’t leave you feeling groggy in the morning.

Scullcap is calming for many nervous conditions and has a tonic effect on the central nervous system and helps with nervous fatigue and hysteria. An antispasmodic is a drug or an herb that suppresses muscle spasms.

Scullcap is very quieting and soothing to the nerves of people who are easily excited. It is used in such diseases such as shaking palsy, convulsion, fits, rheumatism, hydrophobia, epilepsy, and bites for poisonous insects and snakes.

Scullcap is used medicinally as a strong tea also known as an infusion for insomnia and as a tincture for extreme anxiety or pms.

The tincture is best using the fresh herb and a strong alcohol such as 190 proof.  Mix with lemon balm for depression.

Root: Make a decoction with the root and mixed with other herbs that are considered cold and bitter.

Caution: Can be mistaken for germander which should not be taken in large doses. In some US markets Germander is sold as Scullcap. Germander can cause liver toxicity.

Growing and Using Chives

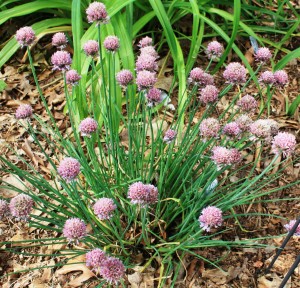
Chives with blooms

Chives

Growing and using Chives (Allium schoenoprasum) with it early spring purple flower is one of the most popular culinary herbs found in herb gardens. The flowers along with the leaves are edible and can be grown both indoors and outdoors. Chives are a member of the alliums genus and are used as companion plant, and both medicinally and culinary.

The leaves can be used all summer long and have a mild onion like flavor and are great on a variety of foods. The leaves contain large amount of Vitamin A and C. Onion chives have purple flowers and garlic chives have a white star like flowers.

Growing Chives: Chives makes great border plants, in the herb garden, in the vegetable garden and in Perennial beds.

  • Height: 4 inches to 2 feet
  • Zones: 3 to 9
  • Site: Fun sun to partial shade
  • Soil: Chives like a well drained soil mixed with compost pH 6.0-7.0
  • Thin or transplant 1 foot apart
  • Propagation: by seed, division, or planting offsets

The seeds can be planted in early spring and the bulbs divided in the fall or spring. Chives will self-seed readily. Divide every three or four years.

The plant has pale purple flowers with long hollow leaves that spike up from the base of the plant. The flowers bloom in the early spring and when spent need to be cut to encourage plant growth. The plant seems to exhaust itself if the flowers are not cut back. Grab hold of the plant like a pony tail and cut entire plant back to the ground leaving just a couple of inches. This will produce fresh leaves.

Culinary: Snip the leaves as you need them for your cooking needs. Remember that bake potato with chives. Fresh leaves are always superior to dried or frozen. Chives do not dry for the most part, so they are better in cooked dishes. To retain the color of the leaves, dry at a very low temperature.

Chives can be stored in the refrigerator for about a week in a plastic bag to retain crispness.

Add chives flowers to herb vinegar and salads. Chives can substitute in most recipes for scallions and when a mild onion flavor is needed.

Try adding chopped fresh chives to softened butter mixed with a little lemon juice. About 1 cup butter, snipped fresh chives, freshly ground pepper, salt and about 1 tsp. lemon juice. Mix and chill.

Medicinal: Fresh leaves and flowers aid in digestion, and most alliums are good for the blood vessels, keeping them elastic and help deter aging. WOW! we all just decided to add chives to our gardens.

Companion plant: Plant near plants that are prone to aphids, leaf spot and mildew. It also can be made into a spray for these pests. Japanese beetles don’t seem to like chives.

Plant chives near roses to help with black spot and apples to help prevent apple scab. Plant near cucumbers to help prevent powdery mildew and carrots seem to like chives.

Chives will enhance grapes and tomatoes. Chives are considered an effective insect repellent along with pennyroyal, nasturtium and garlic. Chives seem to dislike peas and beans.

Happy Gardening!

Indigestion A to Z or Herbal Remedies

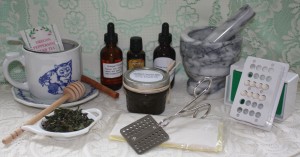
Medical first aid kit

Medicinal Preparations

Tummy troubles, gas, bloating, heartburn, discomfort, irritation, nausea, vomiting, diarrhea or burning sensation after eating are just some of the symptoms of indigestion. These are not words we like to hear.

Acute indigestion also known as immediate or persistent known as chronic is usually a symptom of improper eating and stress. The buzz word “stress” has its own set of problems and it is often used in conjuncture with most health problems, another subject for another day.

Eat too much and you may suffer the consequences, this includes eating food that does not agree with you, or poor food combinations, foods high in acid, eating too fast, too frequently, swallowing too much air, foods that are spicy or too hot or cold.  What’s left!

Unrelenting indigestion may be caused by a lack of hydrochloric acid or not enough digestive enzymes when eating liquid with foods which dilutes the juices in our stomach.

What the first thing a waitress or waiter asks you when you sit down in a restaurant? “What can I bring you to drink?” Our answer should be nothing, but most of us and me included like something wet when we eat a meal.

Does this sound like you?

Food allergies, ulcers, smoking, or problems with liver and or gallbladder may also cause your tummy troubles. Green or red peppers, raw onions, cabbage, citrus fruit, tomatoes, spicy foods, or fried foods cause indigestion for many people.

What we eat is usually the cause, and since we can’t stop eating, using the right combination and the right amount, and thoroughly chewing our food, and the use of herbs may help us conquer or control our tummy troubles.

Keep a diary and try leaving off your dinner plate certain foods or combination of foods for a few days and see if symptoms persist.

Avoid eating in pairs the following:

  • Fruits with vegetables
  • Fruits with starches
  • Sugars with proteins
  • Sugar with starches
  • Liquids with solids
  • Citrus juice with cereal
  • Cherries with dairy products
  • Miso with fruit

Huh did this just ruin your breakfast?

Taking an antacid can do more harm than good, some contain aluminum and sodium which can change the acid/alkaline balance of our tummies, and long term usage may cause kidney damage. Hey we need our kidneys. Over the counter antacids are two of the top ten items purchased.

Vitamins which may help with indigestion:

  • B-complex, B vitamins are essential for normal digestion
  • Folic acid deficiency may cause poor digestion
  • Vitamin C: bioflavonoid ascorbic acid form if hypo-acid or sodium acerbate from if hyper-acid
  • Vitamin E
  • Calcium/magnesium taken between meals
  • Acidophilus is necessary for normal digestion
  • Digestive enzymes such as papaya or pineapple

Papaya and Pineapple contains enzymes that break down foods and protein. Other fruits such as kiwi fruit and figs contain digestive enzymes, in smaller amounts.

Herbs good for indigestion:

  • Drink pure aloe vera juice ¼ c on empty stomach in the morning and bedtime. Avoid if pregnant or nursing.
  • Catnip, helps with diarrhea, calms nervous stomachs
  • Peppermint, help with morning sickness (tincture works better than  tea)
  • Fennel seed, relives nausea
  • Chamomile, relaxants, carminative, good for digestion (tincture works better than tea)
  • Ginger, aids digestion, reduces nausea
  • Rosemary
  • Thyme
  • Basil
  • Spearmint, stimulates digestion, cooling
  • Slippery elm
  • Mallow root, soothes the digestive tract
  • Meadowsweet, hyperacidity
  • Parsley, healing ulcers, diuretic

More good news for the aged, as we grow older the levels of our hydrochloric acid (HCL) lessens due to deficient diet and stressful life.

Many will tell you, ginger is good for motion sickness and nausea, but it is also good for ingestion. Ginger contains compounds that will sooth the tummy and aid digestion.

Chew your food and eat slowly to give time for your digestive enzymes to get moving. Lifting weights over time can help to speed up the digestion by cutting the time it takes to move through the system.

Add tarragon, rosemary, and marjoram to your recipes, these herbs help to digest food. Add parsley whenever you add garlic to help with any garlic related problems.

Here a tasty treat for over indulging in dinner: Drink 1 tsp. lemon juice mixed with ½ tsp. baking soda to a glass of water. Drink quickly. I know sound awful, but it works.

For a better tasting drink: Add 3 drops peppermint oil to a cup of warm water mixed with honey.

Too much acid in the gut: eat dried rolled oats and chew thoroughly.

Not enough acid: Drink 1 Tbsp. honey, 1 Tbsp apple cider vinegar in a cup of warm water.

Use a juicer and make this drink for indigestion: Mix ginger root with fresh mint, kiwi fruit, and about one cup fresh pineapple.

Tummy Soother Breakfast drink:

  1. Mix 1 ripe papaya, peeled, seeded and cut into chunks
  2. Splash of vanilla
  3. 1 to 3 packets of stevia
  4. Dash of cinnamon
  5. 1 c. milk or yogurt
  6. Ice cubes made with crushed mint
  7. Fresh mint leaves to garnish

Mix papaya, vanilla, stevia, cinnamon and milk or yogurt. Blend until smooth. Add ice cubes and process until thick and creamy. Garnish with fresh mint leaves.

Note: If you freeze the papaya it will make a creamer drink, and most of the ice cubes can be left out.

For mint ice cubes: add crushed mint to an ice cube tray and fill with water. Check out my blog on harvesting herbs.

Hope these hints and suggestions help to take away your tummy troubles.

Make Dream and Sleep Pillows

Make dream and sleep pillows from dried herbs.

General instructions:

Simple Dream and Sleep pillows can be made with soft fabric with fairly tight weave. Wash the fabric using natural soap such as borax and do not add any fabric softener or dryer sheets. Washing will wash the sizing and smell out of the fabric.  Some bags may be filled with batting along with the herbs. Use 100% natural fabric.

Dream and Sleep Pillows

Herbal Dream and Sleep Pillows

Cut two pieces of 5” x 8” rectangles or any size you like to use. This is a great project to use up leftover fabric. What’s important is what inside not the shape. Lay wrong size together and sew one long side seam using about ¼” seam allowance. Hem the top of the bag. Sew the other sides of the bag leaving the hem size open. I use a piece of ribbon to tie around the bag to close.

Casing bag: The top of the bag can fold over top for a casing with the seam open just enough to pull a draw sting through.

Fabrics might include: lining fabric, broadcloth, flannel, soft decorative fabric, and cotton.

Place a small amount of fiber fill inside the bag. Add about ½ to ¾ cup of the herbs.

Closed Bag: You can also make a bag with no opening. Just stitch around the four corners of the bag and leave an opening for filling and turning. It is best to use an inner lining of washed muslin for pillows. Just cut two pieces of muslin slightly smaller than the outside fabric.

Be sure you can get you material inside so the opening should be about 4 inches. Turn the bag inside out, iron and fill with herbs. Stitch the opening close. Place the inner bag inside the outer fabric and stitch close. I like to top stitch all around to catch the inner to the outer so the inner pillow does not shift around.

Place either of the bags inside your sleeping pillow or lay beside you head.

A variety of combinations can be used for these little bags. Some are used to help you sleep, or to dream, or help with headaches, or help you recover from an illness.

Dream Pillow may work because the fragrance activities the memory of the brain.

When making these mixtures, use two or three of herbs mentioned.

For example a classic mixture for Nightmare be-gone is equal parts of rose petals, rosemary, lavender, and hops. Sleep mixture is equal parts of lavender, mugwort and hops, or equal parts of lavender, chamomile, hops, mugwort and rose.  Amounts for pillow are about ½ c. herb in each pillow.

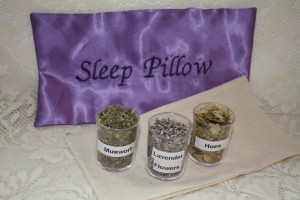
Making sleep pillow

Herbs used in sleep pillow

  • Stress Mixture: Hops, mugwort, sweet marjoram, and lavender
  • Get Well mixture: lavender, catnip,
  • Dream lover pillow: yarrow flowers, dill leaves, basil, and roses
  • Remember dreams: lavender, rosemary, mugwort, catnip, and bay
  • Nightmare be-gone: Rosemary, valerian, lemon balm, rose petals, hops, mullein, or lavender.
  • Headache be-gone: rosemary, mint, betony, or bay, bee balm flower, roses, lavender, nutmeg or cloves, and a small amount of marjoram.

To retain scent, can add some cellulose chips or vetiver root, a little essential oil may be added as well. Orris root which is used in potpourris is usually considered too sensitive for close breathing. Many are allergic to orris root. Also store bag when not in use in a plastic zipper bag.

Herbs used in making dream and sleep pillows:

  • Chamomile: rest, sweet dreams
  • Cloves: repel bad dreams
  • Dill is known to help with cranky babies
  • Hops: restful sleep and healing, sweet dreams
  • Lilac (old fashioned garden variety) good for dreams
  • Lavender: headaches easing, purification, calming
  • Marjoram: relieves depression
  • Mugwort: visions and predictive dreams, aids in remembering dreams
  • Mullein: repel bad dreams
  • Rosemary: avoid nightmares and headaches, folk lore says it retains memory, use sparingly
  • St. Johns Wort: banishes spirits
  • Lemon Grass: predictive dreams
  • Marjoram: relieves depression
  • Mint: vivid dreams, alertness
  • Rose: Clairvoyance, love
  • Thyme: peaceful sleep
  • Valerian: deep rest

Word of warning: If you allergic to ragweed you may have reactions to chamomile. Common sage and clary have been used in pillows but other sages should be avoided. Avoid tansy and Artemisia such as wormwood.  We do not claim these pillows actually help you sleep or will induce sleep. They are just fun.

Lavender has a strong scent and if strong may not induced sleep, but is used for headaches. Strong herbs such as rosemary and mugwort should be avoided in children pillows. Many pillows are made from hops alone, but hops have an unpleasant smell by itself and smell better with other herbs flowers mixed in equal parts.

These little pillows make great gifts and is a fun way to use many of your dried herbs. If you do not grow all the herbs you can usually purchase them form a good herb store. Just be sure herbs are organic. Always label the pillow with all ingredients. They are not intended as a primary sleeping pillow, but an addition.


Making Herbal Jelly

Making Herbal Jelly is fun and extends the harvest for all those herbs you planted this spring. It also makes a wonderful gifts for teachers, co-workers, and gift exchanges. Herbal jelly are unusual. It great to have these gifts ready when you need them.

Using juice instead of water, the number of flavor combinations is quite numerous.

Gather your basic supplies for jelly making.

  • ½ pint Jars, washed in dishwasher or hand washed
  • New lids
  •  Rings
  • Pectin (dry or liquid)
  • Pots: water bath caner, stock pots, small saucepan
  • Jar lifter
  • Tongs
  • Ladle
  • Juice
  • Herb
  • Sugar
  • Butter

Pick your herbs and thoroughly wash, check out part one of harvesting herbs for washing instructions. Try and pick them around mid morning after the dew has dried but before the sun is too hot. Pat the herbs dry.

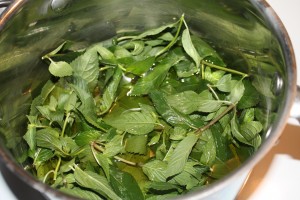
To make infusion: Measure out the juice with a little extra and place in stock pot and add the herbs. Cover and heat the juice and herbs to almost boiling, turn off heat and allow the herbs to steep for about 20 minutes. Strain out the herbs and carefully measure out the amount needed for the recipe. Compost the herbs. When straining herbs, they do take up some of the liquid; this is the reason for a little extra.

Making an herb infusion

Herb infusion with apple juice

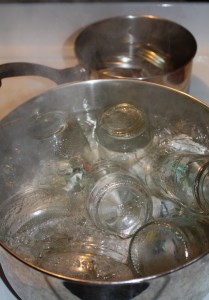
To Sterilized the jars:  Place the washed jars in a stockpot with a cloth lining the bottom of the pan and bring to a boil and boil for 10 minutes to sterilize the jars. I like to use a clean new dishcloth in the bottom of the pan when sterilizing jars so they don’t rattle around.

Place the lids in a small saucepan and cover with water and heat. Both the jars and the lids should be hot when pouring in the jelly and sealing. Start heating the water in the caner.

Making jelly

Sterilizing jars

Making the jelly: Measure out the sugar and set aside.

Chocolate Mint jelly recipe:  Follow directions for making powdered pectin recipes

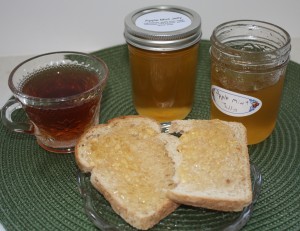
Apple mint jelly

Apple mint jelly on toast

  • 4 c. apple juice
  • 4 c. sugar
  • 1 box of powdered pectin
  • 1 c. mint leaves for infusion, follow directions for making infusion
  • 1 Tbsp. lemon juice
  • ½ tsp. butter
  • Food coloring if desired, I do not use

Basic recipe for making jelly using powdered pectin: (Sugar is added last)

  • 3 c. fruit juice or water
  • 1 c. fresh herb
  • 2 Tbsp. fresh lemon juice, can used bottled, or some recipes use vinegar
  • 1 pkg. powdered pectin
  • 4 c. sugar
  • ½ tsp. butter
  • Food coloring if desired

In a large stock pot with about 8 to 10 quarts capacity with a wide flat bottom is great for most jelly recipe, add the infusion, lemon juice or vinegar, butter and dry pectin.  Bring to a rolling boil, stirring constantly. Once the boil cannot be stirred down, add the sugar and bring back to a rolling boil. Once the boil cannot be stirred down, boil for exactly one minute. Use a clock with a minute hand. Remove from heat. Skim off foam using a metal spoon.

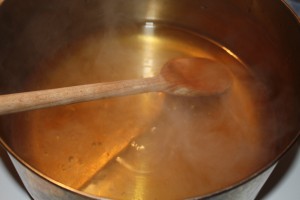
Boillng jelly

Bring jelly to rolling boil that cannot be stirred down

Ladle the hot mixture into the hot jars, Wipe off the rim of the jar with a wet cloth, and place lid and ring and tighten. Turn over jar with jelly to coat the lid. Place the sealed jars in the hot water canner and bring to a boil and boil for 5 minutes. Take out of the caner and place on protected surface to allow cooling. The seals should pop as they cool down, if for some reason they do not, plan on using the jelly and storing it in the refrigerator.

Basic recipe for making jelly using liquid pectin, (Pectin is added last)

  • 2 c. fruit juice
  • 3-1/2 c. sugar
  • 2 Tbsp. lemon juice
  • 1 pouch liquid pectin (3 oz)
  • ¼ tsp. butter
  • 1 c. fresh herbs
  • Food coloring if desired

For the liquid recipe mix everything except the liquid pectin. Stirring all the time, bring to a full rolling boil that cannot be stirred down. Add the pectin all at once and return to rolling boil. Stir constantly and boil for exactly one minute. Remove from heat and skim off any foam with metal spoon and pour into jars and seal. Water bath according to directions, most are 5 to 10 minutes.

Note: I have not had good luck using liquid pectin when making my apple mint jelly. I have made it twice with liquid pectin and ended up with apple mint syrup. Not what I originally intended.

Herb jelly recipes:

  • Basil, either purple or sweet with water                with powdered pectin
    • 4 cups water
    • 2 c. packed fresh basil leaves, finely chopped
    • 1 pkg. powdered fruit pectin
    • 5 c. sugar
    • Make according to powdered pectin recipe and water bath for 15 min. (no vinegar)
    • Lemon Verbena with liquid pectin
      • 2 c. torn lemon verbena leaves
      • 2-1/2 c. water
      • ¼ c. cider vinegar
      • 4-1/2 c. sugar
      • 1 liquid pectin (3 oz.)
      • Make according to powdered pectin recipe and water bath for 5 minutes (has vinegar)
      • Thyme jelly
      • Rose Geranium jelly
      • Orange mint jelly
      • Lemon balm jelly
      • Sage jelly
      • Rosemary jelly
      • Chamomile jelly
      • Lavender jelly
      • Parsley  jelly
      • Lime Geranium jelly
      • Fennel

      Jelly recipes contain acid such as vinegar or lemon juice usually require less time in the water bath.

Herb and Fruit Juice Combination’s jelly:

  • Basil with orange juice
  • Lemon balm with red grape juice
  • Lemon thyme with white grape juice or lemonade
  • Lemon Verbena with  lemonade
  • Marjoram with grapefruit juice
  • Rosemary with orange juice
  • Savory with cranberry juice
  • Sage with apple juice or cranberry juice or pineapple juice
  • Scented Geranium with apple juice
  • Sweet woodruff with white wine
  • Thyme with purple grape juice or apple juice or orange juice
  • Rose petals with apple juice
  • Lavender with apple juice or orange juice or strawberries
  • Mint with apple juice
  • Tarragon with grapefruit juice
  • Calendula with grapefruit juice
  • Mint with grapefruit juice
  • Anise hyssop with grapefruit juice
  • Parsley with grapefruit juice or pineapple juice

It is fun to think of all the different combination of juice with herbs. Try one or two and you might find a favorite. These make great and unusual gifts.

Summertime is the best time to make herbal jellies, but I have used frozen mint when I needed to make jelly with good results.

Have fun!


Harvesting and Drying Fresh Herbs Part Two

Part Two:Harvesting and drying fresh herbs
In this part of the drying herbs blog we will address other ways to dry herbs,freezing herbs, and how to dry seeds and roots. In Part one we address using a dehydrator and hanging herbs to dry. And the best way to harvest the herbs to get them ready to dry.

Screen Drying: Herbs with small leaves (leave on the stem) and short stems which do not hang well can be dried on screens.

For larger leaves snip off the stems and lay on screens in a single layer. During drying time, turn over the leaves at least a couple of times for even drying. Lay the screens in a well ventilated area. I like to use a wooden clothes rack and lay the screen on the rack.

Drying herbs

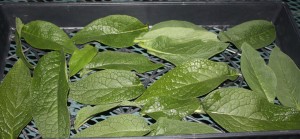
Screen drying comfrey on a nursery plastic tray.

Try using the plastic trays from the nursery that have openings in the tray. If the leaves are small, lay paper towels down first. They should be dry in a little over a week. Be sure and not leave them too long and they will collect dust.

Screens can be constructed with scrap lumber and window screening. Another way is to use canvas stretcher frames which are glued and cover tightly with screening. I use a staple gun to attach the screen.

Microwave drying seems to be latest way to dry herbs; I have not tried this method as I think the microwave would heat the herbs at too high a temperature. The information I found says watch the drying time, as they can start a fire.

Wash the herbs and lay on paper towels to air dry for about an hour. Place herbs on a paper towel in a single layer. Cover with another sheet of paper towel. Heat for one minute on high, turn over stack over and heat for another minute. Depending on your microwave it may take a more or less time. After the initial two minutes, microwave every 30 seconds, until herbs are dry and brittle. Store and label.

Oven drying: This one works pretty well, but again I would not use this method for medical herbs. Set your oven at its lowest setting about 180°F. Leave the door open to allow steam to escape. Wash and air dry herbs. Lay the leaves in a single layer on a cookie sheet. Stir every once in a while to ensure even drying. Dry for about 4 hours. Be sure and work with only one kind of herb. The flavors can actually mix.

Gas oven with constant pilot light drying: Follow the above directions in reference to the preparation of the herbs. Set the temperature at the lowest setting while keeping the door open, and will keep the flame burning. After a few minutes, turn off oven and place the cookies sheets in the oven. Close the door and leave it alone overnight. Check if the herbs are dry before removing.

Salt or sugar: Layer clean and air dry herbs such as mints, anise hyssop, lavender, rose, and scented germanium with sugar. Be sure all parts of the herb are covered. Leave them until they are thoroughly dry. Remove leaves, label and store.

Pick the herbs suited to either salt or sugar. Rosemary, oregano, marjoram, sage, savory, and lovage are best in salt prepared in the same manner as sugar.

Refrigerator drying:  This is one of my favorite ways of drying especially if you don’t have a food dehydrator. Lay the clean and dry to the touch herbs on paper towels on a tray in the refrigerator and allow drying. Do not use the crisper bins. You can also place the herbs in a paper sack and leave in the refrigerator to dry.

Freezer Method:  Some herbs loose there taste when dried, but lend themselves to freezing. Some herbs are delicate and freezing is as close to fresh as possible. Herbs better frozen include basil, chives, dill, fennel, and flat leaf parsley. Herbs should be dry to the touch and place in freezer bags and quickly frozen. Oncefrozen the herbs can easily be stripped from their stems.

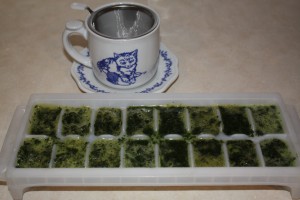
Ice cube freezing: Chop the herbs and place in an ice cube tray. Measure a teaspoon or Tbsp. of the herbs for each hole and fill with water. Freeze.

Ice cube freezing of herbs

Freezing herbs in ice cube trays. Mint ready to make into tea.

Another method is to place herbs in a blender and add enough water to fill the trays. Blend and freeze. Once frozen the herbs can be pop out of trays and store in plastic bags. Be sure and label with the amount of the herb. These cubes can be added to soups, sauces, stews or your favorite recipe.

Tea herbs can be added to a pan and covered with water and bring to almost boil and serve as hot tea. Don’t place the frozen cube in a glass mug and hot water added. The mug might break.

Drying Roots and rhizomes: Roots should be dug in the fall and allow to air dry. Annuals can be dug the first year, but perennials should be allowed to mature for at least two or three years. Annuals roots should be dug up at the end of their growing cycle.

Ginseng is reported to need at least seven years before roots reach their peak. Echinacea needs about three years for their roots to reach any size.

Arrange the roots in front of a fan to speed up drying. Wash quickly and pat dry immediately. If the top of the plant will not be used, compost. You can replant some of the roots of most herbs and they will grow just fine.

The fall is when the greatest concentration of medicinal compounds is stored in the root. Some herbs such as comfrey or horseradish can have their roots cleaned and the hairs remove, but other such as valerian contains most of the compounds is on the surface or skin.

Some roots can be sliced and place on a baking sheet and dried in the oven.

Before digging any roots make sure you are on your own land or you have permission from the land owner. Along the side or the road is not the place to dig, not only is it illegal in most parts, the roots have absorbed car exhaust which we don’t want in our medicine.

Drying and storing Seeds: Harvest seeds on a nice warm day when they have ripen but have not begun to fall. This is usually when the seeds have lost their green and the pods are hard, crinkle dry, and brown or black. Cut the seed heads from the herbs such as dill, lovage, coriander, fennel, and chervil.

Tie the plant inside a paper bag and dry upside down. As they herb begin to dry the seeds will drop into the bags. Carry the bags to the garden, so you do not lose the seed as you walk back to the

Dry seeds

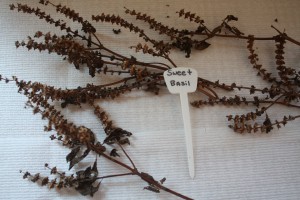
Dry basil seeds ready to plant next year. Laid on paper towels to dry

house. If you carry them back without securing the seeds, you may have plants in places you do not want. Keep each variety in its own bag and be sure and label. Seeds should be dry within two weeks.

Store seeds in jars or I like to keep mine in paper envelopes in a cool, dark place such as the refrigerator.  Some seeds need the cold to stratify, but others may not like to be kept in the cold. This may take some experimentation and research on your part.

Just a few final notes: Harvesting and drying fresh herbs will be appreciated this winter when you have herbs ready to use. Lay a white towel on the table before drying your herbs. This allows you to find any insects and to inspect your herbs before drying.

Humidity will affect your drying time and the quality of the herbs. The dryer the better, avoid drying on rainy days.

Herbs while drying should be protected from direct sunlight, and good circulation. Once dry the herbs should be used in about a year, just in time to dry a new batch the following year. It is important to keep moisture out of the jars used for storing. Who wants to open their cupboard and find a moldy mess?

When drying seeds, be sure they are ripe and ready. Once dry, remove any excess material by blowing across the seeds. Some who save in bulk use a box fan place in front of the seeds to blow away the excess material. Do this outside.

Gather only as much as you can handle at one time. Gather only one variety at a time, and keep in your gathering basket. After you have place one variety in your tub, now go back and gather another and place in another tub. Herbs should be gathered in the morning before it turns hot. If you don’t gather the entire herb you want, and it is not close to frost date, there will be another day.

Try one of these methods and you will be glad this winter when you want to use your dried herbs. Don’t forget to label with date, variety and drying method.

Happy Gardening!