Homemade Bath Oil

These little bottles of homemade bath oil are wonderful for relaxation are easy and fun to make. With just a few ingredients you can have wonderful gifts for your family and friends.
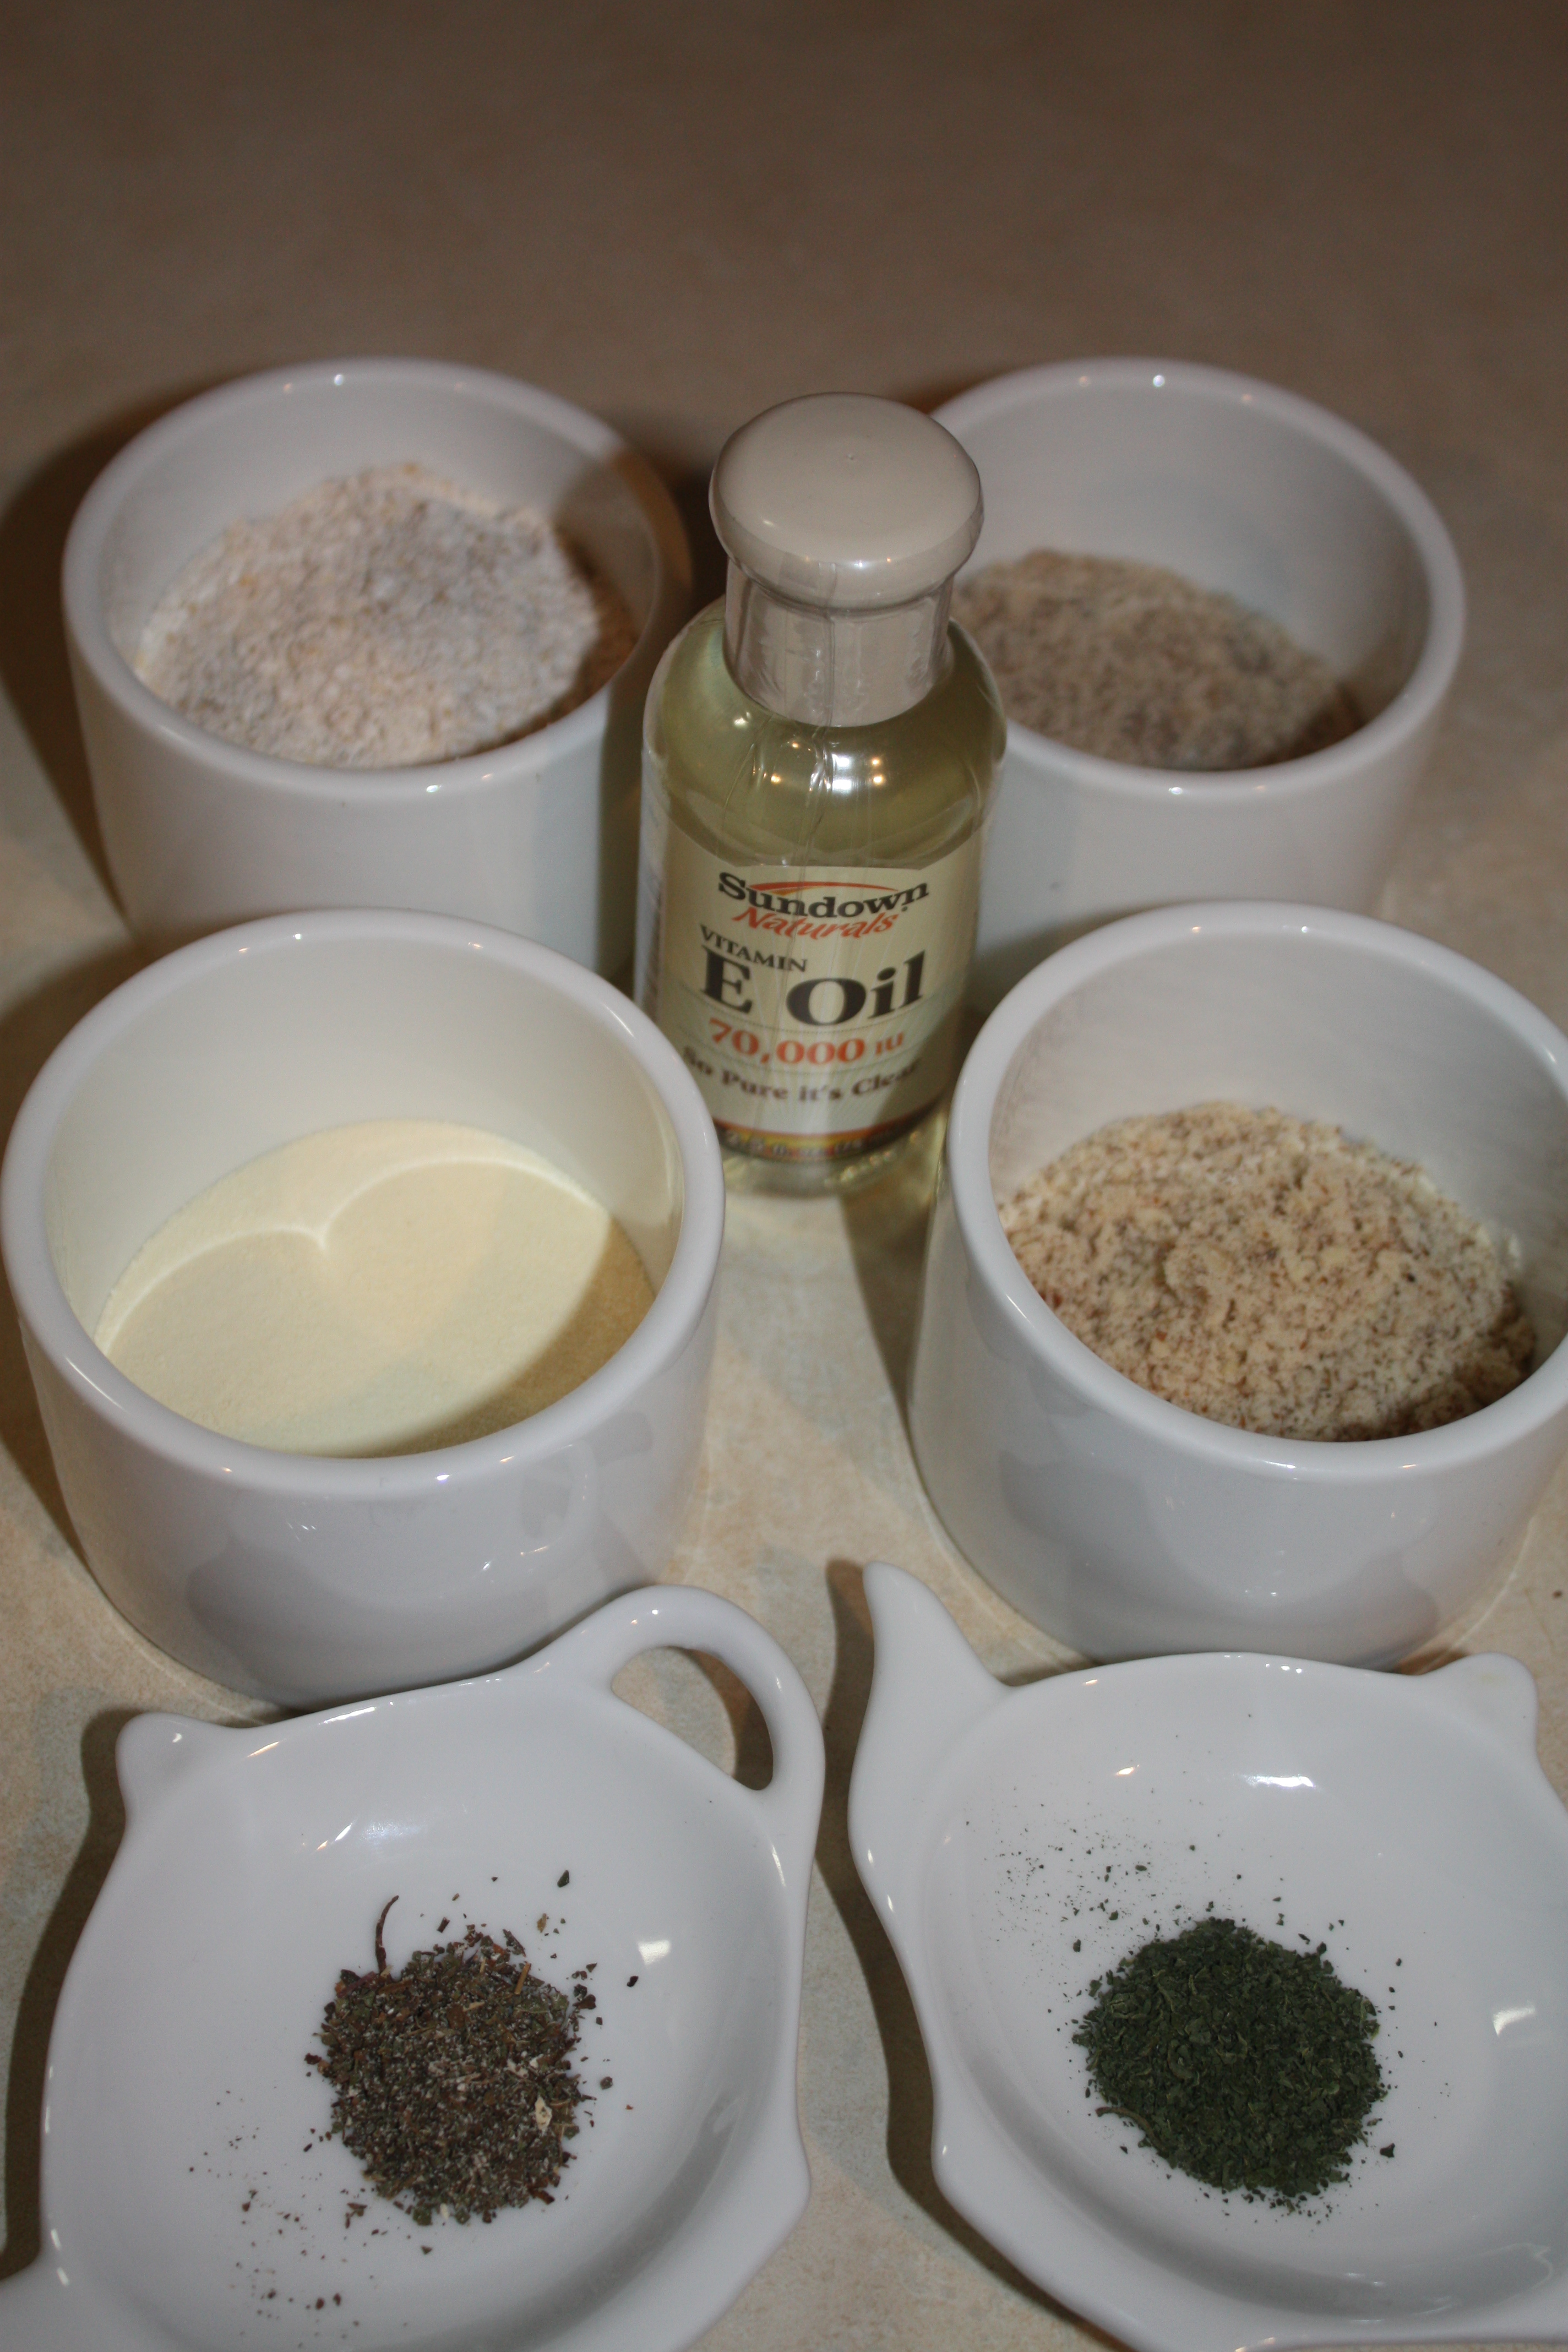
Ingredients:

  • Almond oil
  • Safflower oil
  • Vitamin E oil
  • Rose essential oil (optional)
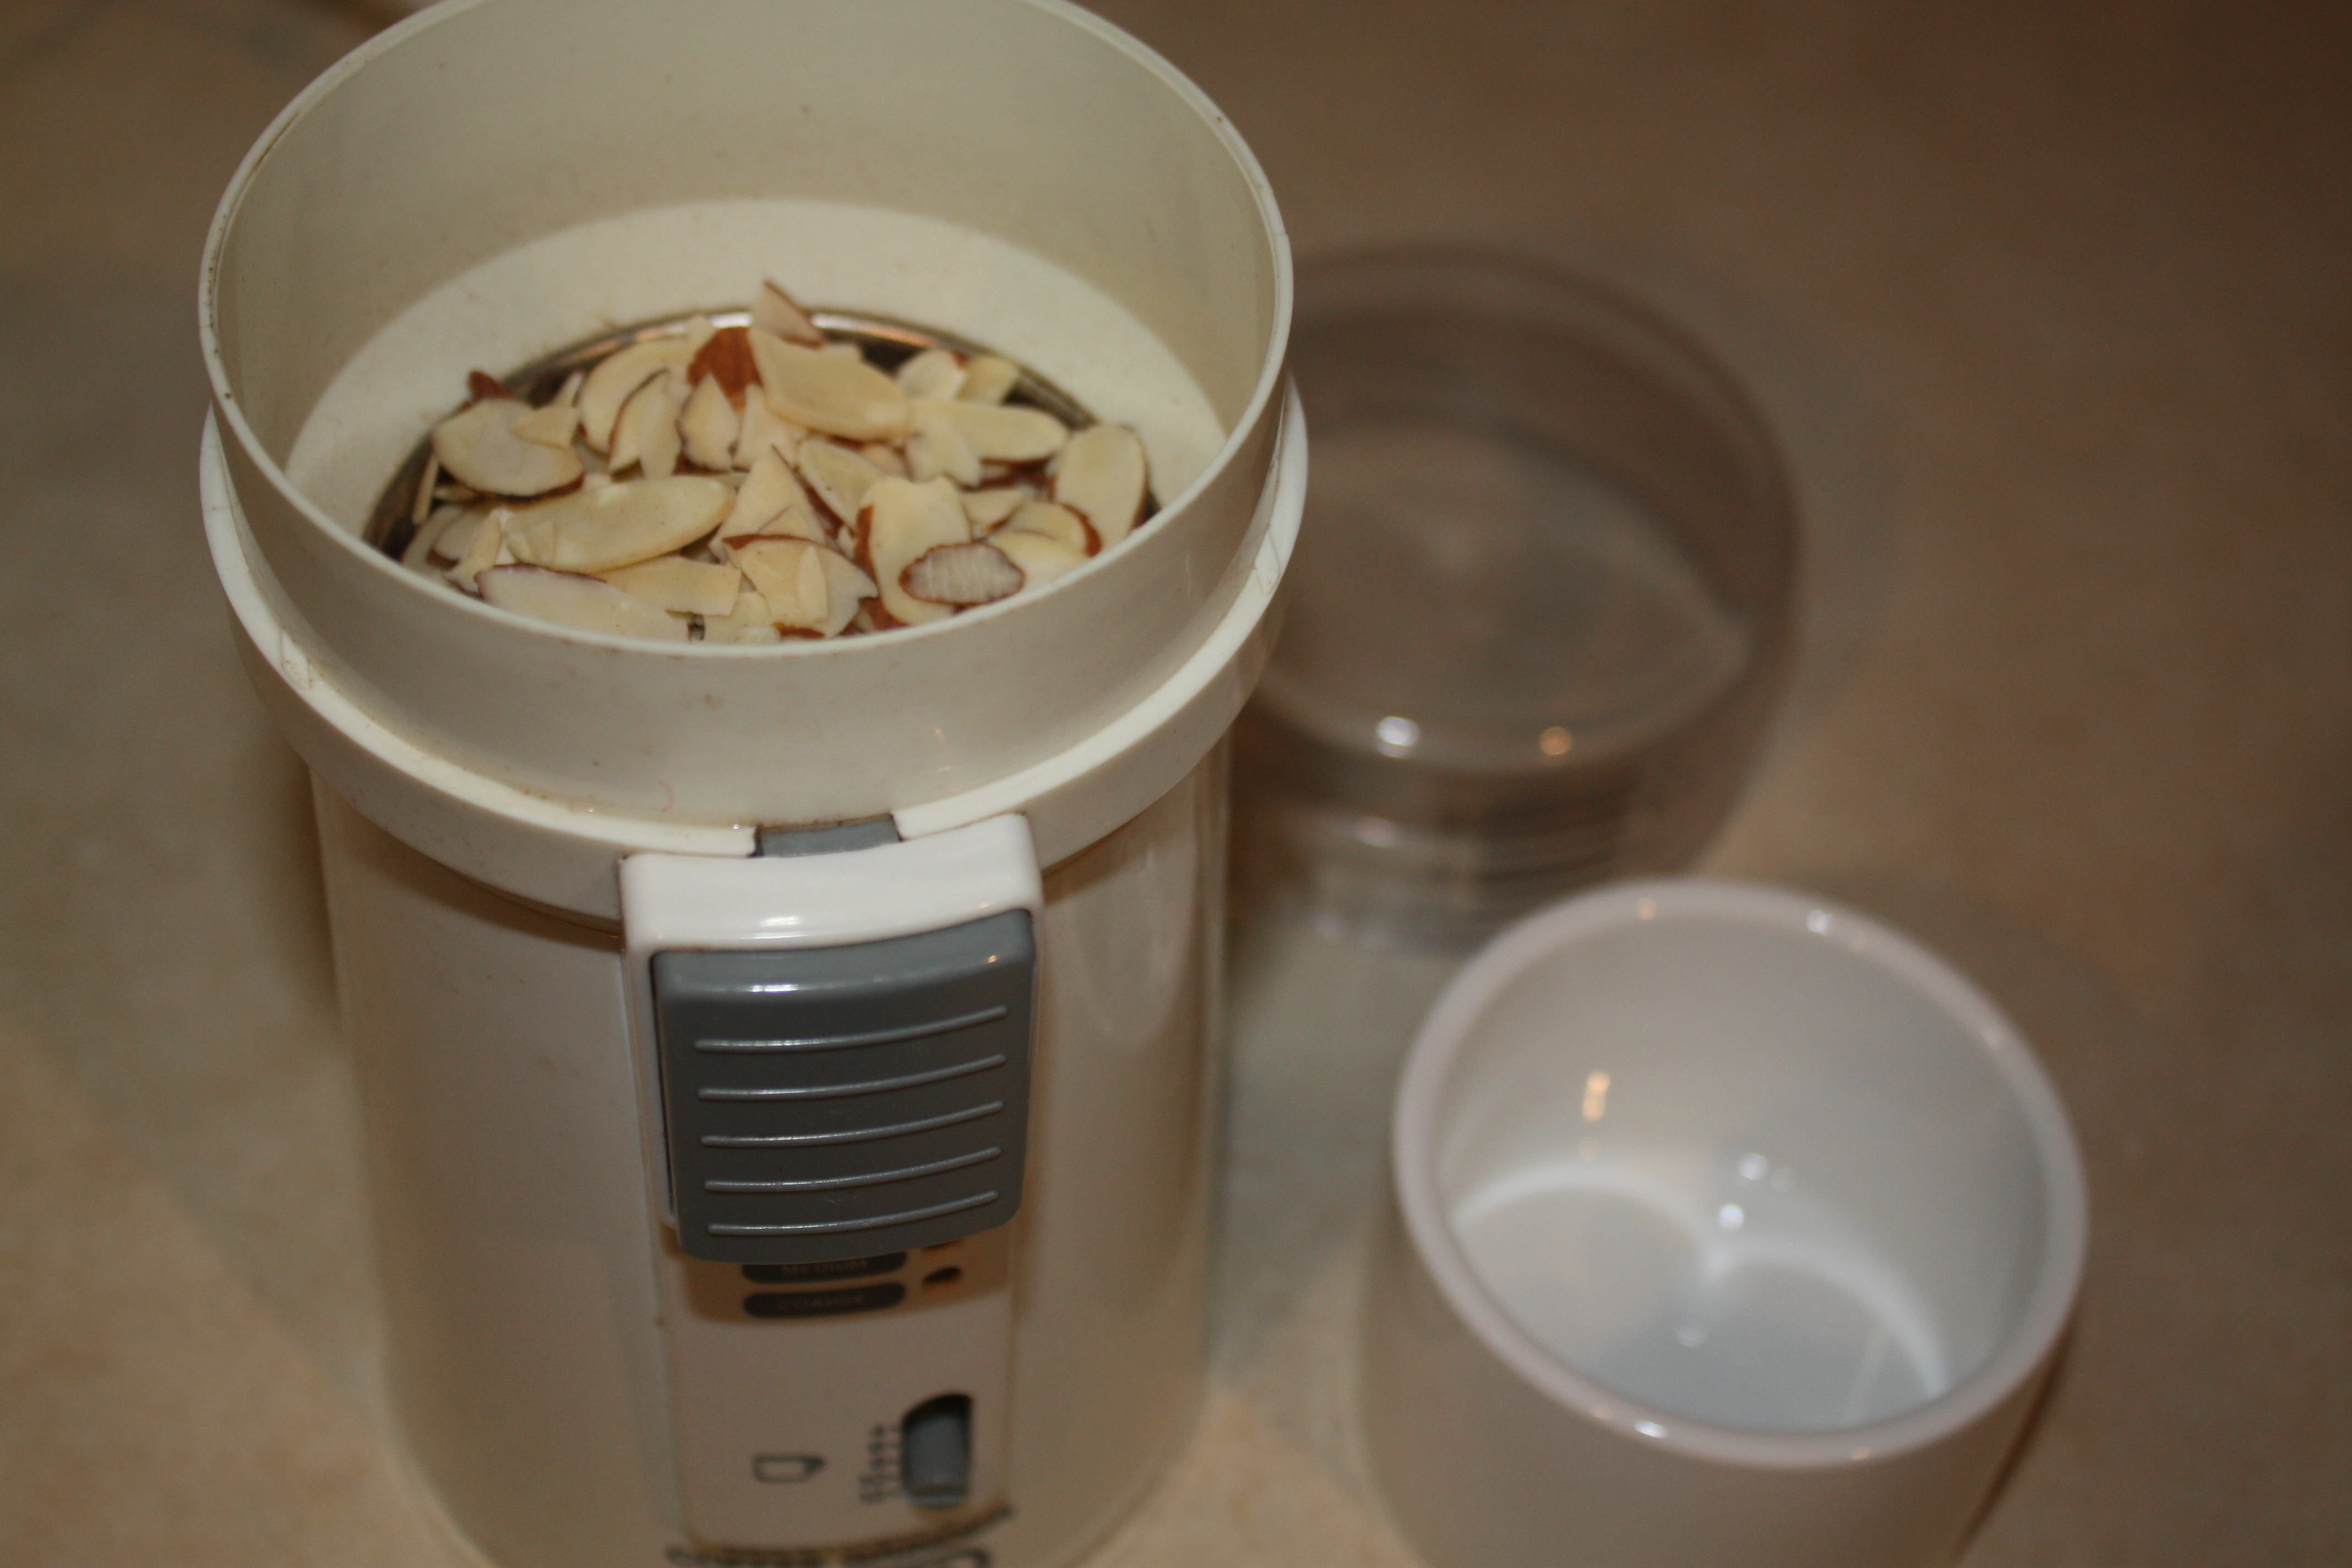
  • Dried rose petals
Oils and herb flowers

Ingredients for bath oil

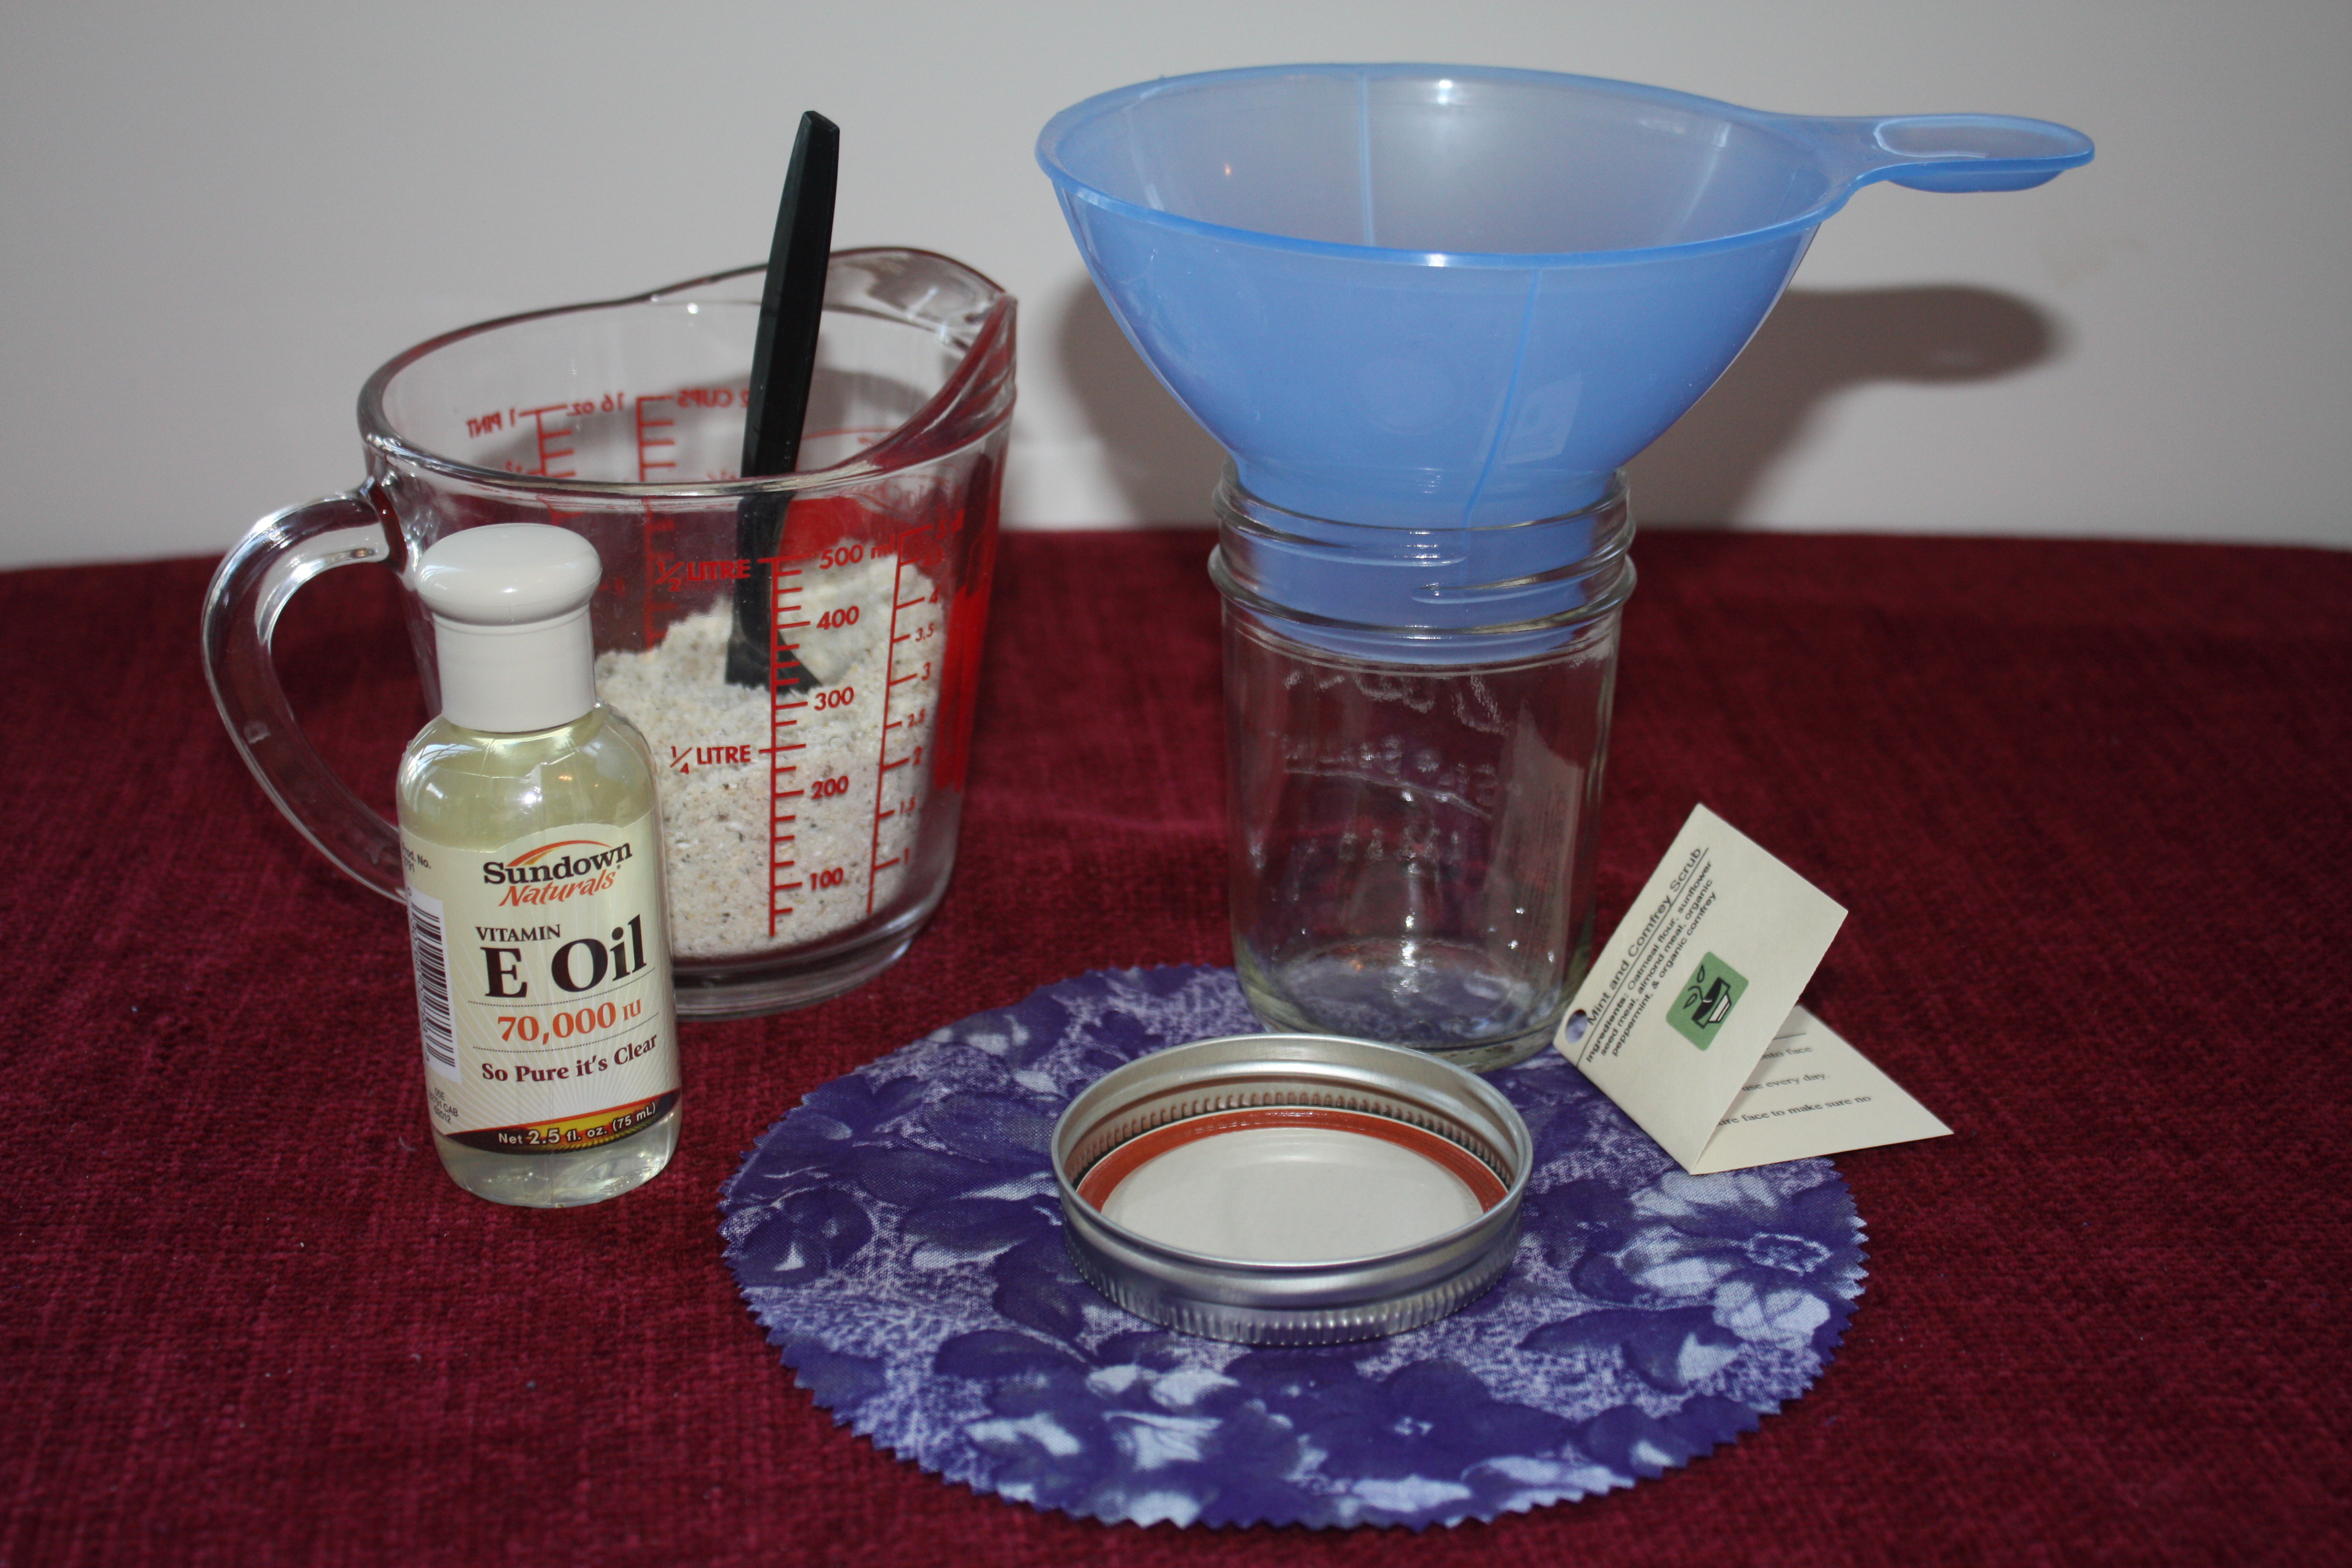
Use a new glass or plastic bottle or a recycle glass bottle. Glass jars should be sterilized in boiling water for 10 minutes and allow to thoroughly dry.

Plastic and glass bottles, perfect for the project can be found at your local hobby store in the cosmetic/soap section. They usually run about $1.00. Just remember what ever size you choose, you have to fill it with oil.

A 16oz. bottle of almond oil runs about $9.00. Safflower oil runs about $4.00 for 24 oz. and a 4 oz. of rose buds runs about $4.00. You will have enough to make several bath oil gifts.

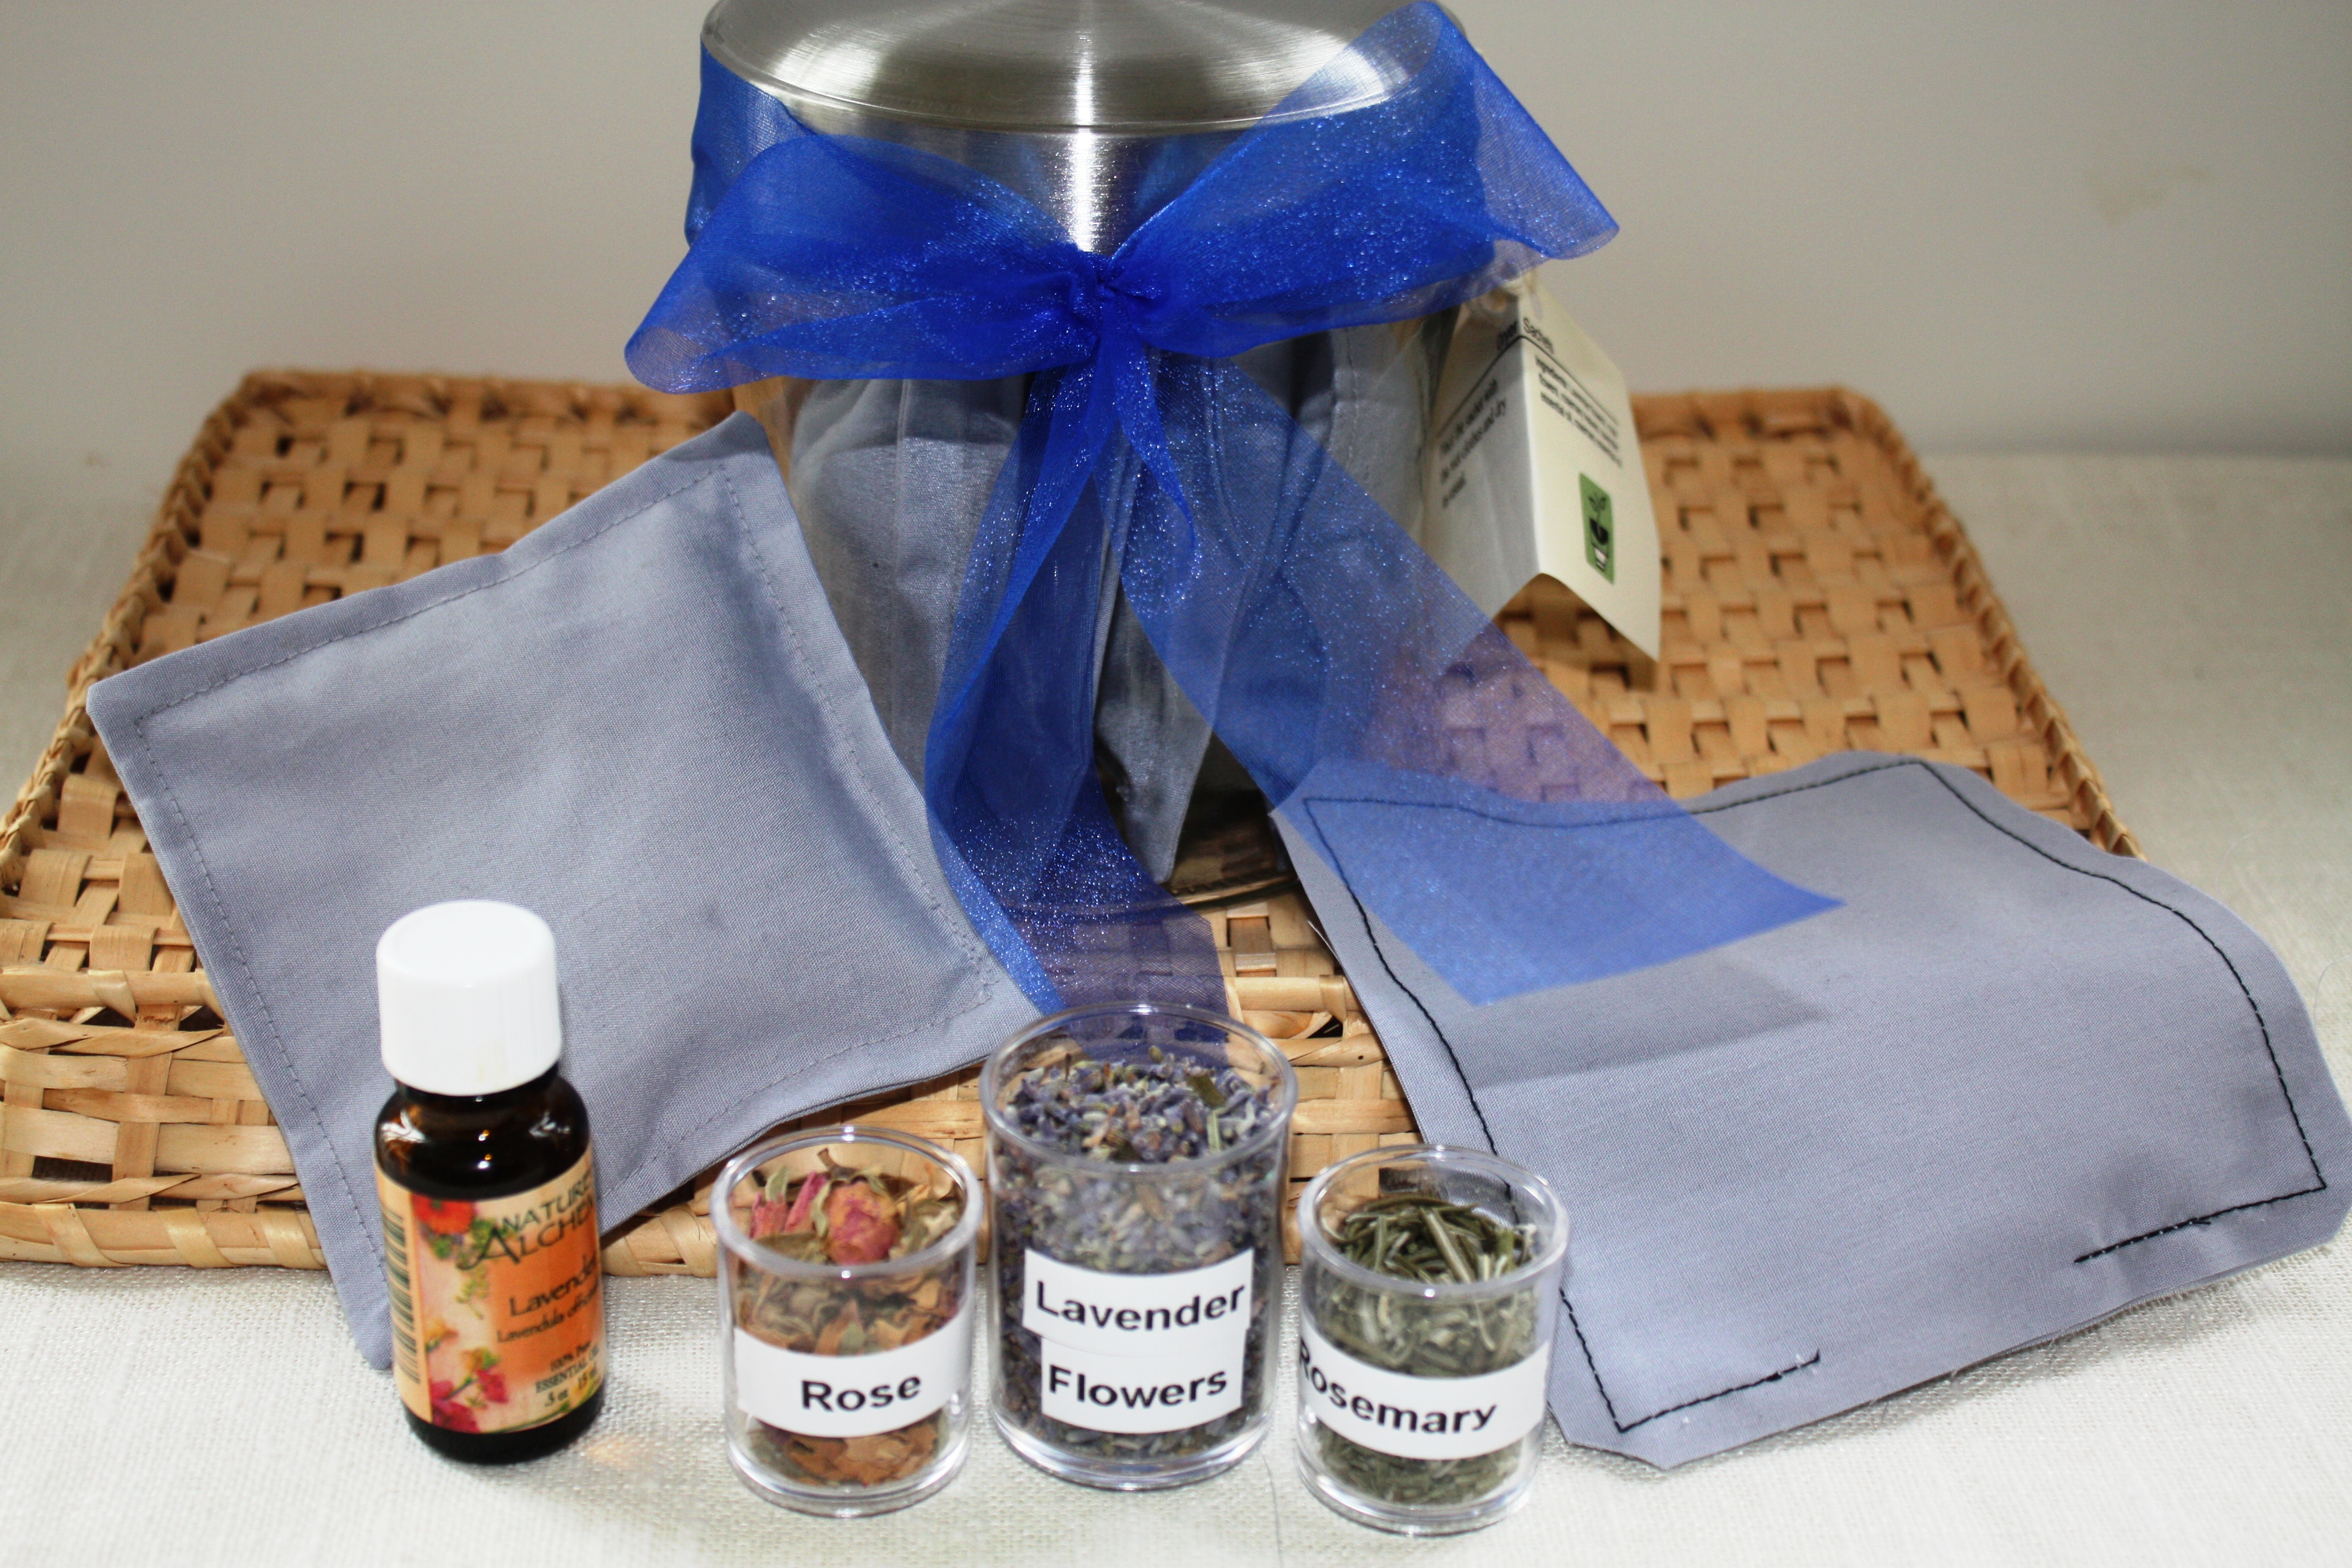
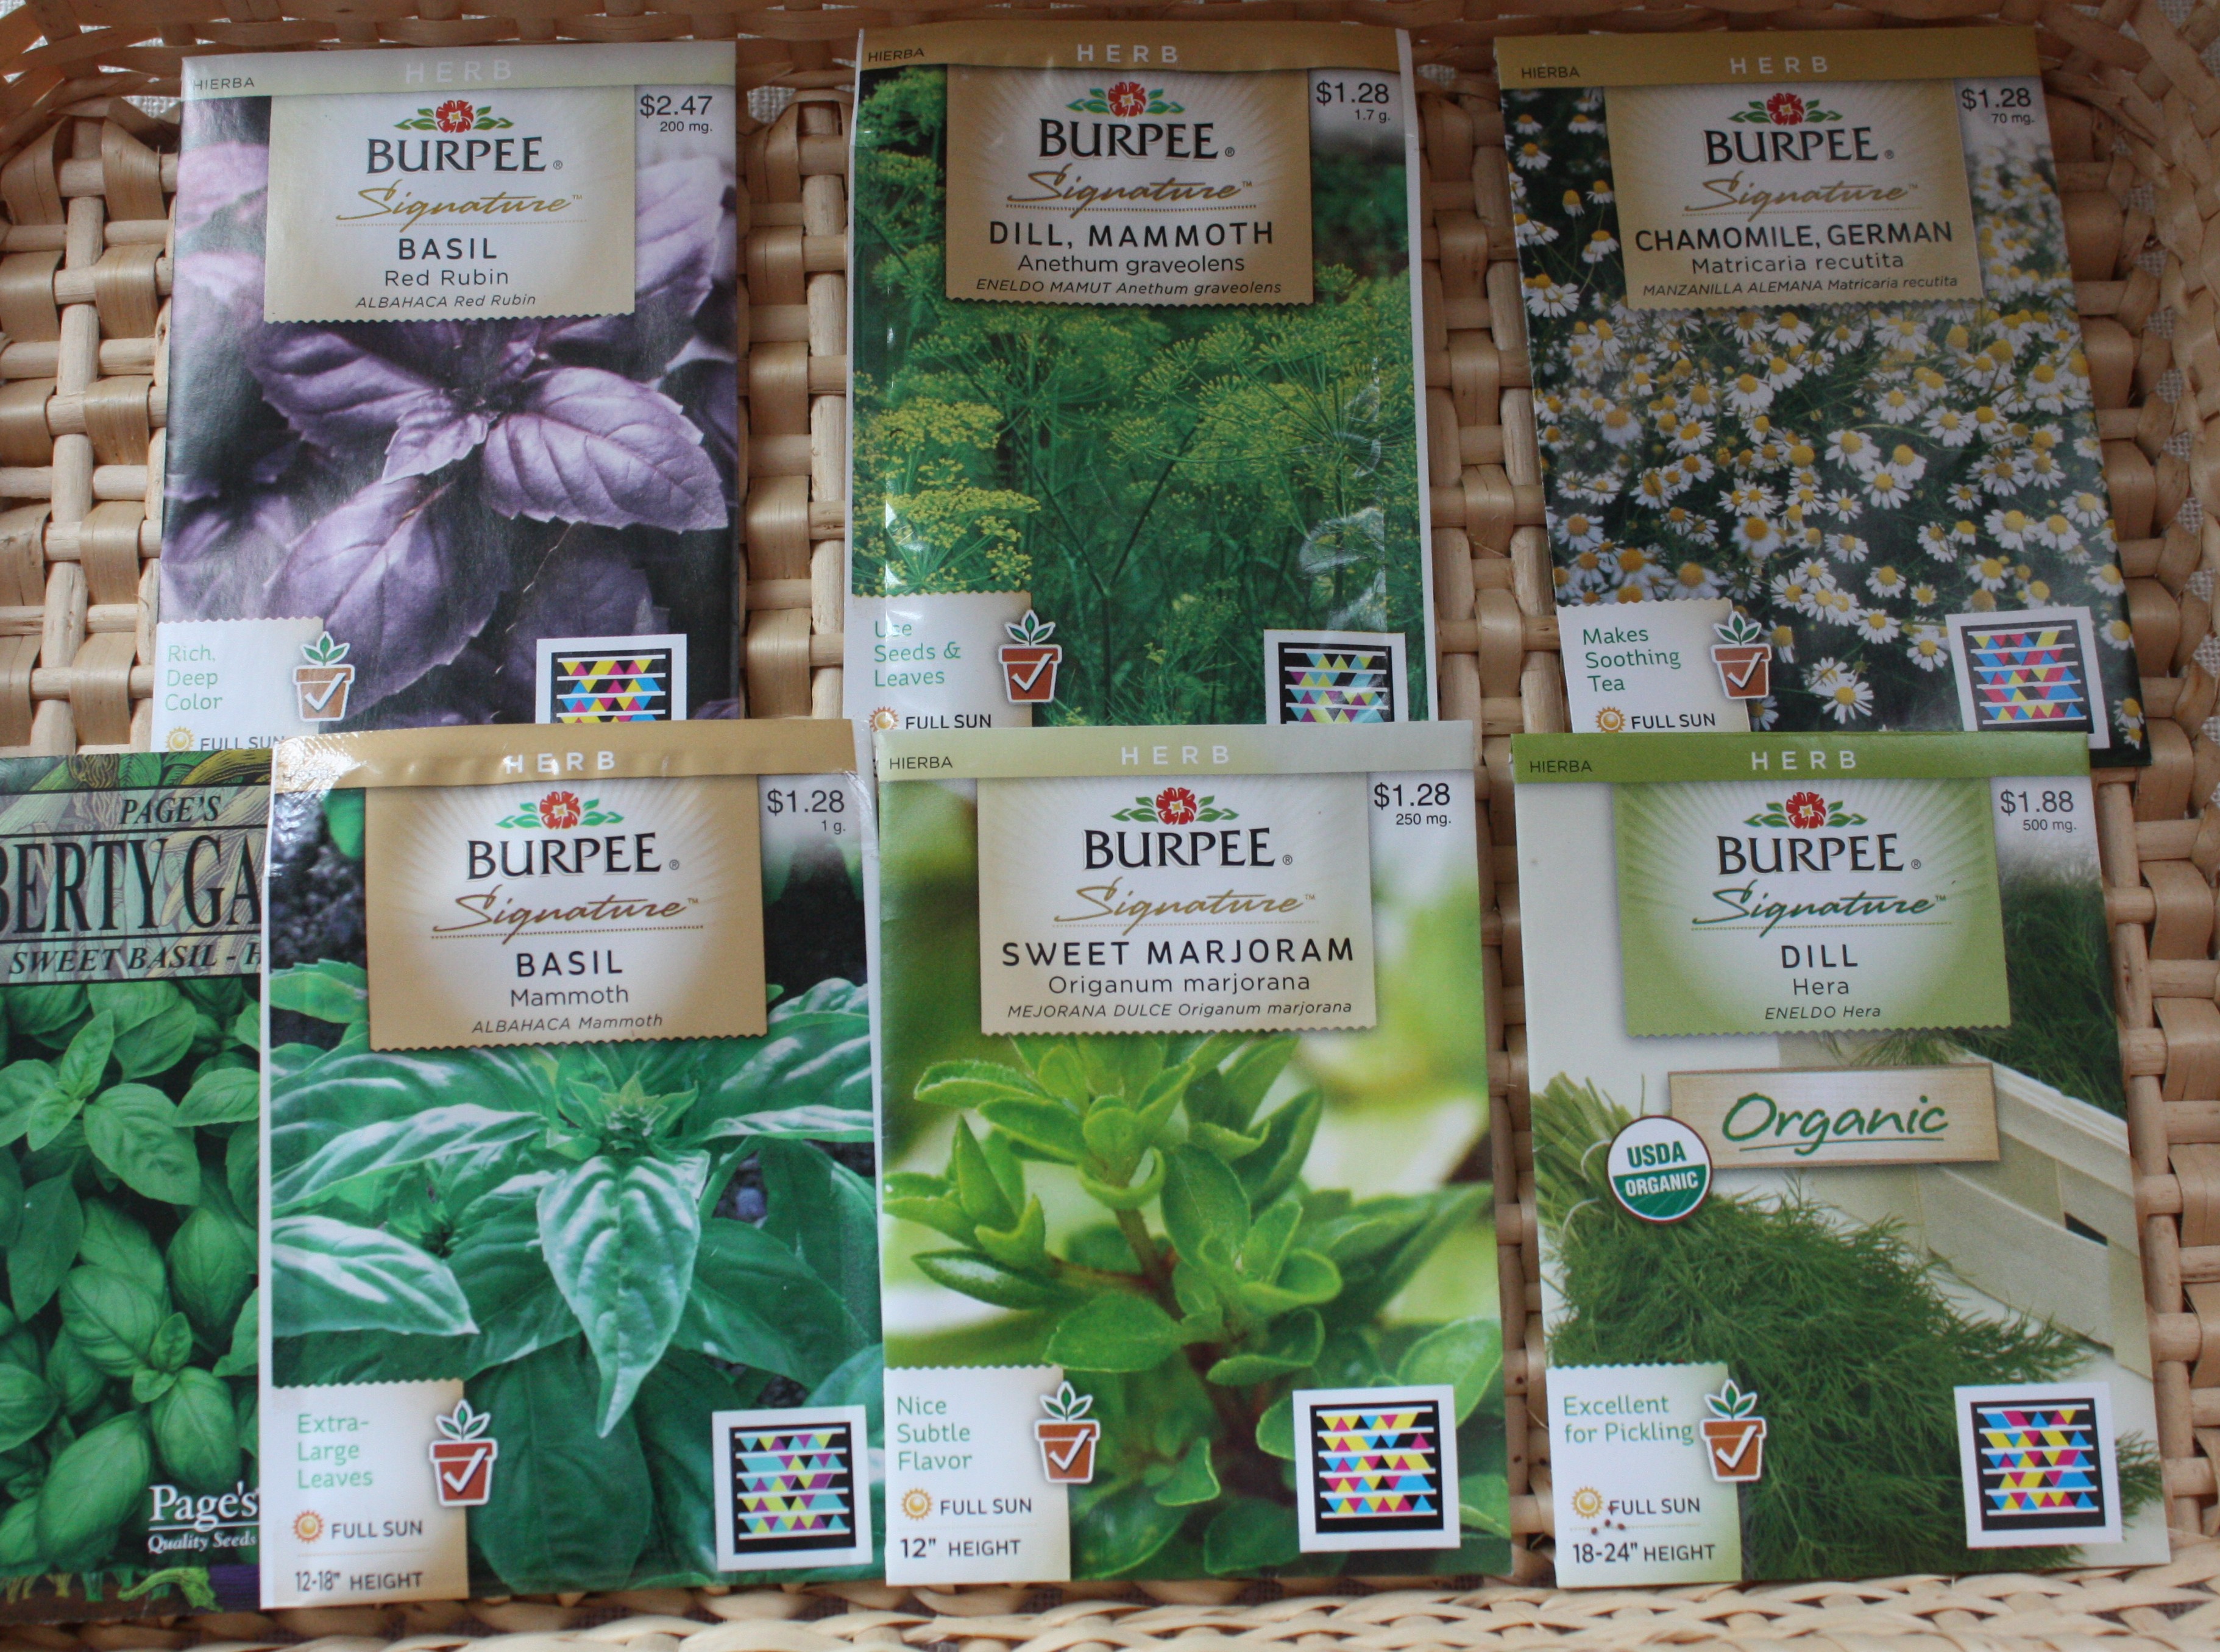
Some other blends for bath oils can be made out of lavender flowers or a mixture of rose and lavender. If you are not allergic to ragweed try chamomile. Other herbs include geranium, jasmine, lemon grass, sage, or rosemary.

 Other oils used in homemade bath oil might include: 

  • Apricot kernel oil
  • Sunflower oil
  • Grapeseed oil
  • Olive oil, it has a fairly strong scent
  • Avocado oil
  • Wheat germ oil
  • Jojoba oil, which never goes rancid

Another gift idea:

A massage oil can be made with a combination of any of these oils and essential oils of your choice. A massage can improve circulation, is good for relaxation, helps relieve stress, tension and in the elimination of waste from the body.

Breakdown of ingredients used in homemade bath oil:

Almond oil is almost orderless oil, very nourishing and slow to become rancid. Vitamin E, is not only good for the skin but will help to preserve the bath oil.

Essential oils are antibacterial as well as adding a wonderful addition to the scent.

The rose buds add scent but also looks great in the bottle. The scent of roses have a calming action to the brain and may help develop a positive mood. Homemade bath oils leaves the skin soft and smooth.
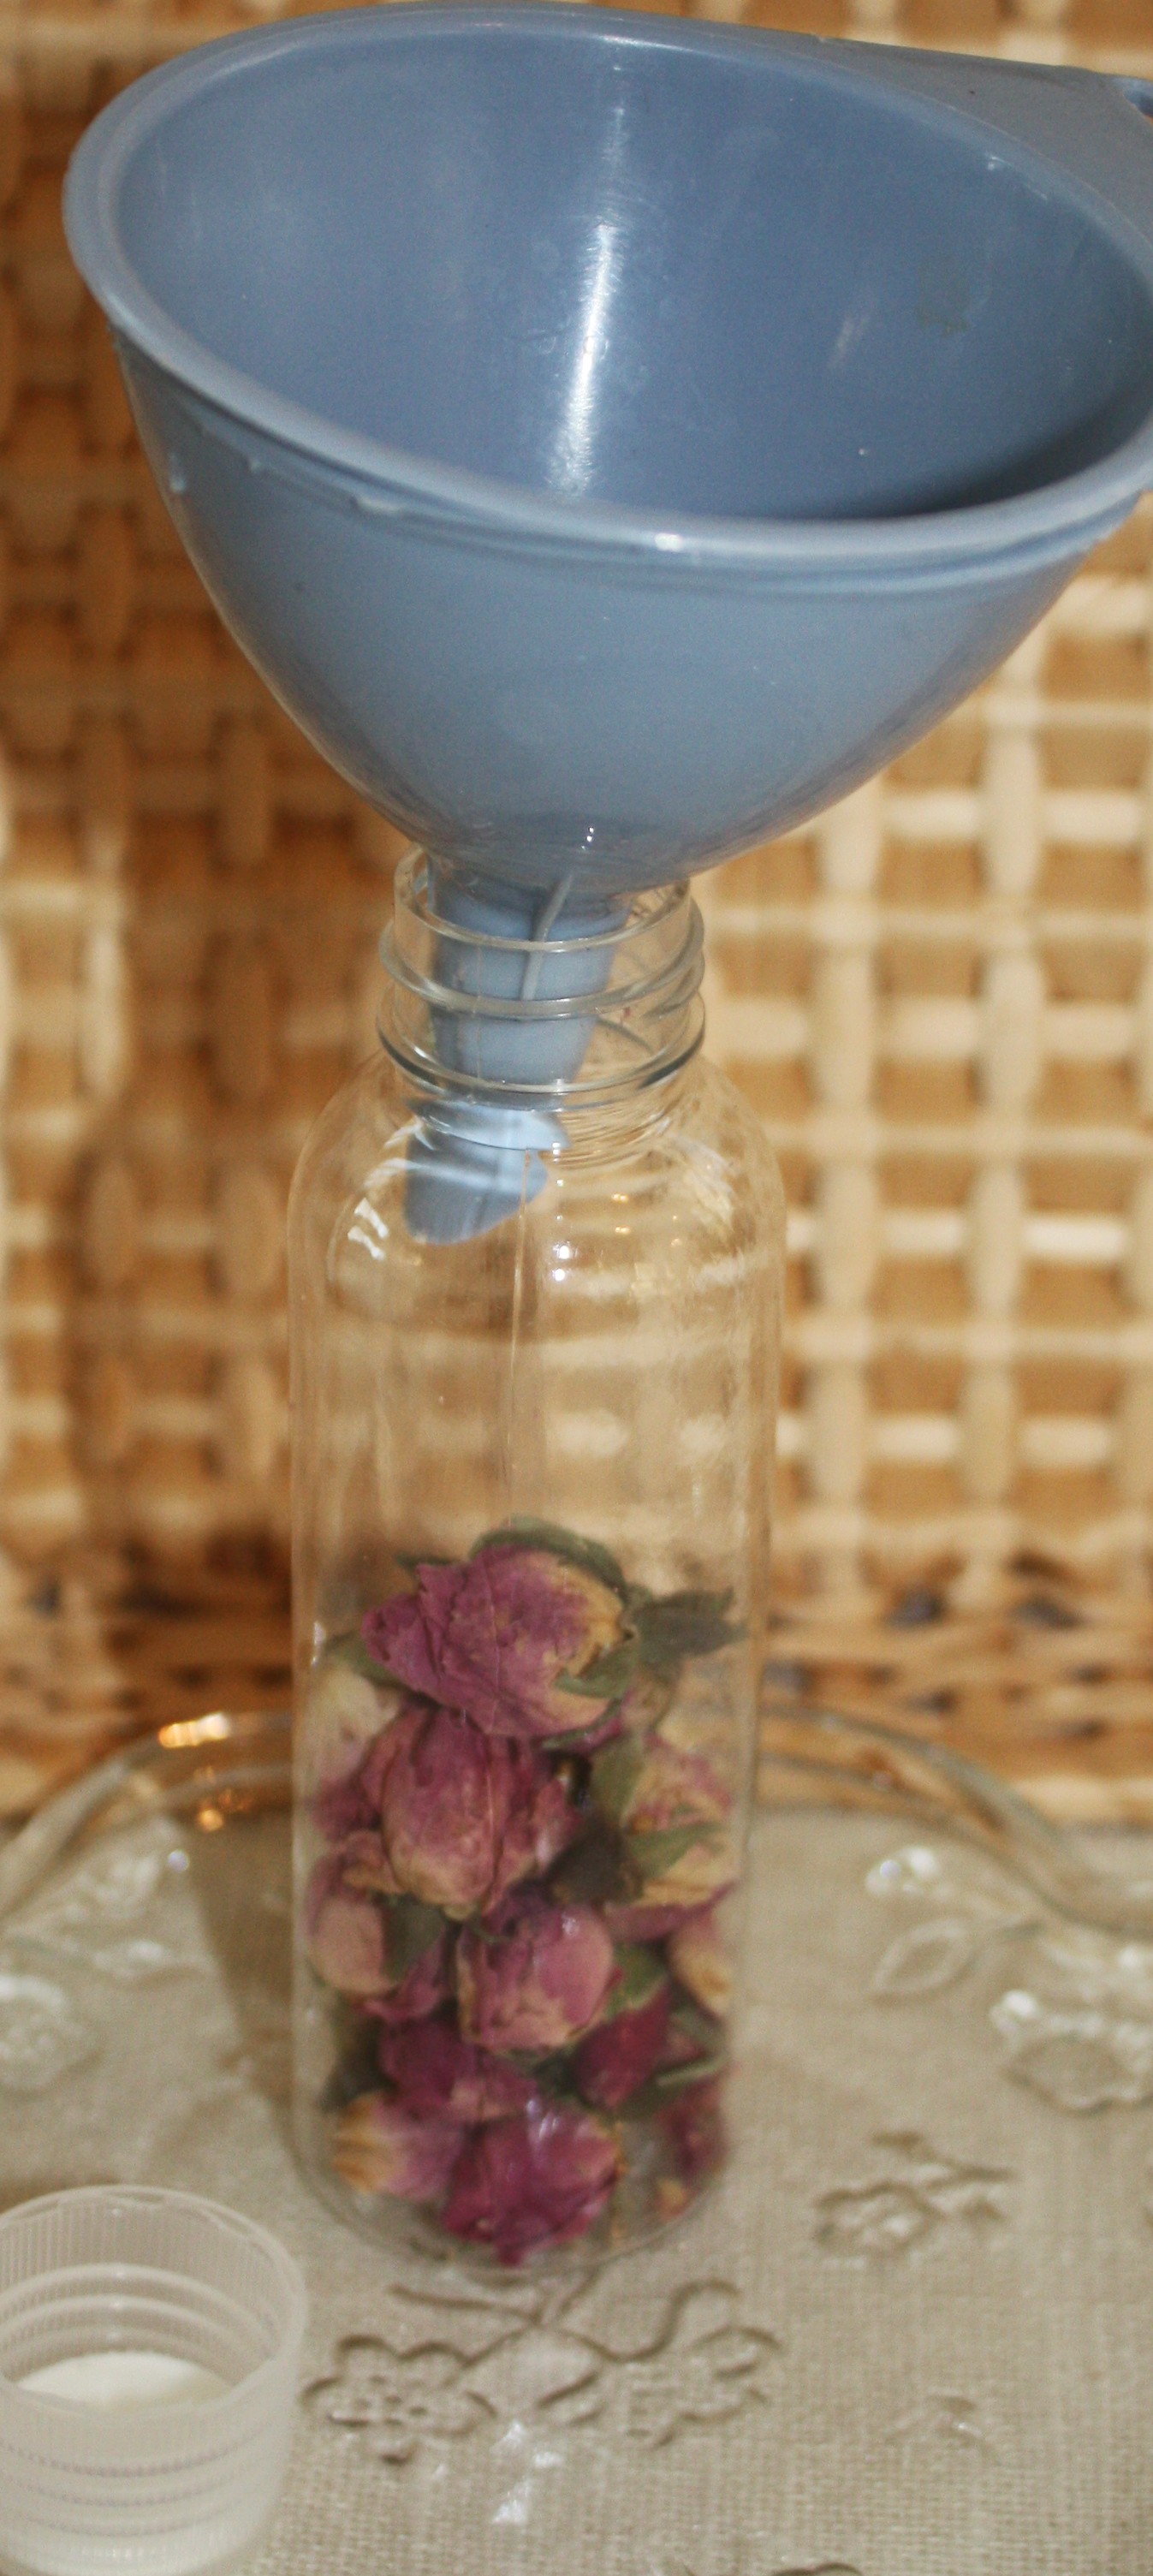
Bottle ready for oil

Pour in the oil

Rose bottle

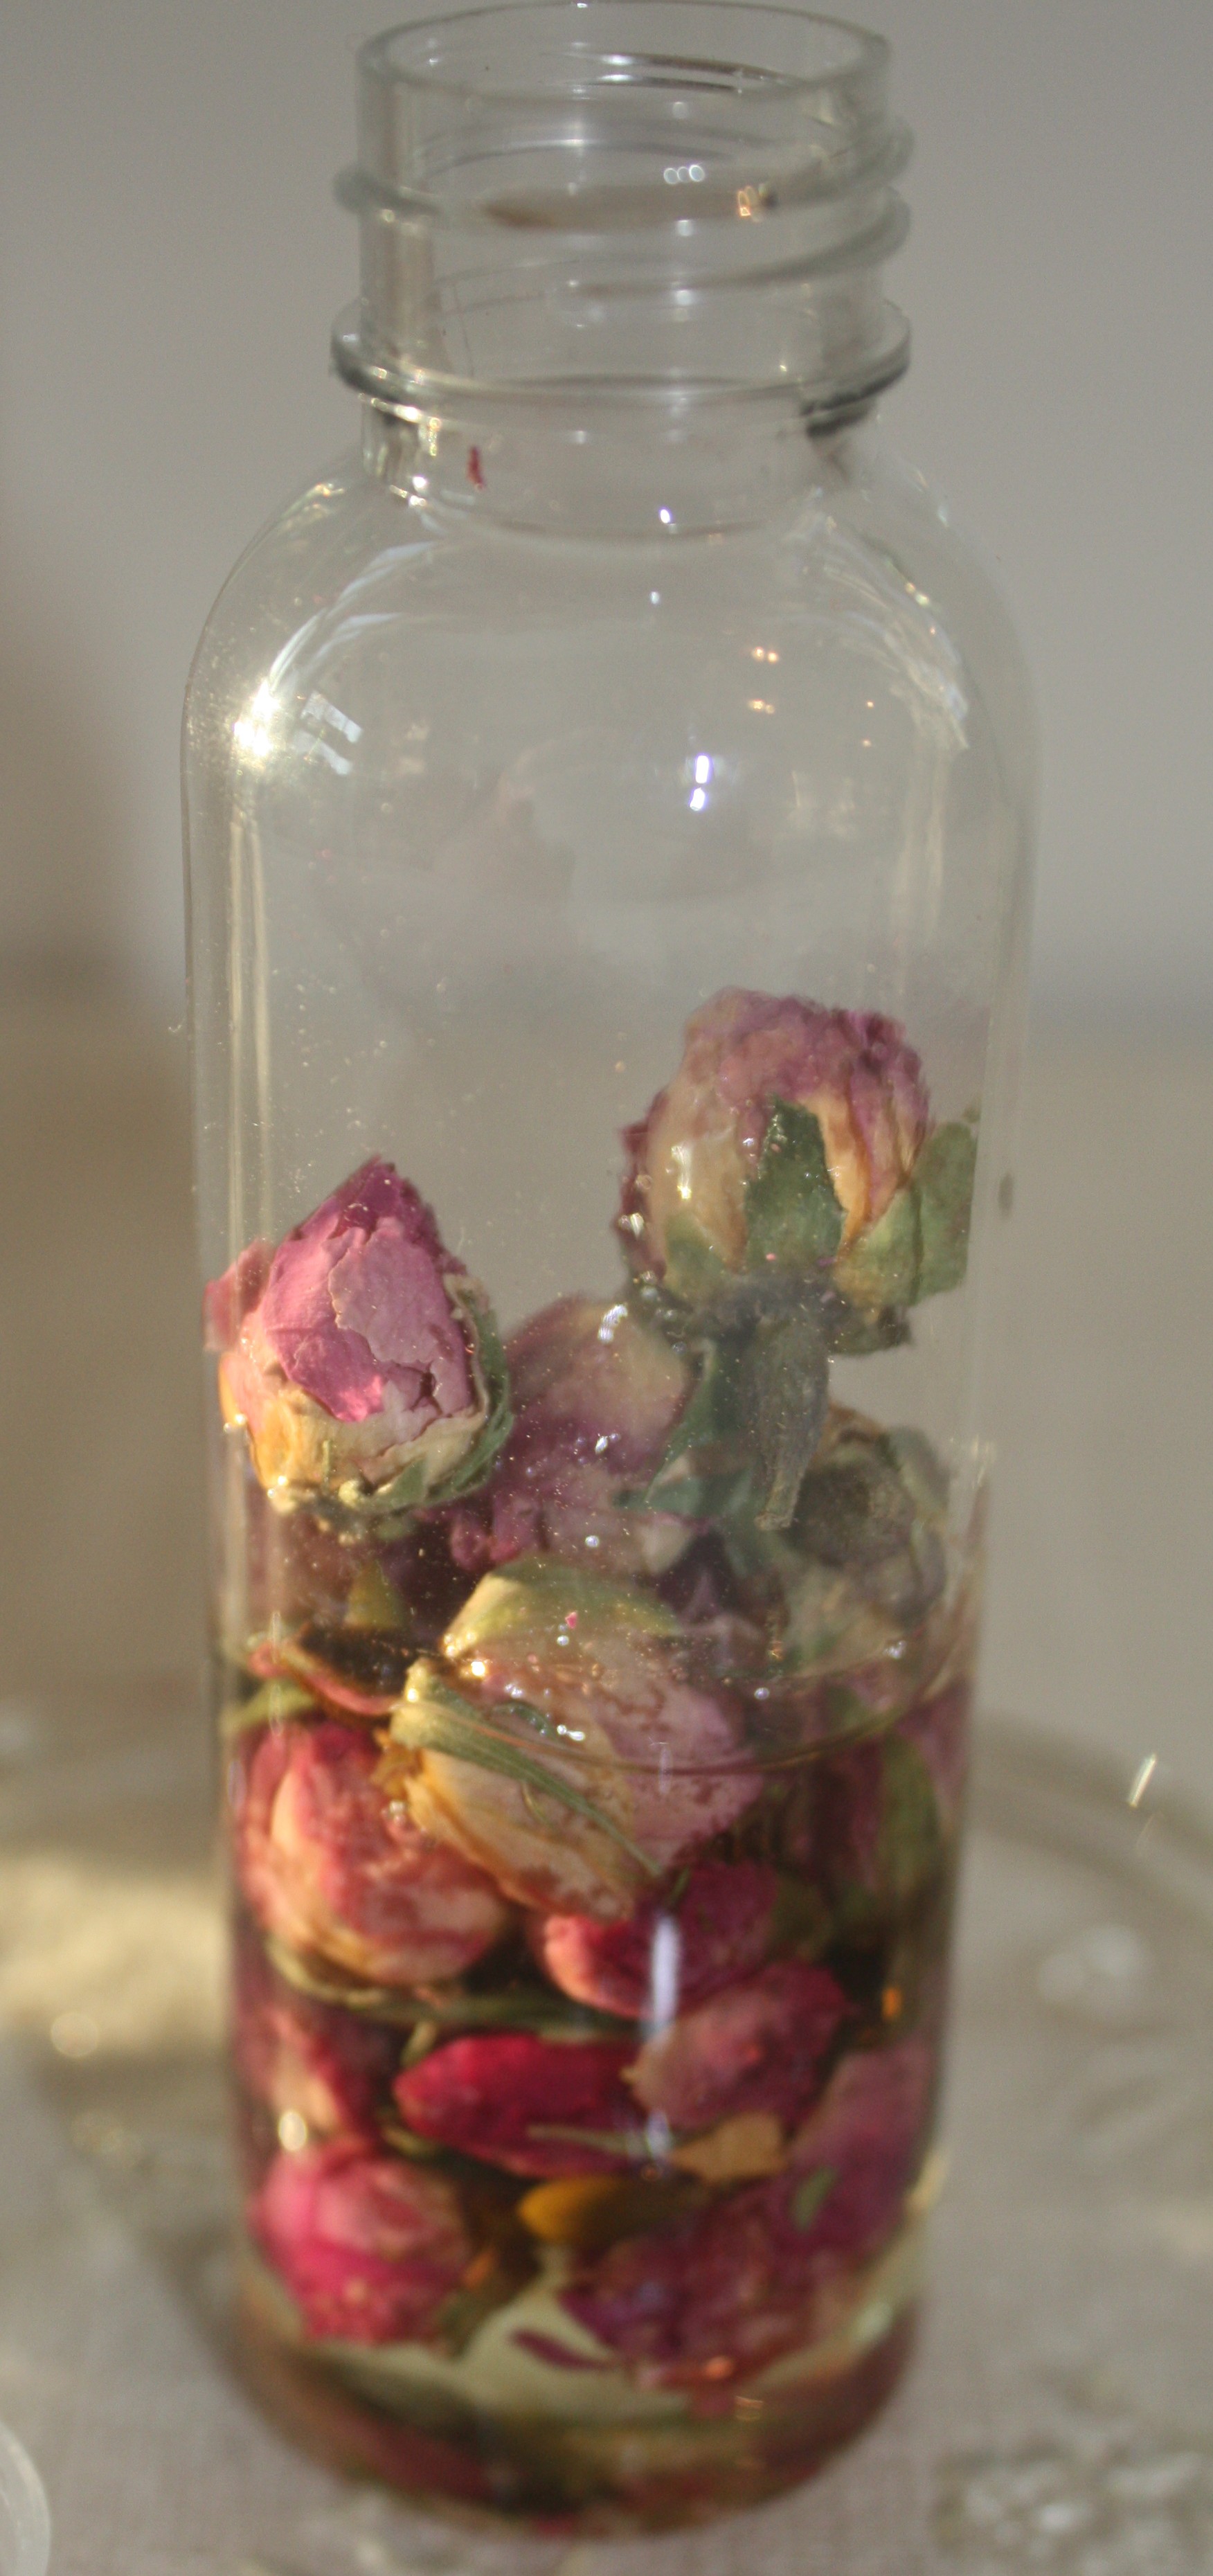
Bottle with rose buds

How to make homemade bath oil:

  • Pick your bottle, herb’s buds and oils
  • Once your bottle is picked, add rose buds to the bottle filling about 1/4 to 1/2 full
  • Add vitamin E oil and any essential oils, about 5 drops each depending on size of bottle
  • Fill the bottle half way with almond oil or oil of your choice
  • Fill the rest of the bottle with safflower oil
  • Allow the mixture to set a minute or two to allow the bubbles to come to the top
  • Cap

To seal homemade bath oil:

melt wax in double boiler

Melting wax in double boiler

  • Place wax with color of your choice in a glass jar in a pan of water, the opening of the jar should have a wide enough mouth to accommodate cap of homemade bath oil
  • Do not heat wax directly on the stove, it can catch fire, Always melt wax in a double boiler
  • Watch carefully and don’t leave the room, or answer the phone.
  • When the wax is melted, dip the capped bottle in the wax and allow the excess to drip back in the glass jar. Dip again several times until the wax has sealed the bottle.
Sealing bottle with wax

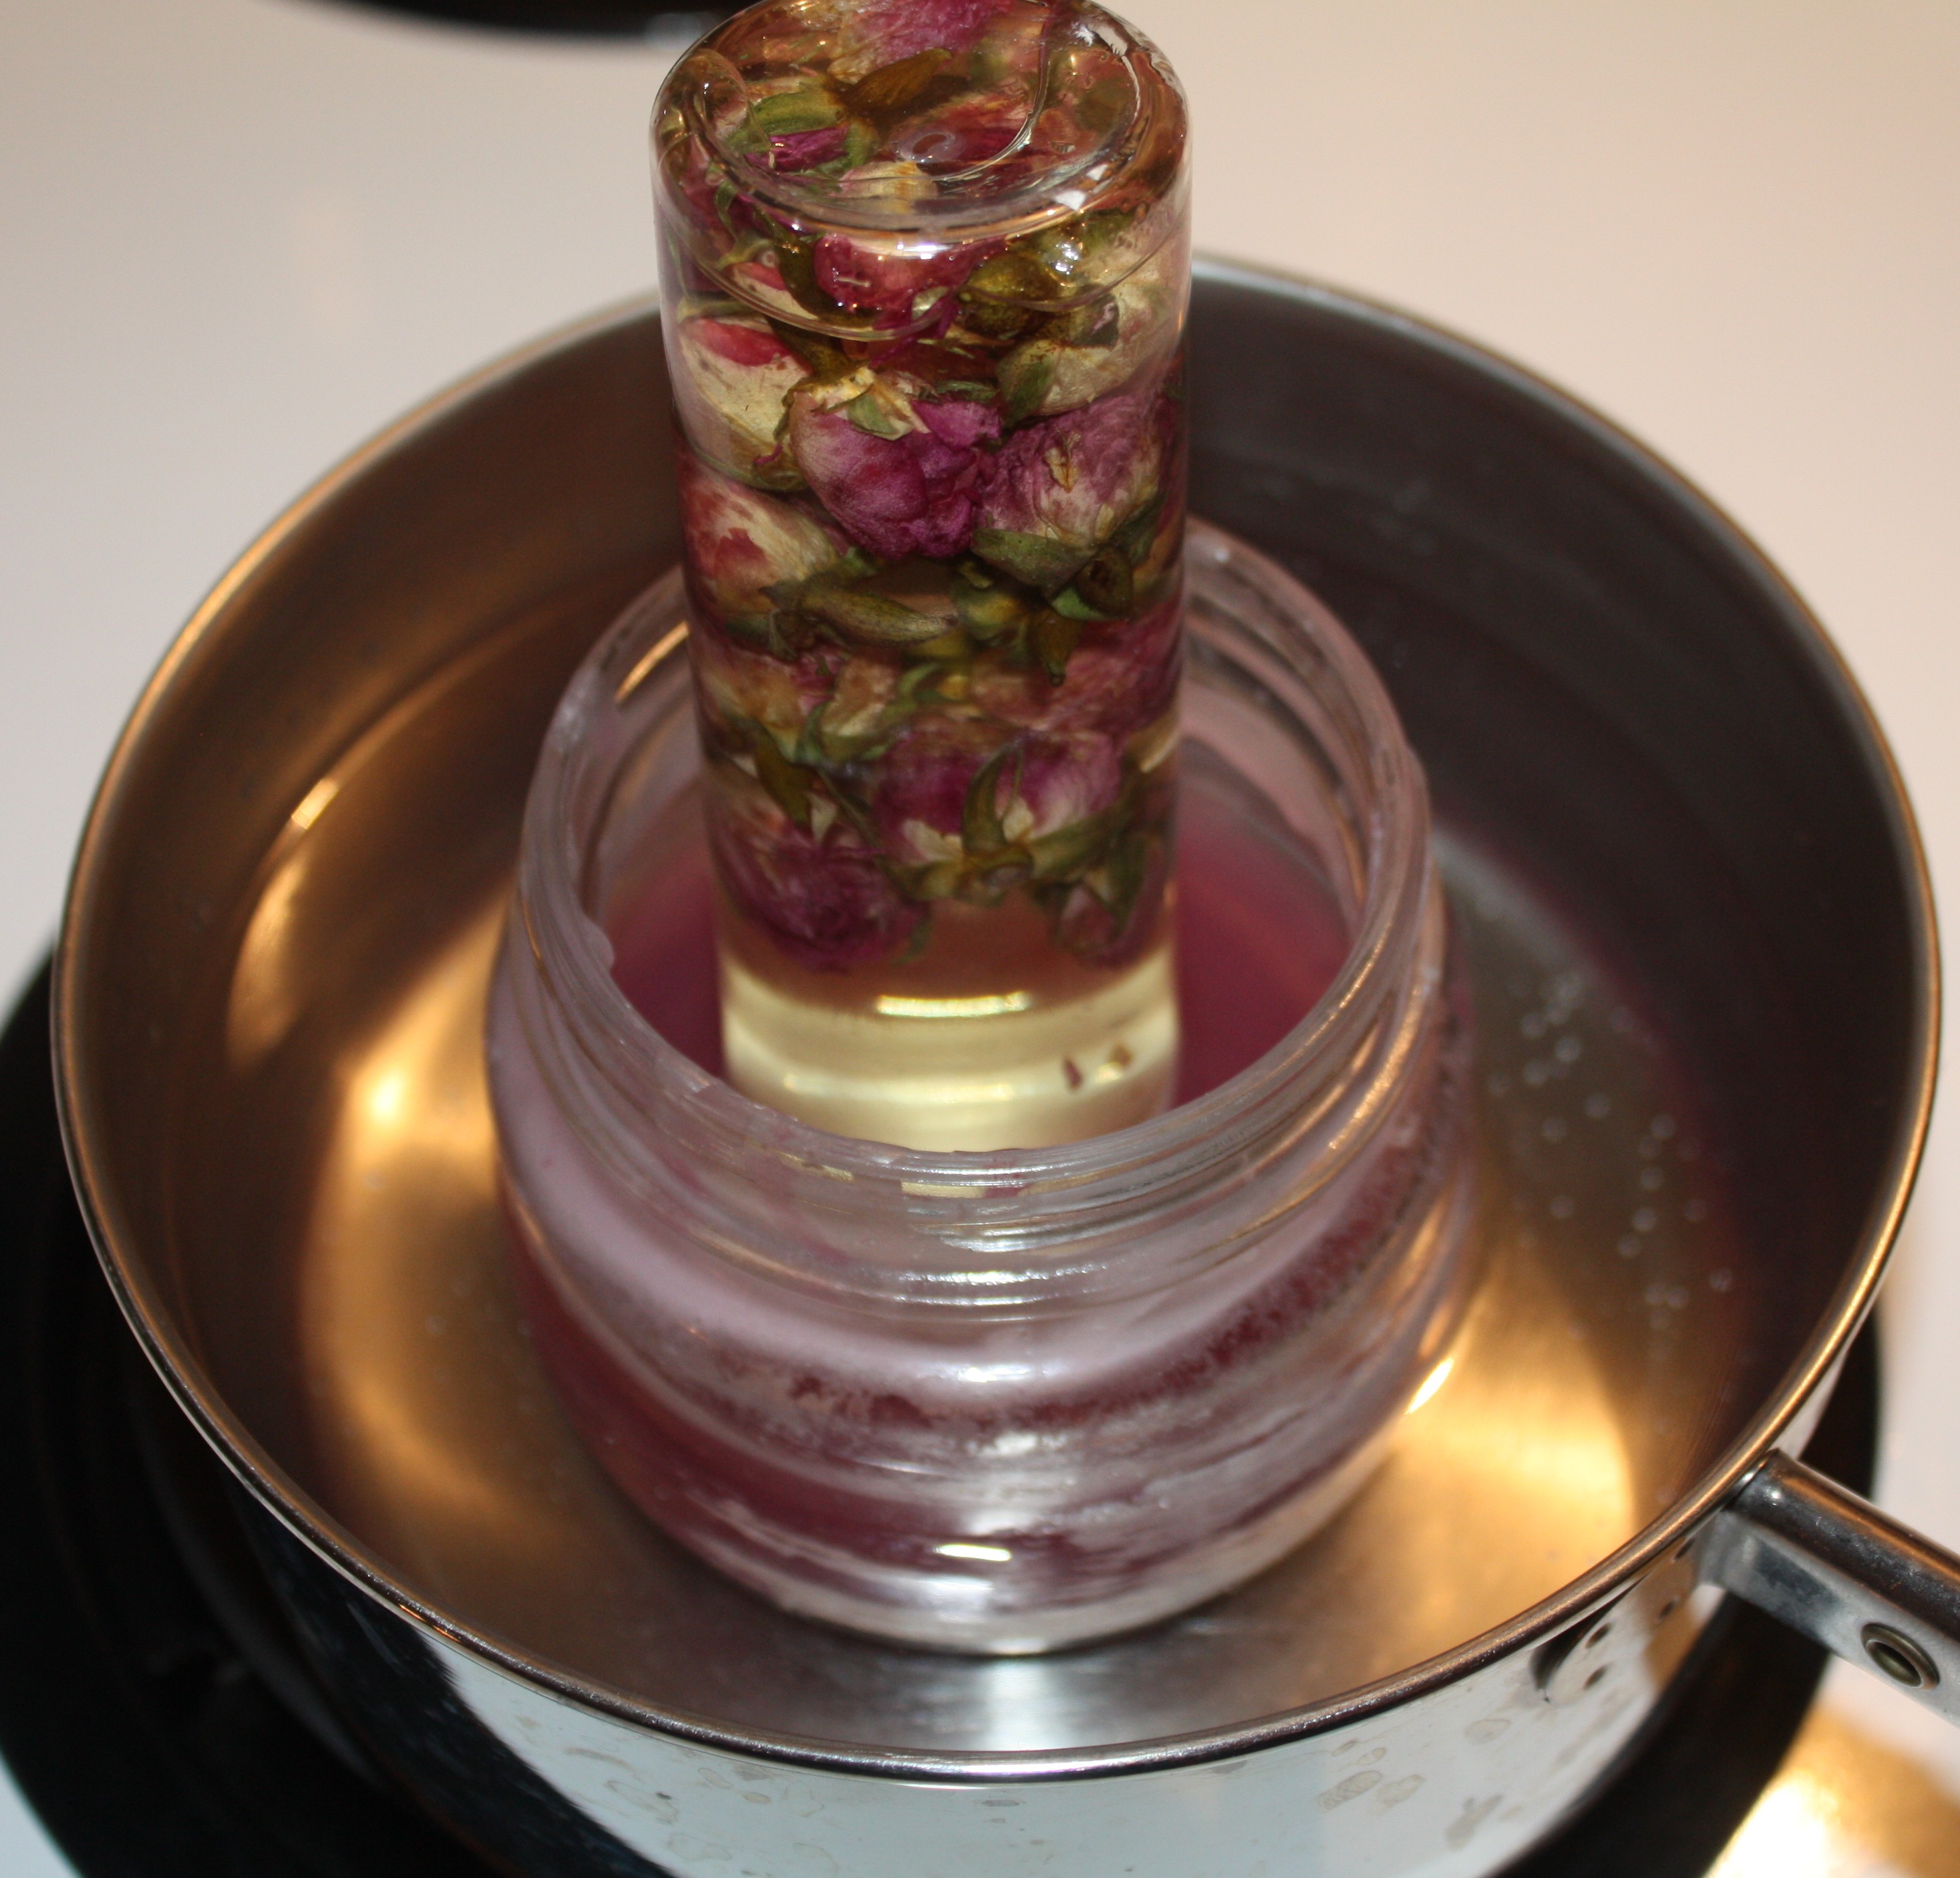
Dip the bottle in the wax to seal

  • Allow to cool
  • Add a label or tie a card with information on the bottle using ribbon or raffia
  • Programs like Publisher will make nice labels, I use the business card size, or hand write a label
  • Shake gently before each use.

On the label I add the date, the ingredients list and how to use the oil.

Bath oil gifts

Bath oil gifts

To use the homemade bath oil:

Add about 1 to 2 Tbsp. oil to the bath water while it is running. Be careful when entering or leaving the bath, the oils can cause the tub to be slippery.

Another recipe for homemade bath oil:

Add 1 Tbsp. vegetable glycerin to the bottle, add essential oil of your choice and fill with oil of your choice. For every 1/2 c. oil use about 10 drops of essential oils.

Other things you might include is pure vanilla, small amount of castile soap, dry milk and or honey.

Enjoy your own version of homemade bath oils.


Growing Parsley an herb lover’s plant

Growing Parsley (petroselinum crispum) is one of those herb everyone should grow in there garden. It can be used as a culinary herb as well as a beautiful border plant.

Cut parsley

Curly Parsley ready to eat

Growing Parsley is a great way to have one of the most popular and oldest well known herbs. Remember when you were a kid and told to clean your plate? I wonder if they meant the garnish, properly not.  Which is a shame because parsley is loaded with vitamin and minerals. Parsley is high in vitamin A, C, iron and minerals.

There are two kinds of parsley, curly and flat leaf Italian. Curly parsley has a milder taste, where Italian has a stronger flavor and most used by cooks.

Growing Parsley: Sow from spring to late summer, in zones 5-8. It grows to a height about 12-20″ tall depending on the variety. Italian is taller of the two plants. Can be grown indoors. Bi-annual which means the second year it goes to seed, so for best results plant parsley every year. By planting every year it will be available whenever it is needed. Parsley can be grown in containers near the kitchen, or in your garden. Likes full sun to part shade.

Parsley will bloom the second year with white tiny flowers umbels. Flowering usually occurs from early to midsummer.

Soil: should be rich and moist. Parsley likes to be grown in slightly alkaline and well drained soil.

Growing Parsley Seeds: The parsley seed is slow to germinate, in fact it may take as many as four weeks to germinate. The length of time for germination can be increase by soaking the seeds in a wet paper towel overnight or for several hours. Germination is about 70% and should start coming up in about 2 weeks if seeds have been soak.

Seeds need a cold spell, so if you collect the seeds they need to be in the refrigerator for a few weeks. Purchase seeds usually have been stratified (cold).

Seeds can be grown directly outside in spring or early early spring indoors. The plants can take cold better than some herb plants. They don’t like their roots disturbed so be careful when transplanting outside.

Harvest: Pick leaves and stems as needed the first year. Parsley can be cut severely several times a year if you give it about six weeks to recover. Parsley can be dried and or frozen. Parsley does well in both situations. Some herbs lose all flavor when dried, but parsley still retains some flavor. Store parsley in a cool dark place, light and heat will destroy flavor.

Culinary: Add raw flat leaf parsley to almost any savory dishes. Parsley makes a wonderful garnish for soups, salads, eggs dishes, potatoes, fish, sandwiches, and sauces. Curly parsley is one of the ingredient in bouquet garni. Check out my blog on “fine herbs and bouquet garni”. Parsley should be added at the last minute to retain it flavor. Check out my blog on “Fresh herbs in the Kitchen”.

The basic rule for using parsley is 1 TBSP. fresh or 1 to 2 tsp. dried.

Pests: Prone to suffer from leaf spot and viral diseases that may damage the leaves.

Companion Planting: Growing parsley can be used as a companion plants for roses, chives, tomatoes, and asparagus. Avoid fennel and dill when growing parsley.

Cosmetic: Can be infused as a hair tonic and conditioner. Add to facial steams and lotions for dry skin to minimize freckles.

Medicinal: Parsley is used in infusion, tinctures, cider vinegar tinctures and teas. Parsley is a antioxidant and is beneficial to the digestive tract and is often recommended for urinary tract problems.

Curly parsley is eaten for bad breath, which is one of the reason you find it as a garnish. It is also used to promote healthy skin. Use in a poultice as an antiseptic dressing for sprains, wounds, and insect bites.

Root: Use for kidney troubles and as a mild laxative.

History: Growing Parsley was held in high esteem by the Greeks and was used to crown the winning athletes.

Parsley is native to the Mediterranean and introduced in Britain and north and central Europe. Parsley was used in funeral ceremonies long before it was used as a garnish.

Growing parsley can be a wonderful addition to any garden, I hope these tips help you the next time you plant parsley.

High Blood Pressure- Herbal Remedies from A to Z

High Blood Pressure (HBP) also known as Hypertension is today’s A to Z

Over 65 million Americans have been diagnosed with HBP, not to mention those who have it and are not aware or have not been diagnose. It is the most common heart disease in the USA and HBP an lead to stroke, heart attack, kidney damage, pancreatic damage and eye diseases.

Hypertension occurs when cholesterol, toxins, and plaque deposits are found on the walls of the blood vessels. Which in turn causes the blood flow to be constricted and less blood flows through the veins causing HBP.

HBP is known as the silent killer because many do not know they have HPB until the symptoms become severe enough.

High blood pressure is a serious condition and should be monitored by a health care professional. Your blood pressure should be taken on a regular basics. If you do not have a monitor at home, try your local pharmacy they usually have a blood pressure station.

Try taking your blood pressure at the same time, every time and in the same situation. Research has shown the arm should be bent and near the heart. Normal reading is 120/80.

Blood pressure is represented by a pair of numbers.The first is the systolic pressure which is the pressure exerted by the blood when the heart beats, forcing blood into the blood vessels. This reading indicates blood pressure at its highest.

The second reading is the diastolic pressure, which is recorded when the heart is at rest in between beats, when the blood pressure is at its lowest. Both represent a ratio of systolic blood pressure to diastolic blood pressure.

Research suggests HBP is higher in women after menopause, men and African Americans.

While researching this subject, I found most of the books and doctors same the same thing. Diet and Exercise!. UGG! for some of us. In this case it is absolutely true, both diet and exercise can help to lower your HBP.

Diet plays an important part and some of the food recommended for reducing HBP include:

  • Potatoes, and the water they were cooked
  • Watermelon seed tea
  • Avocadoes
  • Lima beans
  • White and pinto beans
  • Dried peas
  • Almonds
  • Parsley, benefits the blood and is a natural diuretic
  • Yams
  • Bananas
  • Carrots, benefits the blood
  • Celery and celery seed, benefits the blood
  • Green leafy vegetabels
  • Garlic, raw, benefits the blood, contains chemicals that help in lowering HBP
  • Reishi oriental mushrooms
  • Onions, lipid lowering activity
  • Cucumbers, high in potassium, phosphorus and calcium diuretic and calming
  • Apples and apple cider vinegar

You’ve heard of an apple a day will keep the doctor away, but with HBP it should be two. Apple Cider vinegar taken on a regular basis mixed in with grape juice may help.

Research have shown herbs that may help include:

  • Hawthorn berries, nourishing the heart and will dilate and strengthen the blood vessels
  • Yarrow relaxes the blood minor blood vessels and improves blood flow
  • Rosemary is a general tonic for the circulatory system
  • Cayenne pepper may help to stabilize the blood pressure
  • Raspberry leaf tea
  • Hyssop tea with honey and lemon
  • Marjoram ease effects of blood pressure for dilating blood vessels

Vitamins: B-Complex may help to detoxify the liver and prevent fatty deposits in the arteries. Vitamin C nourishes the veins and improves arterial function. Vitamin E supplies oxygen to the blood. CoQ-10 along with omega 3’s are nutrients that provide oxygen to the vessels and help with HBP.

Calcium and magnesium may be missing in those suffering from HBP, along with potassium.

Research has shown deep breathing may help to lower blood pressure. Take a deep breath and hold it for 10 seconds, and exhale slowly for ten seconds. Repeat these deep breathing exercises two or three times a day, for a minute or so.

The less oxygen we take in, the harder the heart has to work, the harder the heart works the higher the blood pressure.

Stress can cause problems with HBP so take time to relax and meditate with no distractions or noise. I know not an easy task in today’s world. But your health is important so take time to smell the roses.

Some have found help using foot reflexology for lowering blood pressure:

  • Use both thumbs and rub the center of the arch at the point between ball and heal of the foot
  • Rub your foot for about a minute or two.
  • Or Rub the arch of the foot with a tennis ball if the using your thumbs is a problem.
  • The tennis ball will help to stretch the arch of the foot as well

Most health care professionals recommended taking in less salt. Salt retains water which puts extra pressure on the veins.

Sugar can have an effect by retaining salt in the body which can increase HBP. OH OH! Here is the bad news, milk chocolate, coffee, sodas, and tea can increase the blood pressure. There are some herbs to avoid as well, licorice and ephedra.

Always check with your health care professional before trying any home remedies, high or low blood pressure is a serious condition.

Good Health!


Clothes Dryer Sachets

These little sachets bring a wonderful smell to your freshly washed sheets and linens. The mixture of lavender, rose and rosemary may help with sleep as well as headaches. Image the smell of your  sheets may actually help improve your sleep.

Lavender has the added benefit of helping with headaches, sleep, calming, depression and may even affect your dreams.

Lavender essential oil is soothing, antiseptic, good for insomnia, and will help repel insects.

Rosemary is known for remembrance and to help keep away bad dreams and ease body aches.

Rosemary essential oil is good for fatigue, circulation, headaches, pains, and might encourage hair growth. Well who knows!!

Rose petals are known for loving thoughts.

Rose essential oil is good for stress, headaches, relaxing, anti-depression, astringent, and antiseptic.

Granted the small amount of scent on your sheets may not offer all these benefits, but who knows maybe your sheets may help you sleep.

Dryer sachets

Supplies for dryer sachets

Recipe:

  • 1/2 c. dried lavender flowers
  • 1/2 c. dried rose petals
  • 1/4 c. dried rosemary leaves
  • 5-6 drops lavender essential oil
  • 4-5 drops rosemary essential oil
  • or any essential oils of your choice

Mix in glass bowl and add essential oils. Plastic should not be used because essentials can be absorb by the plastic.

These bags can be made with just lavender. And as a added bonus these bags can be stored with your woolen linens to help repel moths.

Peppermint can be used instead of one of the above herbs and is known for repelling insects. I use peppermint in my shed to ward off mice. It works until the smell is gone and I forget to refresh the peppermint oil.

dryer sachet bags

The bags for dryer sachets

To make the dryer sachets: Makes 4 sachets

In the above picture I sewed one of the sachet using a dark color so they would show up in the picture. Normally I would match the thread to the fabric.

Fabric used in this project should be white, muslin or light,plain cotton or broadcloth material. These dryer sachets are thrown in with the wet clothes and colored fabric might bleed on the clean clothes.

  1. Cut eight 5 inch squares of fabric. This makes 4 finish dryer sachets.
  2. Place two squares of fabric right sides together. Pin if necessary.
  3. Sew around three sides leaving a two inch hole for turning on the forth side.
  4. Back stitch at opening for added support when turning.
  5. Cut corners about 1/8″ from stitching to remove excess bulk.
  6. Turn inside out and iron.
  7. Top stitch three sides of the squares. It is easier to top stitch before dry material is added.
  8. Divide the dried mixture, about 4 Tbsp for each mixture.
  9. Fill the bag using the hole in the fourth side.
  10. Pin close.
  11. Top stitch the forth side to close the opening.
  12. Store in a glass jar with tight fitting lid.

Throw these clothes dryer sachets in your dryer each time you wash sheets or linens. These sachets can be used several times.

Just before each use, rub the sachet between your hands (if you are not allergic to any of the materials) to release the fragrance.

Remove about half way through drying time and place back in the jar.

I hope you enjoy these little clothes dryer sachets.


Growing Rosemary

If you think growing rosemary is a mystery read the following blog and hopefully it will answer your questions on growing the perfect and happy rosemary.

Rosemary is a tender woody evergreen perennial, which needs to be brought in for the winter if you live in zone 6 and lower. Zone 7 can usually winter over rosemary especially if it is in a protected area.

Growing rosemary

Growing Rosemary

When bringing rosemary in for the winter just remember rosemary like humidity, does not want to dry out, and hates wet feet.  I know confusing. One way to ensure humidity is to mist it daily and only water about once a week or when the top layer has dried out. Another way to achieve humidity is to place it on a bed of gravel and keep the gravel wet. The gravel will keep the rosemary from setting in a wet saucer, which it does not like.

I like to grow rosemary in pots and bring it in for the winter.  A pot of rosemary can be sunk in the ground with the top of the pot above ground level and “dug” up for the winter.

How to Grow Rosemary:

Site: Sunny, protect rosemary form cold winds, and it can tolerate light shade.

Soil: needs good drainage. Rosemary likes a lime soil, which will increase its fragrance, but may keep it from growing very tall. Add eggshells to the soil and around the plant. Soil should be about 6.5-7.0 pH.

Propagating: Rosemary does not grow well from seed. The best way is layering or by taking cuttings. If you try  seeds, make sure the soil is warm about 70°F.

Growing: Transplant when the plant has several leaves and large enough to take the stress.

Two cultivars: Prostrate and upright. Prostrate Rosemary will grow low to the ground and makes a great plant to grow where it can trail over a wall. The upright will grow about 3 to 6ft. depending on where it is grown.

Harvesting: Pick leaves all summer long, but may want to avoid picking during the winter months. If your are like me and you like to cook with fresh rosemary, take only enough leaves for the dish. For some reason it does not like to be cut much during the winter months.

Preserving: The leaves can be dried either by hanging up or in a food dehydrator. It also works well frozen. The leaves can be tough when dried or frozen so it should be crushed before using. When cutting the branches for harvest always leave about 1/3 of the stem from the base. Cut the stem at an angle just above a nodule. (a nodule is where a new branch or leaf will grow).

Companion planting: Rosemary likes to be planted near cabbages, carrots, sage, broccoli, onions, and beans.

Rosemary may help to repel cabbage worm butterfly, bean beetles, and carrot worm butterfly.

Uses: Rosemary has many uses, one is culinary check out my blog on “Fresh herbs in the Kitchen” or “Fried potatoes with Rosemary and Garlic.” or the article about making vinegar hair rinse.

Use the rosemary stems as skewers when barbecuing.

Rosemary is used in shampoo, hair tonics, facial scrubs, and the essential oil is used in “Hungary water”.  Used in cleaning products just to name a few uses of rosemary.

Decorative:Upright Rosemary makes a great plant for topiaries or bonsai. It can be trim especially during the summer to about any shape you like. Use in potpourri and to fragrant linens.

Medicinal: The leaf will stimulates circulation and increases blood flow. When adding to cooking it will aid in the digestion of fats.

Try this wonderful plant with it pungent, pine-like scent and a pepper flavor. The ancient Greeks believe rosemary improve memory and wore wreaths on their head while studying. In the middle ages, sprigs of rosemary was placed under the pillow to ward off evil spirits and to prevent nightmares.

It is known as the herb of Remembrance.

Happy Gardening!


Sink and Tub Scrub Cleanser

It is easy to make your own Sink and Tub Scrub, just a few ingredients, a few minutes prep and you have an inexpensive green cleaner. Essentials may cost a little up front, but this recipe, in fact most recipes uses a small amount.

Ingredients:

  • 1 part borax
  • 1 part baking soda
  • 5 drops of lemon grass essential oil per cup of Sink and Tub Scrub
  • 5 drops of tea tree oil per cup of Sink and Tub Scrub

In a small glass bowl or the container the Sink and Tub Scrub will be store in, combine borax, baking soda, and essentials oils.

Essentials oils can be absorbed in plastic so use containers or mixing bowls that are separate from kitchen utensils.

Store cleaner in a recycled container with a flip top lid. A non-dairy creamer container works well for this purpose.

Sink and Tub Scrub

Sink and Tub Scrub

Once the cleaner is ready to use, go in search of a dirty sink (not usually hard to find) to use your cleaner.

Very dirty sink

Very dirty sink

Sprinkle the sink and tub scrub on the dirty sink and wipe with a sponge or rag and follow with rinse water. It works well on stainless faucets. I try cleaning an area of the sink with just water and it left watermark and did not clean all the makeup and gunk. Once I use the cleaner, it got off the makeup and gunk and left no watermarks.

Clean sink

Clean sink

Following is a breakdown of the ingredients:

Baking soda is a cleaning agent which is good at dissolving dirt, grease, and grime. It maintains pH.

Borax is sodium borate  which is mildly alkaline mineral. Borax cleans, deodorizes, disinfects, soften water, bleaches (without the harsh chemicals found in regular bleach) and is consider safe but can irritate skin. If you have sensitive skin use gloves while cleaning.

Borax and Baking soda

Borax and Baking soda

Some essentials oils can be harsher than others, so again if you have sensitive skin substitute lavender for the lemon grass. And use gloves.

Most essential oils will work in this recipe. Following is a list of essential oils with antibacterial properties:

  • Chamomile, lavender, lemon, lemon grass, lemon verbena, lime, marjoram, rosemary, spearmint, tea tree, thyme

Essentials oils with antiviral properties include:

  • Cinnamon, clove, lavender, lemon, oregano, tea tree, thyme

Essential oils with anti fungal properties include:

  • Eucalyptus, lavender, lemon, myrtle, patchouli,, sandalwood, tea tree

When choosing essentials, just remember not to use too much, because they might irritate the skin.

If you would like to add whitening, try about 2 tsp. of cream of tartar for every cup of product.

This Sink and Tub Scrub will save you money as well as being good for the environment. The baking soda can be found for less than $1.00 for a box and the borax cost me $4.00 for a 4 pound 12 ounce box.

Have fun making up your own environmentally friendly cleansers.


Comfrey and Mint Facial Scrub

This wonderful Comfrey and Mint facial scrub is just right for normal skin and will add a healthy glow. If you have oily skin, leave out the dried milk.

  • 5 Tbsp. oatmeal flour
  • 4 Tbsp. sunflower seed meal
  • 3 Tbsp. almond meal
  • 2 Tbsp. dry milk
  • 1/4 tsp. ground organic comfrey leaves
  • 1/4 tsp. ground organic peppermint leaves
  • few drops of vitamin E oil (optional)

Use a coffee grinder, mortar and pestle or small food processor to grind your ingredients. Grind each ingredient separately.

Coffee grinder for nuts and herbs

Coffee grinder for nuts and herbs

Wipe out grinder between nuts and herbs for the perfect Comfrey and Mint Facial Scrub.

Ingredients for facial scrub

Ingredients for facial scrub

The picture above shows the ingredients for the Comfrey and Mint facial scrub after they have been ground and measured.The recipe measurements are after grinding.

Mix in a glass bowl or measuring cup and add a few drops of vitamin E oil. This may clump some but the vitamin E is a great addition to your facial scrub.

Facial scrub ready to jar

Facial scrub ready to jar

To make the decorative circle, cut a piece of fabric larger than a saucer, which is what I used to make the circle. Lay the saucer on the fabric and with a white pencil on dark fabric or dark pencil on light fabric draw a circle.

Cutting the perfect circle

Cutting the perfect circle

Use pinking shears cut out the circle.

Pink the circle to prevent fraying

Pink the circle to prevent fraying

To use the Comfrey and Mint Facial Scrub:

Always test a small area on sensitive skin such as the inside the elbow to make sure the ingredients do not cause any allergic reactions, before applying to the face.

In a small bowl mix about 4 tsp. of the facial scrub and enough water to make a paste. Allow to sit a a minute or two until the mixture thickens. Spread on a clean face and rinse thoroughly. Follow with a nourishing moisturizer.

Your face feels clean and soft. This mixture is safe for everyday use.

Why these ingredients and herbs work:

Comfrey is an emollient, soothing, healing and a mild astringent. Peppermint is stimulating to the skin.

Other herbs that might be substituted include:

  • Elder flowers: Cleansing, emollient, helps to clear complexion, hydrate the skin and normalized the acid balance of the skin
  • Violet: Cleansing and emollient
  • Calendula: Cleansing, astringent, promotes healing, toning
  • Lady’s Mantle: Astringent
  • Thyme: Toning, refreshing, disinfectant, may cause a reaction so use with caution
  • Chamomile: Cleansing, cooling, lightening, anti-inflammatory
  • Lavender: Antiseptic, stimulating

Emollient herbs will sooth and lubricate the skin. Sweet violet contains mucilage, a compound which forms gel when mix with water. This mucilage is good for the skin.

Astringent herbs such as calendula reacts with proteins to create a tightening effect on the tissues of the skin.

Oatmeal is a deep pore cleaning agent, softening and nourishing. Almond meal has a healing, soothing and healthful deep pore cleanser.

Milk is good for those dreaded blackheads and help to soften rough skin. Milk should be used on normal skin.

Vitamin E oil helps to slow down the aging process and premature wrinkles. YEA! YEA! Vitamin E is absorbed through the skin and can be apply to problem skin to help with the healing process.

Comfrey and Mint Facial Scrub

Comfrey and Mint Facial Scrub

The finished product and ready to give as a wonderful gift. Don’t forget to make some for yourself.

Enjoy the Comfrey and Mint Scrub.


Headache Remedies from A to Z

Headache remedies are usually treated by taking a pill and waiting for it to work.But do we know the side effects of these pills?

Is there anything more annoying than having a headache? I don’t mean the headaches we have when we don’t want to be bother.

Some of the herbs used in headache remedies include, feverfew, lavender, ginger, cayenne pepper, and peppermint.

Some doctors are becoming more in tune with using non drug methods of relieving headaches. The side effects from most headache drugs can cause more problems in the long run. Always check with your health care professional before trying any headache remedies.

White willow bark was the original ‘aspirin’ before it became chemically produced. White willow bark can be found in capsule forms at your favorite health store. Its main ingredient is salicylic acid which is what works on the pain.

Medowsweet a bitter tasting herb contains methy salicylate which when dried turns into salicylic acid. If using as a tea be sure and cover when brewing as the steam contains the salicylic acid.

Many have used fresh feverfew for migraines and headaches. One leaf eaten once or twice a day on a daily basis may prevent migraines. Be careful, some have reported mouth irritation when using feverfew, start slow.

Feverfew, an anti-inflammatory, dilates the cerebral blood vessels, easing the migraine associated with constricted blood vessels. Feverfew can be found in capsule form.

Another type of headache may be caused by overindulging especially with alcohol and/or sugar. Success has been found in drinking a tea of 1 tsp. alfalfa seed and 1 tsp. orange leaf and steep for five minutes in almost boiling water. Stain and sip for this headache remedy.

Rosemary tea and peppermint tea may help with food-related headaches. Peppermint oil has been used for years. When using peppermint essential oil, mix it with a carrier oil such as almond oil or grape seed oil. The proportion of essential oil should be about 10% essential oil to the carrier oil.

Other types of headache oils include Lavender oil with the same proportion of essential oil to carrier oil. Lavender is a sedative, analgesic with antispasmodic action, cooling bitter remedy useful for migraines and tension headaches.

It is never a good idea to use essential oils straight from the bottle, they can cause burns. Do not take internally unless aided by a health care profession with the knowledge of essential oils.

Tension headache are usually at the back of the neck and travels up the head. Try chamomile flower tea in 1 c. almost boiling apple juice. Steep for 5 minutes and sip.

Other headache remedies:

Relax and use acupressure for headache remedies. Press on the back of the neck at the indention where the neck attaches to the skull. At the same time press gently on the bridge of the nose between the eyes. Press gently and increase pressure if you can tolerate the pressure.

Ginger tea is folk remedy for headaches and a ginger bath may reduce the tension causing the headaches. Another folk remedy is gently rubbing a cut lemon on the affected area, or used well diluted lemon oil with a carrier oil. Only about 5 drops should be mixed in 25 ml of oil.

Cayenne Pepper may help; one way is to smell the spice and another way is to rub capsicum cream on the affect area.

Sometimes laying down with an ice pack on the top of the head or back of the neck with feet elevated above the heart may help, be sure and keep warm by covering with a blanket and adding something warm to the top of the feet such as a heated towel.

Headaches may respond to relaxing and drinking a strong cup of black tea. Some food can cause headaches. Keep a food diary and when a headache occurs take stock of what you had to eat.

Always start slow when trying any herbal headache remedies and take time to smell the roses or maybe the cayenne pepper.


Rosemary and Roasted Garlic Fried Potatoes

Rosemary garlic fried potatoes

Rosemary garlic fried potatoes

Potatoes and Rosemary just seem to go together like Tomatoes and Basil, and Oregano and Pasta, and Sage and Turkey. For this recipes the ingredients are simple.

  • Sliced Potatoes, 5-6 small I like to use red
  • Sliced onions, 1 small red or white
  • roasted garlic 4-5 cloves
  • Olive oil
  • water
  • rosemary, 1/2 tsp. dried, 1 tsp. fresh or to taste

In an iron skillet pour some olive oil about 4-5 Tbsp. in pan and heat. Add sliced potatoes and sliced onions. Fry for a few minutes until onions start to soften. Add chopped roasted garlic. At this point add a little water to keep from adding so much oil. Cover and let steam for about 5-8 minutes until the potatoes start to soften.

Rosemary should be added about half way through the cooking time. Dried rosemary needs time to soften. Fresh rosemary should be added about 5 minutes before the dish is finished. Cook until all water is gone and the potatoes start to fry. May need to add a little more olive oil. Cook until desired tenderness.

Enjoy.


Starting Herbs from Seeds

Herb Seed Packers

Herb Seed Packers

Some perennial herbs can be started from seed. Mints on the other hand usually should be grown from transplants because you don’t know what mint you get from seeds. Listed below is a partial list of perennials that can be grow from seed:

  • Chamomile, Roman (Note: German Chamomile is an annual)
  • Horehound
  • Winter Savory
  • Garden sage
  • Common thyme
  • Hyssop
  • Lemon balm
  • Pennyroyal
  • Wormwood
  • Greek Oregano
  • Chives
  • Lavender
  • Lovage
  • Rue
  • Fennel
  • Echnicea

Annual Herbs that can be started from seed

  • Calendula
  • Borage
  • Basil
  • Dill
  • German Chamomile
  • Clary sage
  • Coriander/Cilantro
  • Marjoram
  • Summer savory
  • Anise
  • Chervil
  • Parsley (bi-annual)

Starting your herbs from seeds is much cheaper than purchasing the plant and sometimes the variety is better. It is not always easy to fine several kinds of basil, but several variety can usually be found in seeds. There  are some wonderful seed saving companies and organic seed companies you can find if you search the web.

Herbs such as variegated thyme, purple and golden sage, French tarragon are usually not grown from seeds, these are best grown from cuttings or plants.

Four things are needed to start seeds:

  1. Moisture
  2. Air/Soil
  3. Light
  4. Temperature

Moisture: All seeds need moisture to germinate, and if the soil dries out before germination the seeds will  die.

Air/Soil: An organic, peat base soil-less mix made for seed starting is what I like to start with. Seeds need air to grow roots, and the wrong kind of soil will prevent this.

Light: Seeds for the most part need light, especially after they have germinated, don’t plant them to deep. This is one mistake many new to seed starting make, they plant tiny seeds deep in their seed starting pot. Tiny seed should be planted near or on top of the soil. Always check the package, it usually has a ton of information.

Temperature: Most seeds need a warm climate to germinate. I like to place my trays with seeds on top of my refrigerator or on top of crate over a grate. These are warm places and I’ve had pretty good luck with this method. Some seeds growers will buy heat mats just for this purpose and they work as well, just cost more.

Equipment for starting seeds

Equipment for starting seeds

Gather your materials, at this time of year go into any garden center and you will find all kinds of seed starting materials. I like to use trays with plastic covers for most annuals and peat pods for herbs such as parsley which really doesn’t like transplanting.

Place the peat pod trays in a plastic tray and fill with seed starting mix. Moisten well and allow the soil to absorb the water. Plant the seeds in each pod two or three seeds per pod. Cover with plastic wrap and place on top of the frig or anywhere it is warm. Check often and as soon as you see growth, get the plants in light.

Some trays already have soil, just moisten them well before planting seeds. They usually have a plastic cover you place over the seeds until germination. Once you see some green, take off the plastic cover and place it under light.

Place a grow light about 2″ above the top of the plant and as it grows, move the grow light to stay in the 2″ range. The grow light should be on about 12- 14 hours. I like to put in on a timer so it will come on and off automatically. I use an old baker rack where I can chain a light to the underneath of each shelf and change the height of the light as the plants grow. I use a shop light with a cold and warm bulb.

Keep the plants under the grow light until it needs to be transplanted and set outside in a protected area to harden off.

To Harden off: Set the plants under an old window frame on top of bricks or bales of hay. Watch the temperature, it it gets too hot, it will cook the plants. When the sun comes out or if the temperature increases remove the window frame. After a week or two or when the temperature warms, set out perennials. Most annuals need to be set out after frost date, check your seed package.

Basil does not like anything below 40 degrees F. Annuals seeds need about 6 weeks to grow to a size for taking outside. Perennials may need much longer. Echnicea takes forever to get any size.

Some herbs can be planted directly in the garden such as Cilantro and Parsley. Even if you don’t have the area for starting them indoors plant the seeds outside, it may take a while but they usually grow.

Another way is to ask your friends or join an herb club. Most herb lovers will share their plants. In many cases we need to share because herbs can grow in abundance.

Happy Gardening