Category Archives: Growing herbs

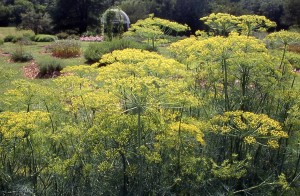
Dill is easy to grow and should be in every garden.

Dill (anethum gaveolens)is a hardy annual and one of the easiest herbs to grow. It can be planted indoors and well as outside in cool weather. Try the variety ‘Bouquet’ for a high leaf yield.

Use in cooking

Annual culinary herb

Ancient Egyptians recorded dill as a soothing medicine, and the Greeks used it for hiccups. Dill was brought to America by the early settlers. The children would chew on the seed during long sermons.
The herb obtained its name from the Old Norse word ‘dilla’, which means to lull. Today herbalist still used it for colic babies, and is used commercially to scent soaps
Dill likes full sun, protected from the wind, and the soil should be rich and well drained.

Sow in the seed directly in the ground a couple weeks for the last frost. Cover the plants with light dusting of compost. Keep moist until germination which should be about 10-15 days. Plant every couple of weeks for continuous crop. Seeds can be stored for 3-10 years and should remain viable. Store the seeds in the refrigerator in an envelope and label with year and variety.

Dill grown in pots need room for deep roots and room for stakes, and can grow up to 3 feet tall. Fennel, dill and carrots all compete for moisture, so it is good idea to plant in different areas.

Black swallowtail larval love to feast on fennel and dill, so don’t be surprise if the plants are stripped down to the stem. Parsley can also be host to butterflies. It is good idea to sew dill seeds in different parts of the garden and enough to share with the butterflies. The plants should be spaced 10-12” apart.

Harvest the leaves when young, pick the flowering tops just as fruits begin to form and gather the seeds after flowering head turns brown. To collect seeds hang the seed head over a cloth to collect the seeds.
Dry or freeze the leaves or used in herbal vinegar. When making vinegar add the flowering seed heads to a sterilized canning jar and cover with apple cider or white wine vinegar. Allow to set for two weeks. Strain out the plant material and use a bottle with cork or plastic lid. Metal will react to the vinegar.
Use the whole seed or ground in soups, fish, cabbage, pies, dill butter, breads and of course pickles.
The crushed seed can be infused as a nail strengthening bath. Chew the seeds to sweeten breath.
Dill is rich in mineral salts, and is good for indigestion, flatulence, hiccups, stomach cramps, insomnia and colic. Infuse ½ ounce crushed seeds in 1 cup of boiling water, strain. Add one tablespoon to water for best results.
Do not confuse the plant with the water hemlock and position hemlock. They are part of the same family Apiaceae.

Salad

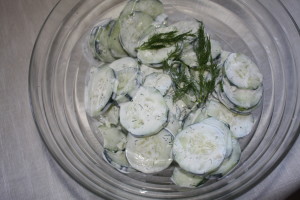
Dilly Cucumber salad

Dill Cucumber Salad

¾ c. sour cream
1 small clove garlic, crushed
1 tsp. honey or Stevia to taste
½ tsp. salt
¼ tsp. pepper
¼ tsp. dried dill weed or 1 tsp. fresh
2 med cucumber, thinly sliced and seeded

Mix sour cream, garlic, honey, salt, pepper, and dill weeds. Stir in cucumbers and sprinkle with fresh dill.

Dill dip recipe

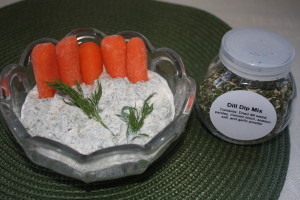
Dill Dip and dill mix

Dill Dip Mix

¼ c. dried dill weed
2 tsp. garlic powder
¼ c. dried minced garlic
¼ c. dried minced parsley
2-3 tsp. season salt

Mix and store in airtight container.

To make the dip:
½ c. sour cream
½ c. mayonnaise
1-2 Tbsp. dill dip mix

Mix all ingredients together and chill for several hours. Garnish with fresh dill and parsley.

Hope you enjoy these recipes and have fun growing dill.

Growing and Using Chives

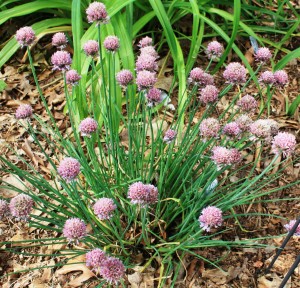
Chives with blooms

Chives

Growing and using Chives (Allium schoenoprasum) with it early spring purple flower is one of the most popular culinary herbs found in herb gardens. The flowers along with the leaves are edible and can be grown both indoors and outdoors. Chives are a member of the alliums genus and are used as companion plant, and both medicinally and culinary.

The leaves can be used all summer long and have a mild onion like flavor and are great on a variety of foods. The leaves contain large amount of Vitamin A and C. Onion chives have purple flowers and garlic chives have a white star like flowers.

Growing Chives: Chives makes great border plants, in the herb garden, in the vegetable garden and in Perennial beds.

  • Height: 4 inches to 2 feet
  • Zones: 3 to 9
  • Site: Fun sun to partial shade
  • Soil: Chives like a well drained soil mixed with compost pH 6.0-7.0
  • Thin or transplant 1 foot apart
  • Propagation: by seed, division, or planting offsets

The seeds can be planted in early spring and the bulbs divided in the fall or spring. Chives will self-seed readily. Divide every three or four years.

The plant has pale purple flowers with long hollow leaves that spike up from the base of the plant. The flowers bloom in the early spring and when spent need to be cut to encourage plant growth. The plant seems to exhaust itself if the flowers are not cut back. Grab hold of the plant like a pony tail and cut entire plant back to the ground leaving just a couple of inches. This will produce fresh leaves.

Culinary: Snip the leaves as you need them for your cooking needs. Remember that bake potato with chives. Fresh leaves are always superior to dried or frozen. Chives do not dry for the most part, so they are better in cooked dishes. To retain the color of the leaves, dry at a very low temperature.

Chives can be stored in the refrigerator for about a week in a plastic bag to retain crispness.

Add chives flowers to herb vinegar and salads. Chives can substitute in most recipes for scallions and when a mild onion flavor is needed.

Try adding chopped fresh chives to softened butter mixed with a little lemon juice. About 1 cup butter, snipped fresh chives, freshly ground pepper, salt and about 1 tsp. lemon juice. Mix and chill.

Medicinal: Fresh leaves and flowers aid in digestion, and most alliums are good for the blood vessels, keeping them elastic and help deter aging. WOW! we all just decided to add chives to our gardens.

Companion plant: Plant near plants that are prone to aphids, leaf spot and mildew. It also can be made into a spray for these pests. Japanese beetles don’t seem to like chives.

Plant chives near roses to help with black spot and apples to help prevent apple scab. Plant near cucumbers to help prevent powdery mildew and carrots seem to like chives.

Chives will enhance grapes and tomatoes. Chives are considered an effective insect repellent along with pennyroyal, nasturtium and garlic. Chives seem to dislike peas and beans.

Happy Gardening!

Harvesting and Drying Fresh Herbs Part Two

Part Two:Harvesting and drying fresh herbs
In this part of the drying herbs blog we will address other ways to dry herbs,freezing herbs, and how to dry seeds and roots. In Part one we address using a dehydrator and hanging herbs to dry. And the best way to harvest the herbs to get them ready to dry.

Screen Drying: Herbs with small leaves (leave on the stem) and short stems which do not hang well can be dried on screens.

For larger leaves snip off the stems and lay on screens in a single layer. During drying time, turn over the leaves at least a couple of times for even drying. Lay the screens in a well ventilated area. I like to use a wooden clothes rack and lay the screen on the rack.
Drying herbs

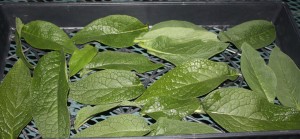
Screen drying comfrey on a nursery plastic tray.

Try using the plastic trays from the nursery that have openings in the tray. If the leaves are small, lay paper towels down first. They should be dry in a little over a week. Be sure and not leave them too long and they will collect dust.

Screens can be constructed with scrap lumber and window screening. Another way is to use canvas stretcher frames which are glued and cover tightly with screening. I use a staple gun to attach the screen.

Microwave drying seems to be latest way to dry herbs; I have not tried this method as I think the microwave would heat the herbs at too high a temperature. The information I found says watch the drying time, as they can start a fire.

Wash the herbs and lay on paper towels to air dry for about an hour. Place herbs on a paper towel in a single layer. Cover with another sheet of paper towel. Heat for one minute on high, turn over stack over and heat for another minute. Depending on your microwave it may take a more or less time. After the initial two minutes, microwave every 30 seconds, until herbs are dry and brittle. Store and label.

Oven drying: This one works pretty well, but again I would not use this method for medical herbs. Set your oven at its lowest setting about 180°F. Leave the door open to allow steam to escape. Wash and air dry herbs. Lay the leaves in a single layer on a cookie sheet. Stir every once in a while to ensure even drying. Dry for about 4 hours. Be sure and work with only one kind of herb. The flavors can actually mix.

Gas oven with constant pilot light drying: Follow the above directions in reference to the preparation of the herbs. Set the temperature at the lowest setting while keeping the door open, and will keep the flame burning. After a few minutes, turn off oven and place the cookies sheets in the oven. Close the door and leave it alone overnight. Check if the herbs are dry before removing.

Salt or sugar: Layer clean and air dry herbs such as mints, anise hyssop, lavender, rose, and scented germanium with sugar. Be sure all parts of the herb are covered. Leave them until they are thoroughly dry. Remove leaves, label and store.

Pick the herbs suited to either salt or sugar. Rosemary, oregano, marjoram, sage, savory, and lovage are best in salt prepared in the same manner as sugar.

Refrigerator drying:  This is one of my favorite ways of drying especially if you don’t have a food dehydrator. Lay the clean and dry to the touch herbs on paper towels on a tray in the refrigerator and allow drying. Do not use the crisper bins. You can also place the herbs in a paper sack and leave in the refrigerator to dry.

Freezer Method:  Some herbs loose there taste when dried, but lend themselves to freezing. Some herbs are delicate and freezing is as close to fresh as possible. Herbs better frozen include basil, chives, dill, fennel, and flat leaf parsley. Herbs should be dry to the touch and place in freezer bags and quickly frozen. Oncefrozen the herbs can easily be stripped from their stems.

Ice cube freezing: Chop the herbs and place in an ice cube tray. Measure a teaspoon or Tbsp. of the herbs for each hole and fill with water. Freeze.
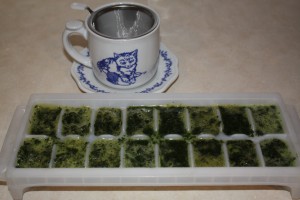
Ice cube freezing of herbs

Freezing herbs in ice cube trays. Mint ready to make into tea.

Another method is to place herbs in a blender and add enough water to fill the trays. Blend and freeze. Once frozen the herbs can be pop out of trays and store in plastic bags. Be sure and label with the amount of the herb. These cubes can be added to soups, sauces, stews or your favorite recipe.

Tea herbs can be added to a pan and covered with water and bring to almost boil and serve as hot tea. Don’t place the frozen cube in a glass mug and hot water added. The mug might break.

Drying Roots and rhizomes: Roots should be dug in the fall and allow to air dry. Annuals can be dug the first year, but perennials should be allowed to mature for at least two or three years. Annuals roots should be dug up at the end of their growing cycle.

Ginseng is reported to need at least seven years before roots reach their peak. Echinacea needs about three years for their roots to reach any size.

Arrange the roots in front of a fan to speed up drying. Wash quickly and pat dry immediately. If the top of the plant will not be used, compost. You can replant some of the roots of most herbs and they will grow just fine.

The fall is when the greatest concentration of medicinal compounds is stored in the root. Some herbs such as comfrey or horseradish can have their roots cleaned and the hairs remove, but other such as valerian contains most of the compounds is on the surface or skin.

Some roots can be sliced and place on a baking sheet and dried in the oven.

Before digging any roots make sure you are on your own land or you have permission from the land owner. Along the side or the road is not the place to dig, not only is it illegal in most parts, the roots have absorbed car exhaust which we don’t want in our medicine.

Drying and storing Seeds: Harvest seeds on a nice warm day when they have ripen but have not begun to fall. This is usually when the seeds have lost their green and the pods are hard, crinkle dry, and brown or black. Cut the seed heads from the herbs such as dill, lovage, coriander, fennel, and chervil.

Tie the plant inside a paper bag and dry upside down. As they herb begin to dry the seeds will drop into the bags. Carry the bags to the garden, so you do not lose the seed as you walk back to the
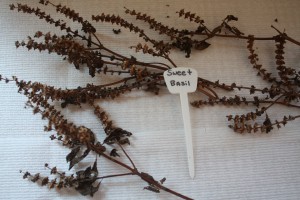
Dry seeds

Dry basil seeds ready to plant next year. Laid on paper towels to dry

house. If you carry them back without securing the seeds, you may have plants in places you do not want. Keep each variety in its own bag and be sure and label. Seeds should be dry within two weeks.

Store seeds in jars or I like to keep mine in paper envelopes in a cool, dark place such as the refrigerator.  Some seeds need the cold to stratify, but others may not like to be kept in the cold. This may take some experimentation and research on your part.

Just a few final notes: Harvesting and drying fresh herbs will be appreciated this winter when you have herbs ready to use. Lay a white towel on the table before drying your herbs. This allows you to find any insects and to inspect your herbs before drying.

Humidity will affect your drying time and the quality of the herbs. The dryer the better, avoid drying on rainy days.

Herbs while drying should be protected from direct sunlight, and good circulation. Once dry the herbs should be used in about a year, just in time to dry a new batch the following year. It is important to keep moisture out of the jars used for storing. Who wants to open their cupboard and find a moldy mess?

When drying seeds, be sure they are ripe and ready. Once dry, remove any excess material by blowing across the seeds. Some who save in bulk use a box fan place in front of the seeds to blow away the excess material. Do this outside.

Gather only as much as you can handle at one time. Gather only one variety at a time, and keep in your gathering basket. After you have place one variety in your tub, now go back and gather another and place in another tub. Herbs should be gathered in the morning before it turns hot. If you don’t gather the entire herb you want, and it is not close to frost date, there will be another day.

Try one of these methods and you will be glad this winter when you want to use your dried herbs. Don’t forget to label with date, variety and drying method.

Happy Gardening!

Growing Yarrow

Growing Yarrow is a perennial and works great in dry places with full sun. It grows in zones 3 to 10 and has showy bright flowers.  The white yarrow can be found along roadsides and fields.

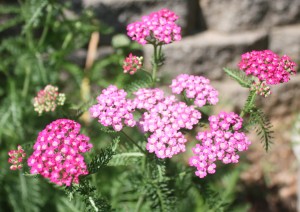
Pink Yarrow

Pink Yarrow, A bit of a spreader and shorter

Yarrow fossils were found in caves which were in existence for 60,000 years. Yarrow was used to stop solders wounds with the leaves and the Native Americans used the plant for most injuries and ailments. Yarrow can be found growing wild in many areas of the US.

Medical: The medicinal yarrow has white flowers, and is rich in chemicals and great for allergic problems such as hay fever. The flowers should be harvest in the peak of their flowering cycle.  The essential oil is used for anti-inflammatory and good mixed with carrier oil for chest rubs to combat colds and influenza.

The leaves of the (Achillea millefolium) encourage clotting and can be used for bleeders. When dried the plant is great used in digestive tonic to encourage bile flow in the gall bladder, and good for circulation and high blood pressure. The plant will promote sweating which may bring down a fever.

Ways of using the plant include teas, used as an inhalation, as a poultice for cuts and bruises and to increase circulation for varicose veins. The white yarrow can be made into a tincture or added to salves or your very own skin lotions. You can make your own skin lotion or added to commercial.

Just a note: Products used on the skin, I prefer to make my own because in most cases the commercial products have ingredients I can’t even pronounce.

Chew a fresh leaf to stop the pain of a toothache and drink a tea to aid in digestion. Mouthwash made with yarrow is used for inflamed gums. Yarrow is known to help cleanse the body.

In some cases yarrow can cause a skin rash and large does can cause sensitivity to sun. It should be avoided by pregnant women, actually include most herbs.

Growing: It grows about 1 foot to 2 feet tall and is considered a weed in many cases. Likes full sun but will tolerate light shade and likes a well-drained soil. Yarrow can grow in dry areas. Remove faded blooms to increase bloom time. The seed is small and tear shaped.

The plant should be divided in the fall because the roots can be invasive.

Don’t confuse Yarrow with Queen Anne lace or hemlock. Be sure and check with a field guide before picking any plants in the wild.

Culinary: The young yarrow leaves can be added to salads, or mixed in herb butter or herb cheese.

Other cultivars: The most common ornamental yarrow is yellow which is great for dry flower arrangements or adds a long living flower in the garden. Other colors of yarrow include bright pink, pastel, gold, salmon, peach and red.

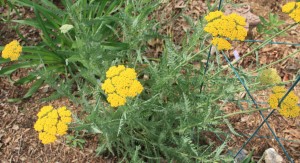
Yellow Yarrow

Yellow Yarrow, ornamental

Dye: The yellow flowers yield a yellow dye to wool when it is mordant with alum. The whole plant will dye an olive green when mordant is iron.

Yarrow will attract beneficial insects and likes to be grown near other herbs.  The root of the plant activates a disease resistance for the nearby herbs. Cut the plant back and add to the compost pile to increase composting time. The compost pile only needs a small amount of leaves to make a pile of compost.

Yarrow looks great mix with purple cone flower and other perennials. Yarrow starts blooming usually a bit before the purple cone flower but will continue blooming as the purple cone flower bloom.  Some varieties will grow lower to the ground while other stand up tall. Have fun with yarrow in your garden. It is a work worth having.

Happy Gardening!
Why I haven’t been blogging

To all my friends reading my blog, I apologized I haven’t been blogging in several days. It is not my intention to go so long between blogs. We had a big family reunion on Memorial Day which kept me busy as well as working in my garden.

I have included some pictures of my garden. As my garden changes and things start growing, I will keep you up to date.

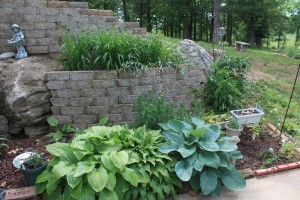
Hostas

Hosta’s gardens

These hostas I want to move because they really get too much sun, I want to plant more herbs in this area.

Garden

My newest garden

This is just above the hostas and to the right and is my newest garden. I want to move my thyme here and allow it to hang over the retaining wall.

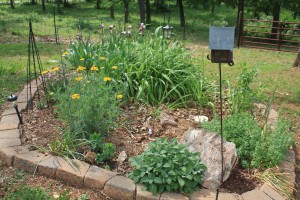
Day lilly bed

My oldest garden

This is my oldest garden and I have planted lots of different herbs in this bed, some reason I have trouble growing. In front you can see sage and the yellow is yarrow. To the right of the rock is oregano. The plants in the middle are daylillies.

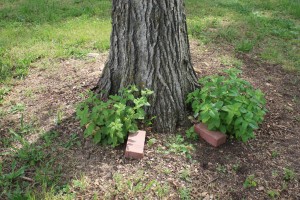
Mint bed

Mint bed

I like to plant mint all by itself so it can be mowed around and will not spread in the garden. I put the brick around the mint because, last year it was attacked by the weed eater. My weed eater uses thought it was a weed. Mints will mixed in flavor so it is better to plant one kind.


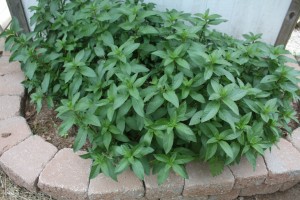
chocolate mint

Chocolate mint

Here is another example of mint in a bed by itself.

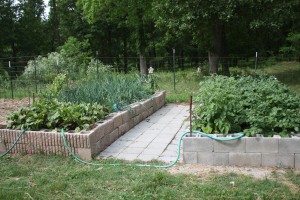
raised beds

Raised beds with vegetables

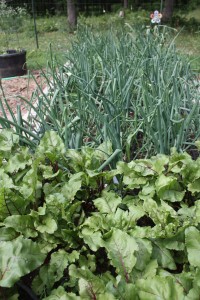
This is a picture of two of my raised beds with vegetables. The one on the left has beets and onions and the one on the right has potatoes and peanuts.

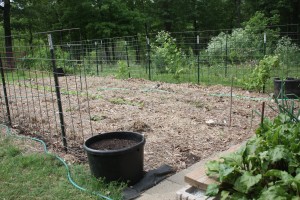
vegetable gardem

vegetable garden

This is the vegetable garden with grapes in the background. The large black pots will have plants good for companion planting.

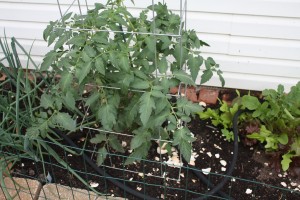
Tomatoes

Tomatoes

What is any garden without tomatoes. This tomatoes is planted near onions as companions.

beets and onions

closeup of beets and onions

I hope you have enjoyed a tour of part of my garden. This is not all.

I have a garden tour plan soon, and need to get most of the weeds out of the garden. I tell everyone I grow fruit, vegetables, herbs, flowers, and weeds.

Stick with me because I plan on several new blogs. I want to teach you how to make your own herb remedies from making a cup of tea to tinctures.

Crafts will include leaf printing, paper making, potpourris and perfumes. Lots of new recipes for using herbs in your cooking.

Other things I have planed include making all types of cosmetics and cleaners for your home as well as ideas for using herbs in your home.

One of my latest passions besides herbs is art printing on fabric and I want to try and use some of these ideas on my homemade paper. I won’t know if they work until I try some of the ideas I have been reading about.

I will teach you how to dry and freeze your herbs and what the herbs are good for and what to watch out for.

Medicinal subjects will include herbs to slow down aging, herbs good for indigestion and all kinds of everyday ailments. We will talk about food allergies and herbs to take to help with inflammation which can cause pain. For example, I heard the other day on the Dr. OZ show, that almond milk, Swiss chard, and tart cherries for anti-inflammatory. There are herbs that can be used for this as well.

If anyone wants to learn something special just leave a comment and I will try and research the subject. Sharon


Growing Sage

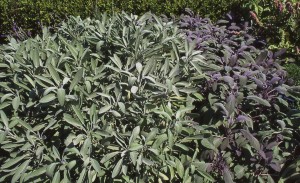
Sage plants

Garden sage and purple sage

Growing Sage ( salvia officinalis)

“How can a man grow old who has sage in his garden” was a proverb used in China and Persia and parts of Europe. Sage was much prized by the Chinese as money and would trade three chests of tea for one chest of sage leaves. The ancients claim sage increase mental ability.

Today we can grow garden sage in our gardens and it is used in a number of ways, such as decorative, culinary, around the house, cosmetic and medicinal. If you have cooked a turkey you may have heard of sage.

Growing Sage:

Site: Hardy soft evergreen silver shrub which grows about 1 to 2 feet and likes full sun to part shade and likes light, dry, alkaline and well drained soil. Zones 4-8 and is drought-tolerant and low maintenance with soil pH 6.0-6.7

This Mediterranean plant has pretty little blooms in pink, lavender, purple, and white. Usually blooms in late spring or early summer. Garden sage has violet blue flowers which attract bees, and humming birds.

Growing: Garden sage can be grown from seed; most of the sages that are variegated should only be grown from cutting, layering and division.  Sage seeds do not store well, so use fresh seeds. Sage should be cut back after flowering, to keep it bushy and replace every few years as it get too woody.

Uses: Around the house, use it in wreaths, herbal hair rinses, astringents, toothpowders, dusting powder and in mouthwashes. It is added to homemade perfumes, soaps, and cosmetics. Sage is one of the herbs used in hair rinses for dark hair.

Culinary: Most of us like sage with poultry, but it is wonderful with so many other dishes. Great with rich, fatty meats, pork, sausage, cheese, butters, and fry the whole leaves as an appetizer. Sage has a lemony but camphor like bitter taste. Young leaves can be eaten in salads or cooked with eggs. Flavored sage such as clary and pineapple sage can be substituted for most culinary dishes. Dried sage has a different flavor than fresh; it is less lemony and may even taste a little musty.

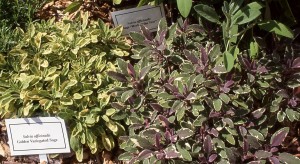
mixtures of sage plants

Golden sage along with tri-color sage

Garden sage is the one most cooks used because it will retain its flavor through longer cooking periods and dries great.

Harvest: Snip fresh leaves as needed or bunch them together and hang to dry inside of a paper bag with holes punch in the bag. Or you can freeze the leaves. Avoid harvesting fully the first year. Pick sage leaves just before flowers appear and dry leaves slowly to preserve the flavor.

Medicinal: Sage will aid in digestion and is antiseptic, antifungal, and contains estrogen. Suffers of diarrhea may want to make a tea of sage. Just be aware, sage does not make a great tasting tea. Sage in dishes is strong and favorable and will help to digest fatty foods. Sage is said to help with sore throats, mouth irritations and cut and bruises. Research has revealed sage may lower blood sugar.

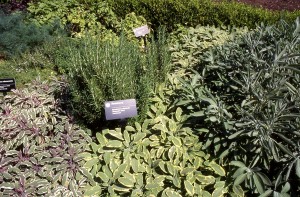
There are dozen if not hundreds of sage both perennial and annual. Some of my favorite includes tricolor sage, clary sage, purple sage, golden sage, pineapple sage, Mexican blue sage and blue sage.

Sage and Rosemary

Sages and rosemary

Companion plants: Sage is good with rosemary, lavender, marjoram and thyme. It may repel the cabbage butterfly. Plant with cabbage, carrots, strawberries, and tomatoes; avoid planting with cucumbers and onions.


Growing Thyme and other Thymely tips

Growing thyme is one of the herbs every herb lover want to grow. Thyme give many rewards and has a lots of uses, but it also looks good in the garden. Its low growing habit look great in walkways, rock gardens, trailing over walls, and as a ground cover to help repel weeds.

The common thyme’s Latin name T. vulgaris is an ever green shrub. Depending on the variety Thyme grows about 3-10 inches. The creeping varieties grow low to the ground.

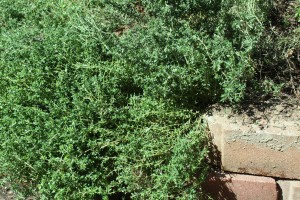
Thyme

Thyme growing over a wall

Just a few of the over 350 varieties

  • Broad leaf thyme
  • Lemon thyme
  • Wooly thyme
  • Golden creeping thyme
  • English thyme
  • Lemon thyme
  • Lavender thyme
  • German thyme
  • Camphor thyme
  • Silver thyme
  • Nutmeg thyme
  • Caraway thyme
  • Mother-of-Thyme

It is fun to grow as many varieties as possible. Try growing several in a thyme bed with a sundial set int the center of the bed.

Sundial with thyme

Sundial with thyme planted around.

Common thyme is upright with woody stems and about one foot in height. The leaves are dark green to grayish green and very aromatic.

All parts of this sweet aromatic thyme can be used in cooking, cosmetics, medicinal, cleaning and just because it look nice. When thyme flowers it looks wonderful in arrangements trailing over the side of the vase and the smell is tremendous.

Site: Full sun to partial shade. At least four hours of sun. The soil should be well drained, slightly alkaline with a soil pH of 6 to 6.7 and dislike wet feet.

Propagating: Can be grown from seeds if growing common variety. The method used for other varieties is either division, layers or cuttings.

Growing: This evergreen scrub like to grow in zones 5-9. Other areas should protect in the winter. Thyme’s flowers are loved by the bees and produce a wonderful honey with a unique flavor. The flowers come in shades of pink to purple depending on the variety.

Grow thyme for borders, to drape over walls, for low edgings.  The creeping varieties such as wooly, snowdrift, English wild thyme, and golden creeping thyme are wonderful between stepping stones and used for weed control. This wonderful plant will spread some and will fill in the gaps.

Companions: Plant thyme with eggplants, cabbage, potatoes, and tomatoes. Help to repel cabbage worms. It is a perennial and you may not want to plant in the garden. Better to plant in pots near these garden vegetables.

Harvest: Cut stems anytime during the summer, but twice cut back hard leaving about 3 inches of the stems during growing season. The leaves will dry, freeze or are wonderful in herbal vinegars.

Drying: Thyme is easy to dry. The leaves should be left on stems for drying and one method is to tie a group of stems with a rubber band and place inside of a paper bag filled with holes and tie shut and hung up to dry. The holes are for circulation, use a hole punch and punch several holes.
Dehydrator makes short work of drying thyme. If you have a mesh liner use it for thyme. Once the leaves dry they sometimes come off the stems. You can store the thyme on the stems or strip.

Refrigerator drying: Place the thyme on paper towels and either place inside of paper bags or lay on trays. It takes a little longer to dry but works quite well.

Cooking: Along with parsley thyme is added to a bouquet garni. Culinary thyme add lots of flavor to all kinds of dishes, such as stocks, marinades, lamb, chicken, pork, sauces, dressing, soups, and vegetables, especially root vegetables. Begin by using a small amount, the flavor of thyme is quite strong. As an added bonus, thyme helps to digest fatty foods, it aids in digestion.

Tip: To use just the leaves, hold the cut end of the stem in your hands and slide your fingers up the stem to the top or tip of thyme, removing the leaves as you go. Some thyme taste better than others, culinary thyme included common thyme or lemon thyme.

Cleaning: Thyme makes a great cleaner especially if added to vinegars for products such as dish soaps, laundry detergent, and all purpose cleaners. It has powerful antibacterial properties. It is also used as an insect repellent.

Cosmetics: Use in bath sachets, deodorants, facial steams, hair rinses, and as an antiseptic in mouthwashes and toothpaste. Thyme is very fragrant and can be used in potpourri.

Medicinal: Aid in digestion, mix with honey for coughs, sore throats, and chest infections. Common thyme can be used in infusions, tinctures, syrups, and massage oils. It is an antiseptic, expectorant, antispasmodic, astringent, antimicrobial, diuretic, and might help to heal wounds. Avoid if pregnant.

Just a little history. Thyme is found on the sunny hills of the Mediterranean. The Greeks and Scots revered the plant and use it for bravery. In 17th century England’s Culpeper recommended thyme for handovers, coughs and melancholy. A cookbook from the 1600’s had a recipe using thyme and beer to overcome shyness.

Growing thyme is easy and finding new varieties can be quite an adventure.

Happy Gardening!


Growing and Using Echinacea (Purple Cone-flower)

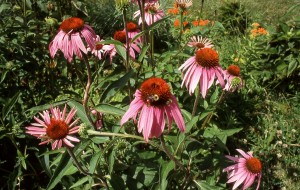
Purple Cone flower

Echinacea or Purple Cone Flower

Purple cone-flower also known as Echinacea was once at risk as an endangered plant. It was over harvested in the wild and some states took action to protect the remaining Echinacea also know as purple cone-flower.Today we are growing these purple daisy like flowers in our gardens and perennial herbaceous border.

Purple cone-flower or echinacea has widespread medicinal applications. The Native Americans used Echinacea to treat all kinds of ailments such as snakebites, fevers, colds, and influenza. They used the roots for their painkilling and blood purifier properties. Native Americans were the first to discover the root had the most medicinal properties.

In the 1920’s it became popular by practitioners and was widely prescribed, but when antibiotics was introduced Echinacea was all but forgotten. With the over use of antibodies, today’s herbalists have popularized the herb again. Echinacea is now found in most herbal first aid kits and can be purchase in most health food stores, including the big box stores.

Millions of Americans and Europeans use purple cone-flower as their main go to for colds and flues. It is known for its antibiotic qualities and general immune boosting effects.

Purple cone-flowers well known species include: Echinacea purpurea, E. pallida, and E. angustifolia. All three can be grown in our garden and in some states pallida is a native.

Parts used: The whole plant which includes the root, flowers, leaves, and seed.

Site: Its native habitat of prairies is found from Texas to southern Canada. E purpurea likes a richer soil with rock phosphate and compost in the soil. E. angustifolia and pallida like a leaner soil with less water. Pallida is not as showy or tall as E. purpurea. The growing zones for purple cone flower or echinacea is 3-9 and likes full sun to part shade.

Blooms: E. purpurea has a bright pink flower with a hairy stem and will bloom from mid to late summer. The more water it receives, the longer the blooms. E. pallida has paler pink flowers, fewer leaves and is not as tall. Purple cone-flower’s stunning flowers make a wonderful border plant for any size garden. Purpurea has a slight honey like scent.

Growing: Perennial. Purple cone-flower will grow from seed with about 50% germination. It needs a cold period for about 3 months. Sew the seeds in the fall or indoors in very early spring with stratified (exposed to cold)  seeds. Echinacea is slow to grow and may take several months to reach a size to transplant in the garden. The seeds take about 2 to 6 weeks to germinate. Purple cone-flower likes to grow in clumps, so plant about a foot apart. It can be divided or grown from root cuttings.

Harvest: Roots should be about three years old before harvesting. Any sooner and the roots are too small to harvest. Pallida and angustifolia have fibrous roots and are easier to harvest, but unless you are growing these in your own garden, please be aware of the laws of harvesting in the wild. Your neighbors may allow you to harvest, but ask first.

Properties: Bitter and slightly aromatic, antibacterial and antiviral. Cool, dry and pungent.

Primary medicinal uses: Immune system function, colds, flues, minor infections, wounds, psoriasis, eczema, Echinacea is being study in aids therapy, digestion, fungal infections, blood poisoning, boils, abscesses, respiratory tract, and venereal diseases.

Cautions: Few if any, mostly extreme use can cause throat irritation. Autoimmune suffers should check with their health care professional. Echinacea, if strong enough, will numb the tongue.

Applications: Root (decoction) tinctures, wash, gargle, powdered, capsules, syrups, compress, poultice, lozenges, infused oil, and liniments. The leaf and flower can be used in the same applications as the root except the leaf and flower should be brewed as an infusion.

Decoction is used for bark and roots. Place roots in simmering water for 10 minutes and strain.

An infusion is for the soft parts of the plant. Take boiling water off heat and allow to cool one minute and pour over leaves and steep for 2-5 minutes. Delicate leaves and flowers should be steeped for about one minute.

All medicinal information is for your information and not intended as medical advice.

Happy gardening!

Growing Parsley an herb lover’s plant

Growing Parsley (petroselinum crispum) is one of those herb everyone should grow in there garden. It can be used as a culinary herb as well as a beautiful border plant.

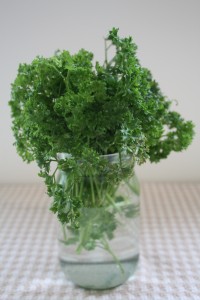
Cut parsley

Curly Parsley ready to eat

Growing Parsley is a great way to have one of the most popular and oldest well known herbs. Remember when you were a kid and told to clean your plate? I wonder if they meant the garnish, properly not.  Which is a shame because parsley is loaded with vitamin and minerals. Parsley is high in vitamin A, C, iron and minerals.

There are two kinds of parsley, curly and flat leaf Italian. Curly parsley has a milder taste, where Italian has a stronger flavor and most used by cooks.

Growing Parsley: Sow from spring to late summer, in zones 5-8. It grows to a height about 12-20″ tall depending on the variety. Italian is taller of the two plants. Can be grown indoors. Bi-annual which means the second year it goes to seed, so for best results plant parsley every year. By planting every year it will be available whenever it is needed. Parsley can be grown in containers near the kitchen, or in your garden. Likes full sun to part shade.

Parsley will bloom the second year with white tiny flowers umbels. Flowering usually occurs from early to midsummer.

Soil: should be rich and moist. Parsley likes to be grown in slightly alkaline and well drained soil.

Growing Parsley Seeds: The parsley seed is slow to germinate, in fact it may take as many as four weeks to germinate. The length of time for germination can be increase by soaking the seeds in a wet paper towel overnight or for several hours. Germination is about 70% and should start coming up in about 2 weeks if seeds have been soak.

Seeds need a cold spell, so if you collect the seeds they need to be in the refrigerator for a few weeks. Purchase seeds usually have been stratified (cold).

Seeds can be grown directly outside in spring or early early spring indoors. The plants can take cold better than some herb plants. They don’t like their roots disturbed so be careful when transplanting outside.

Harvest: Pick leaves and stems as needed the first year. Parsley can be cut severely several times a year if you give it about six weeks to recover. Parsley can be dried and or frozen. Parsley does well in both situations. Some herbs lose all flavor when dried, but parsley still retains some flavor. Store parsley in a cool dark place, light and heat will destroy flavor.

Culinary: Add raw flat leaf parsley to almost any savory dishes. Parsley makes a wonderful garnish for soups, salads, eggs dishes, potatoes, fish, sandwiches, and sauces. Curly parsley is one of the ingredient in bouquet garni. Check out my blog on “fine herbs and bouquet garni”. Parsley should be added at the last minute to retain it flavor. Check out my blog on “Fresh herbs in the Kitchen”.

The basic rule for using parsley is 1 TBSP. fresh or 1 to 2 tsp. dried.

Pests: Prone to suffer from leaf spot and viral diseases that may damage the leaves.

Companion Planting: Growing parsley can be used as a companion plants for roses, chives, tomatoes, and asparagus. Avoid fennel and dill when growing parsley.

Cosmetic: Can be infused as a hair tonic and conditioner. Add to facial steams and lotions for dry skin to minimize freckles.

Medicinal: Parsley is used in infusion, tinctures, cider vinegar tinctures and teas. Parsley is a antioxidant and is beneficial to the digestive tract and is often recommended for urinary tract problems.

Curly parsley is eaten for bad breath, which is one of the reason you find it as a garnish. It is also used to promote healthy skin. Use in a poultice as an antiseptic dressing for sprains, wounds, and insect bites.

Root: Use for kidney troubles and as a mild laxative.

History: Growing Parsley was held in high esteem by the Greeks and was used to crown the winning athletes.

Parsley is native to the Mediterranean and introduced in Britain and north and central Europe. Parsley was used in funeral ceremonies long before it was used as a garnish.

Growing parsley can be a wonderful addition to any garden, I hope these tips help you the next time you plant parsley.

Growing Rosemary

If you think growing rosemary is a mystery read the following blog and hopefully it will answer your questions on growing the perfect and happy rosemary.

Rosemary is a tender woody evergreen perennial, which needs to be brought in for the winter if you live in zone 6 and lower. Zone 7 can usually winter over rosemary especially if it is in a protected area.

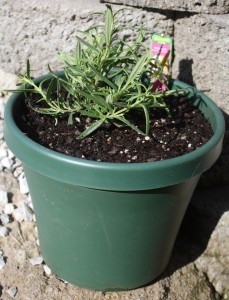
Growing rosemary

Growing Rosemary

When bringing rosemary in for the winter just remember rosemary like humidity, does not want to dry out, and hates wet feet.  I know confusing. One way to ensure humidity is to mist it daily and only water about once a week or when the top layer has dried out. Another way to achieve humidity is to place it on a bed of gravel and keep the gravel wet. The gravel will keep the rosemary from setting in a wet saucer, which it does not like.

I like to grow rosemary in pots and bring it in for the winter.  A pot of rosemary can be sunk in the ground with the top of the pot above ground level and “dug” up for the winter.

How to Grow Rosemary:

Site: Sunny, protect rosemary form cold winds, and it can tolerate light shade.

Soil: needs good drainage. Rosemary likes a lime soil, which will increase its fragrance, but may keep it from growing very tall. Add eggshells to the soil and around the plant. Soil should be about 6.5-7.0 pH.

Propagating: Rosemary does not grow well from seed. The best way is layering or by taking cuttings. If you try  seeds, make sure the soil is warm about 70°F.

Growing: Transplant when the plant has several leaves and large enough to take the stress.

Two cultivars: Prostrate and upright. Prostrate Rosemary will grow low to the ground and makes a great plant to grow where it can trail over a wall. The upright will grow about 3 to 6ft. depending on where it is grown.

Harvesting: Pick leaves all summer long, but may want to avoid picking during the winter months. If your are like me and you like to cook with fresh rosemary, take only enough leaves for the dish. For some reason it does not like to be cut much during the winter months.

Preserving: The leaves can be dried either by hanging up or in a food dehydrator. It also works well frozen. The leaves can be tough when dried or frozen so it should be crushed before using. When cutting the branches for harvest always leave about 1/3 of the stem from the base. Cut the stem at an angle just above a nodule. (a nodule is where a new branch or leaf will grow).

Companion planting: Rosemary likes to be planted near cabbages, carrots, sage, broccoli, onions, and beans.

Rosemary may help to repel cabbage worm butterfly, bean beetles, and carrot worm butterfly.

Uses: Rosemary has many uses, one is culinary check out my blog on “Fresh herbs in the Kitchen” or “Fried potatoes with Rosemary and Garlic.” or the article about making vinegar hair rinse.

Use the rosemary stems as skewers when barbecuing.

Rosemary is used in shampoo, hair tonics, facial scrubs, and the essential oil is used in “Hungary water”.  Used in cleaning products just to name a few uses of rosemary.

Decorative:Upright Rosemary makes a great plant for topiaries or bonsai. It can be trim especially during the summer to about any shape you like. Use in potpourri and to fragrant linens.

Medicinal: The leaf will stimulates circulation and increases blood flow. When adding to cooking it will aid in the digestion of fats.

Try this wonderful plant with it pungent, pine-like scent and a pepper flavor. The ancient Greeks believe rosemary improve memory and wore wreaths on their head while studying. In the middle ages, sprigs of rosemary was placed under the pillow to ward off evil spirits and to prevent nightmares.

It is known as the herb of Remembrance.

Happy Gardening!