Monthly Archives: July 2013

Make Dream and Sleep Pillows

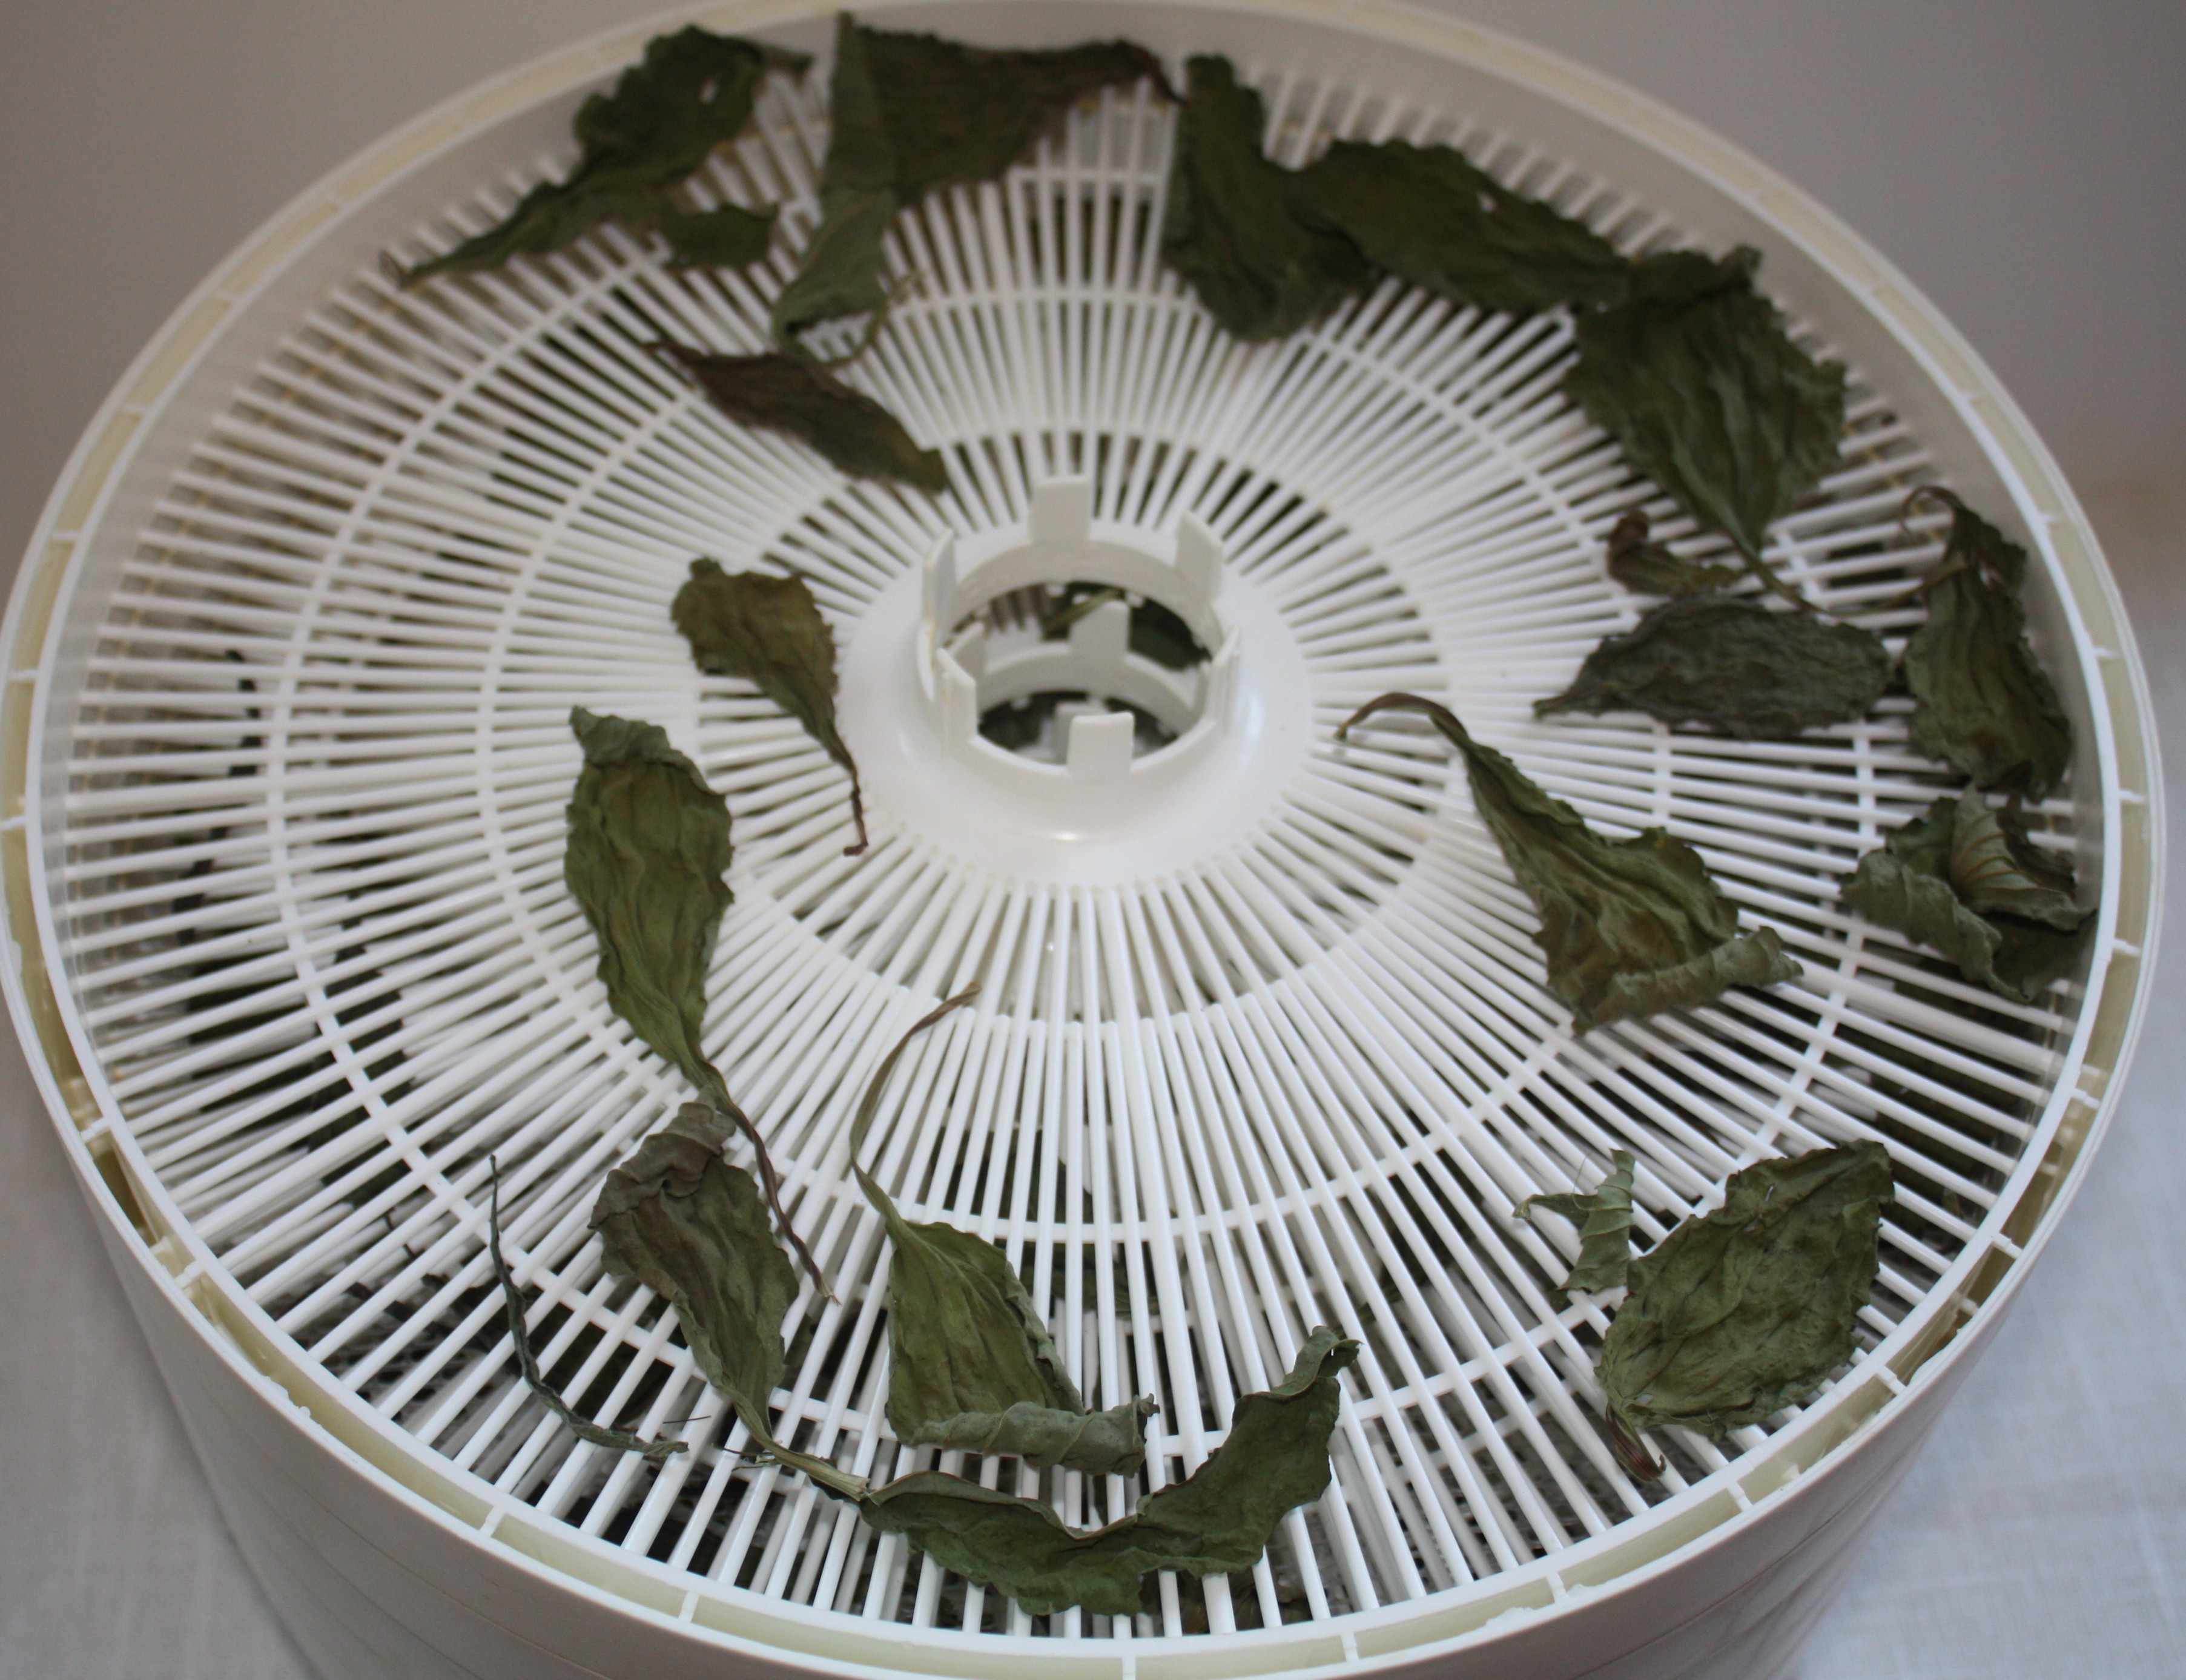
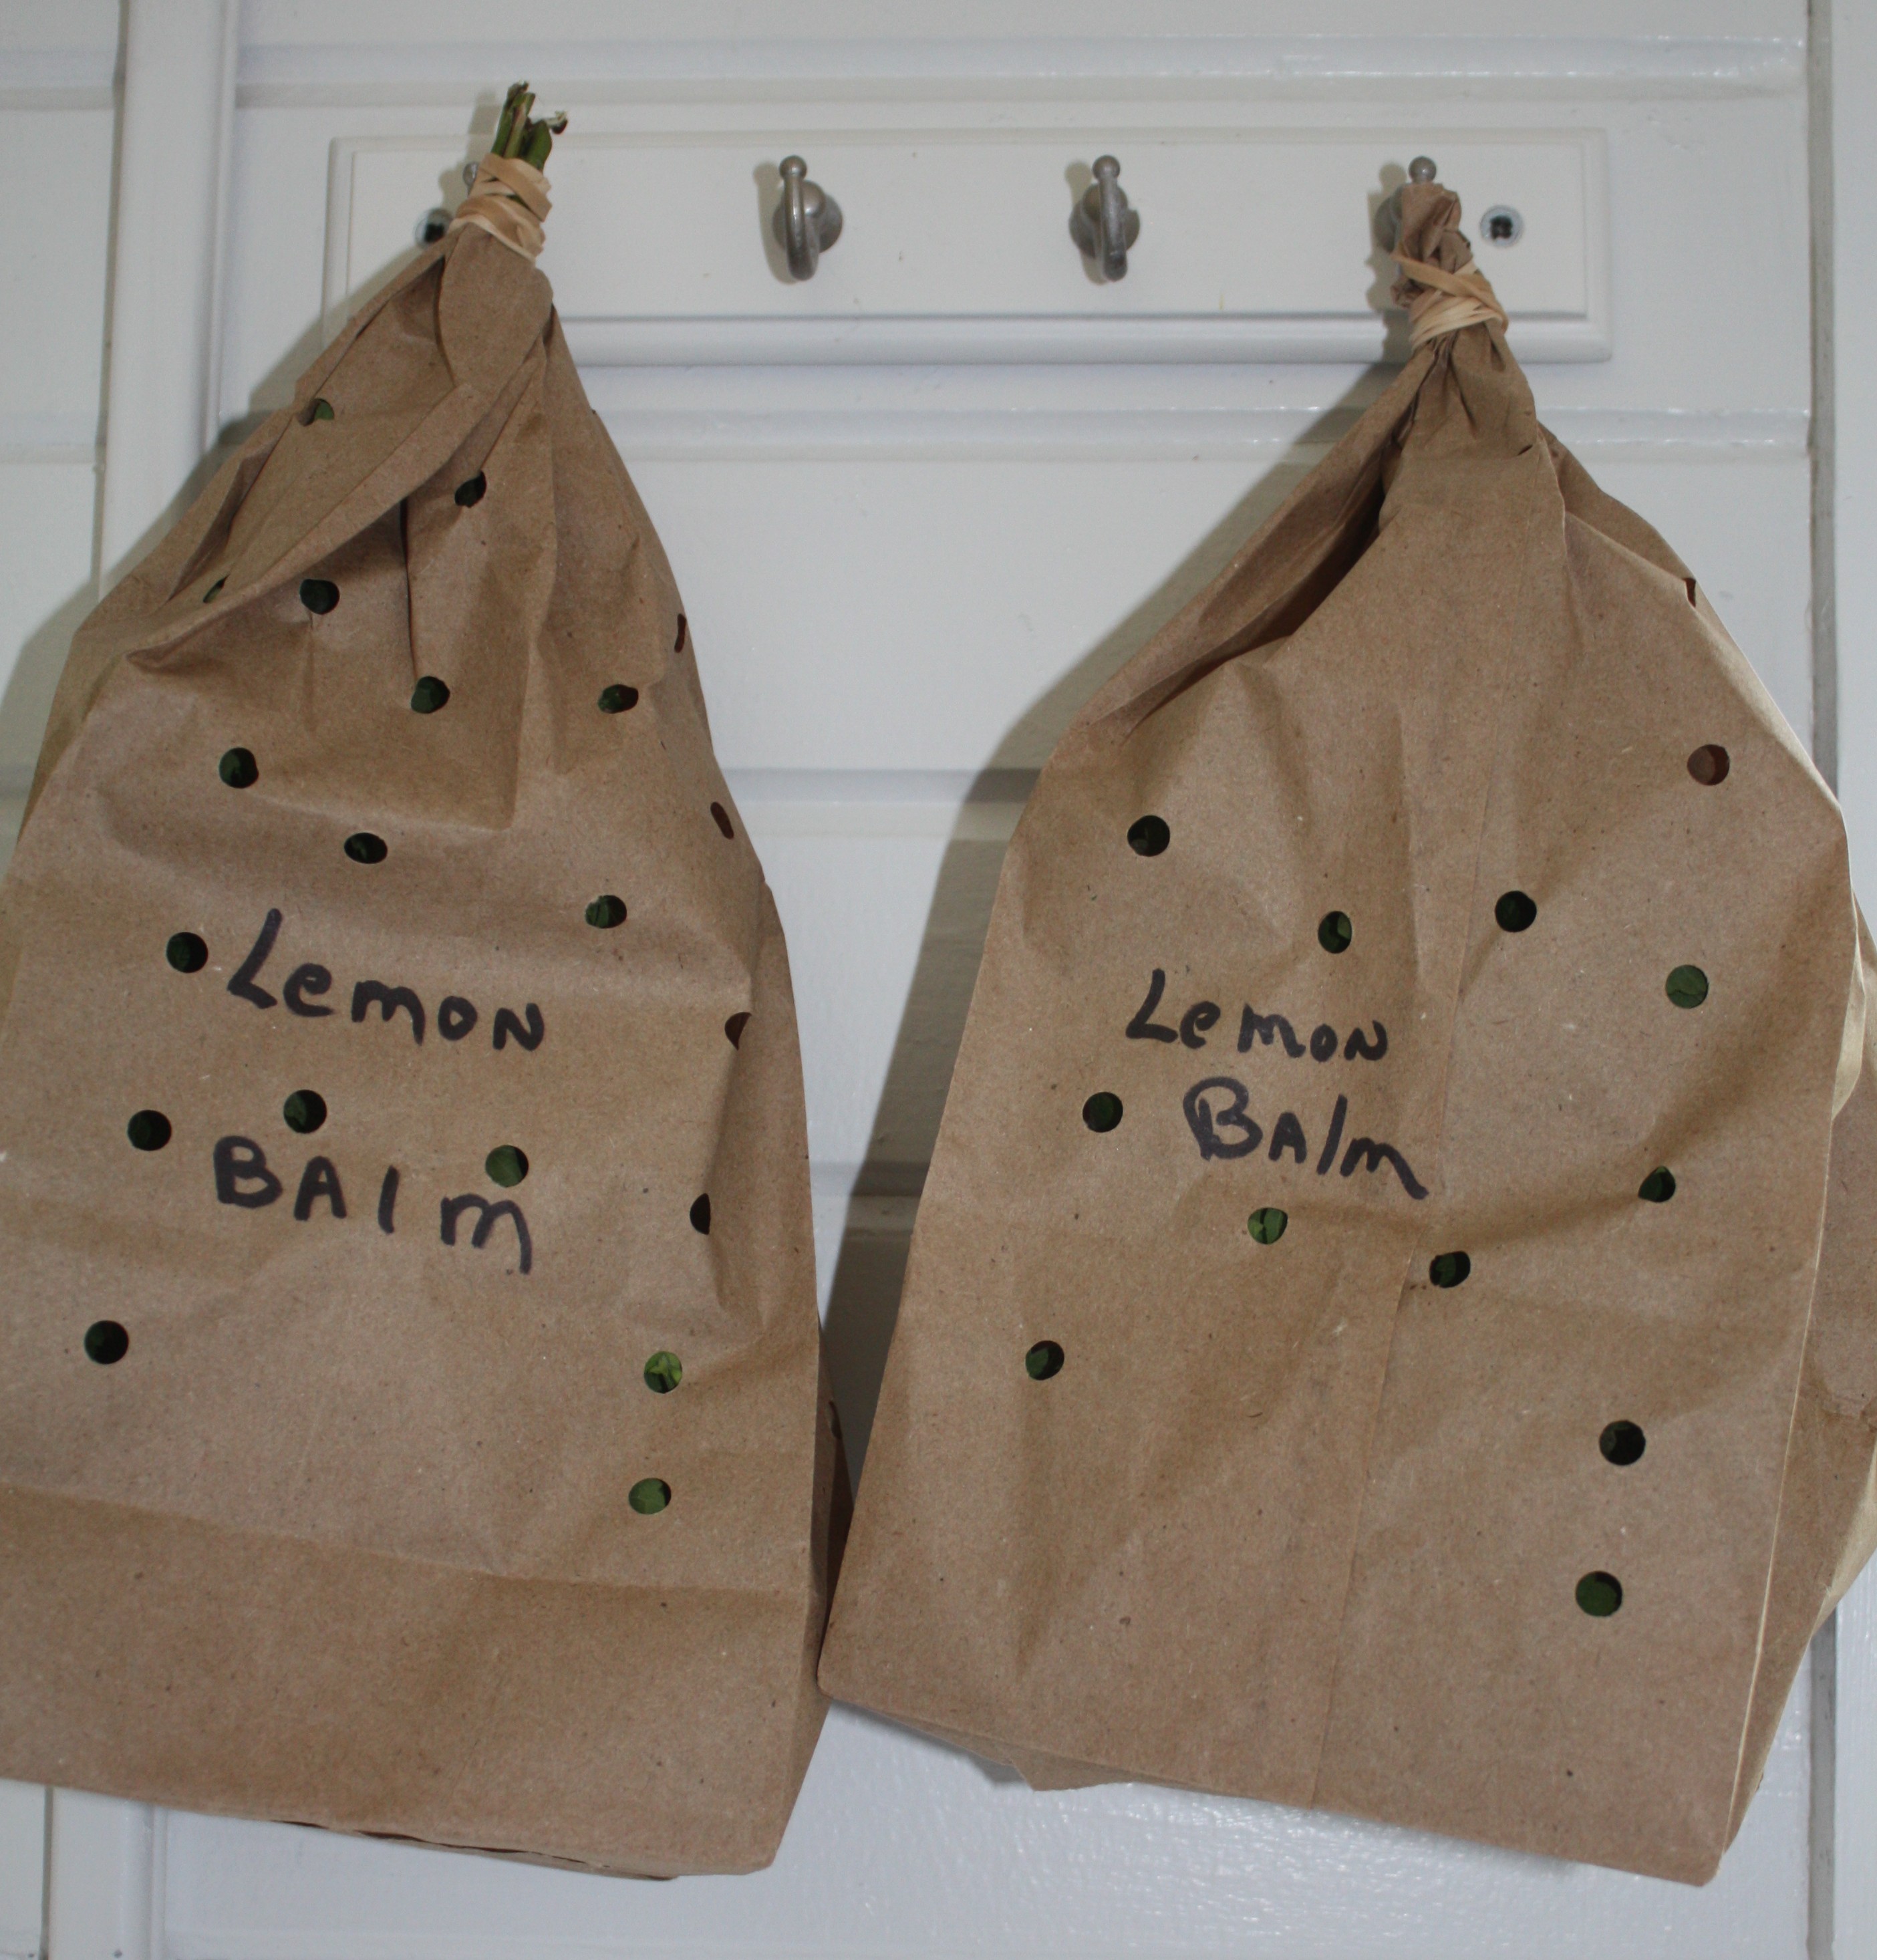
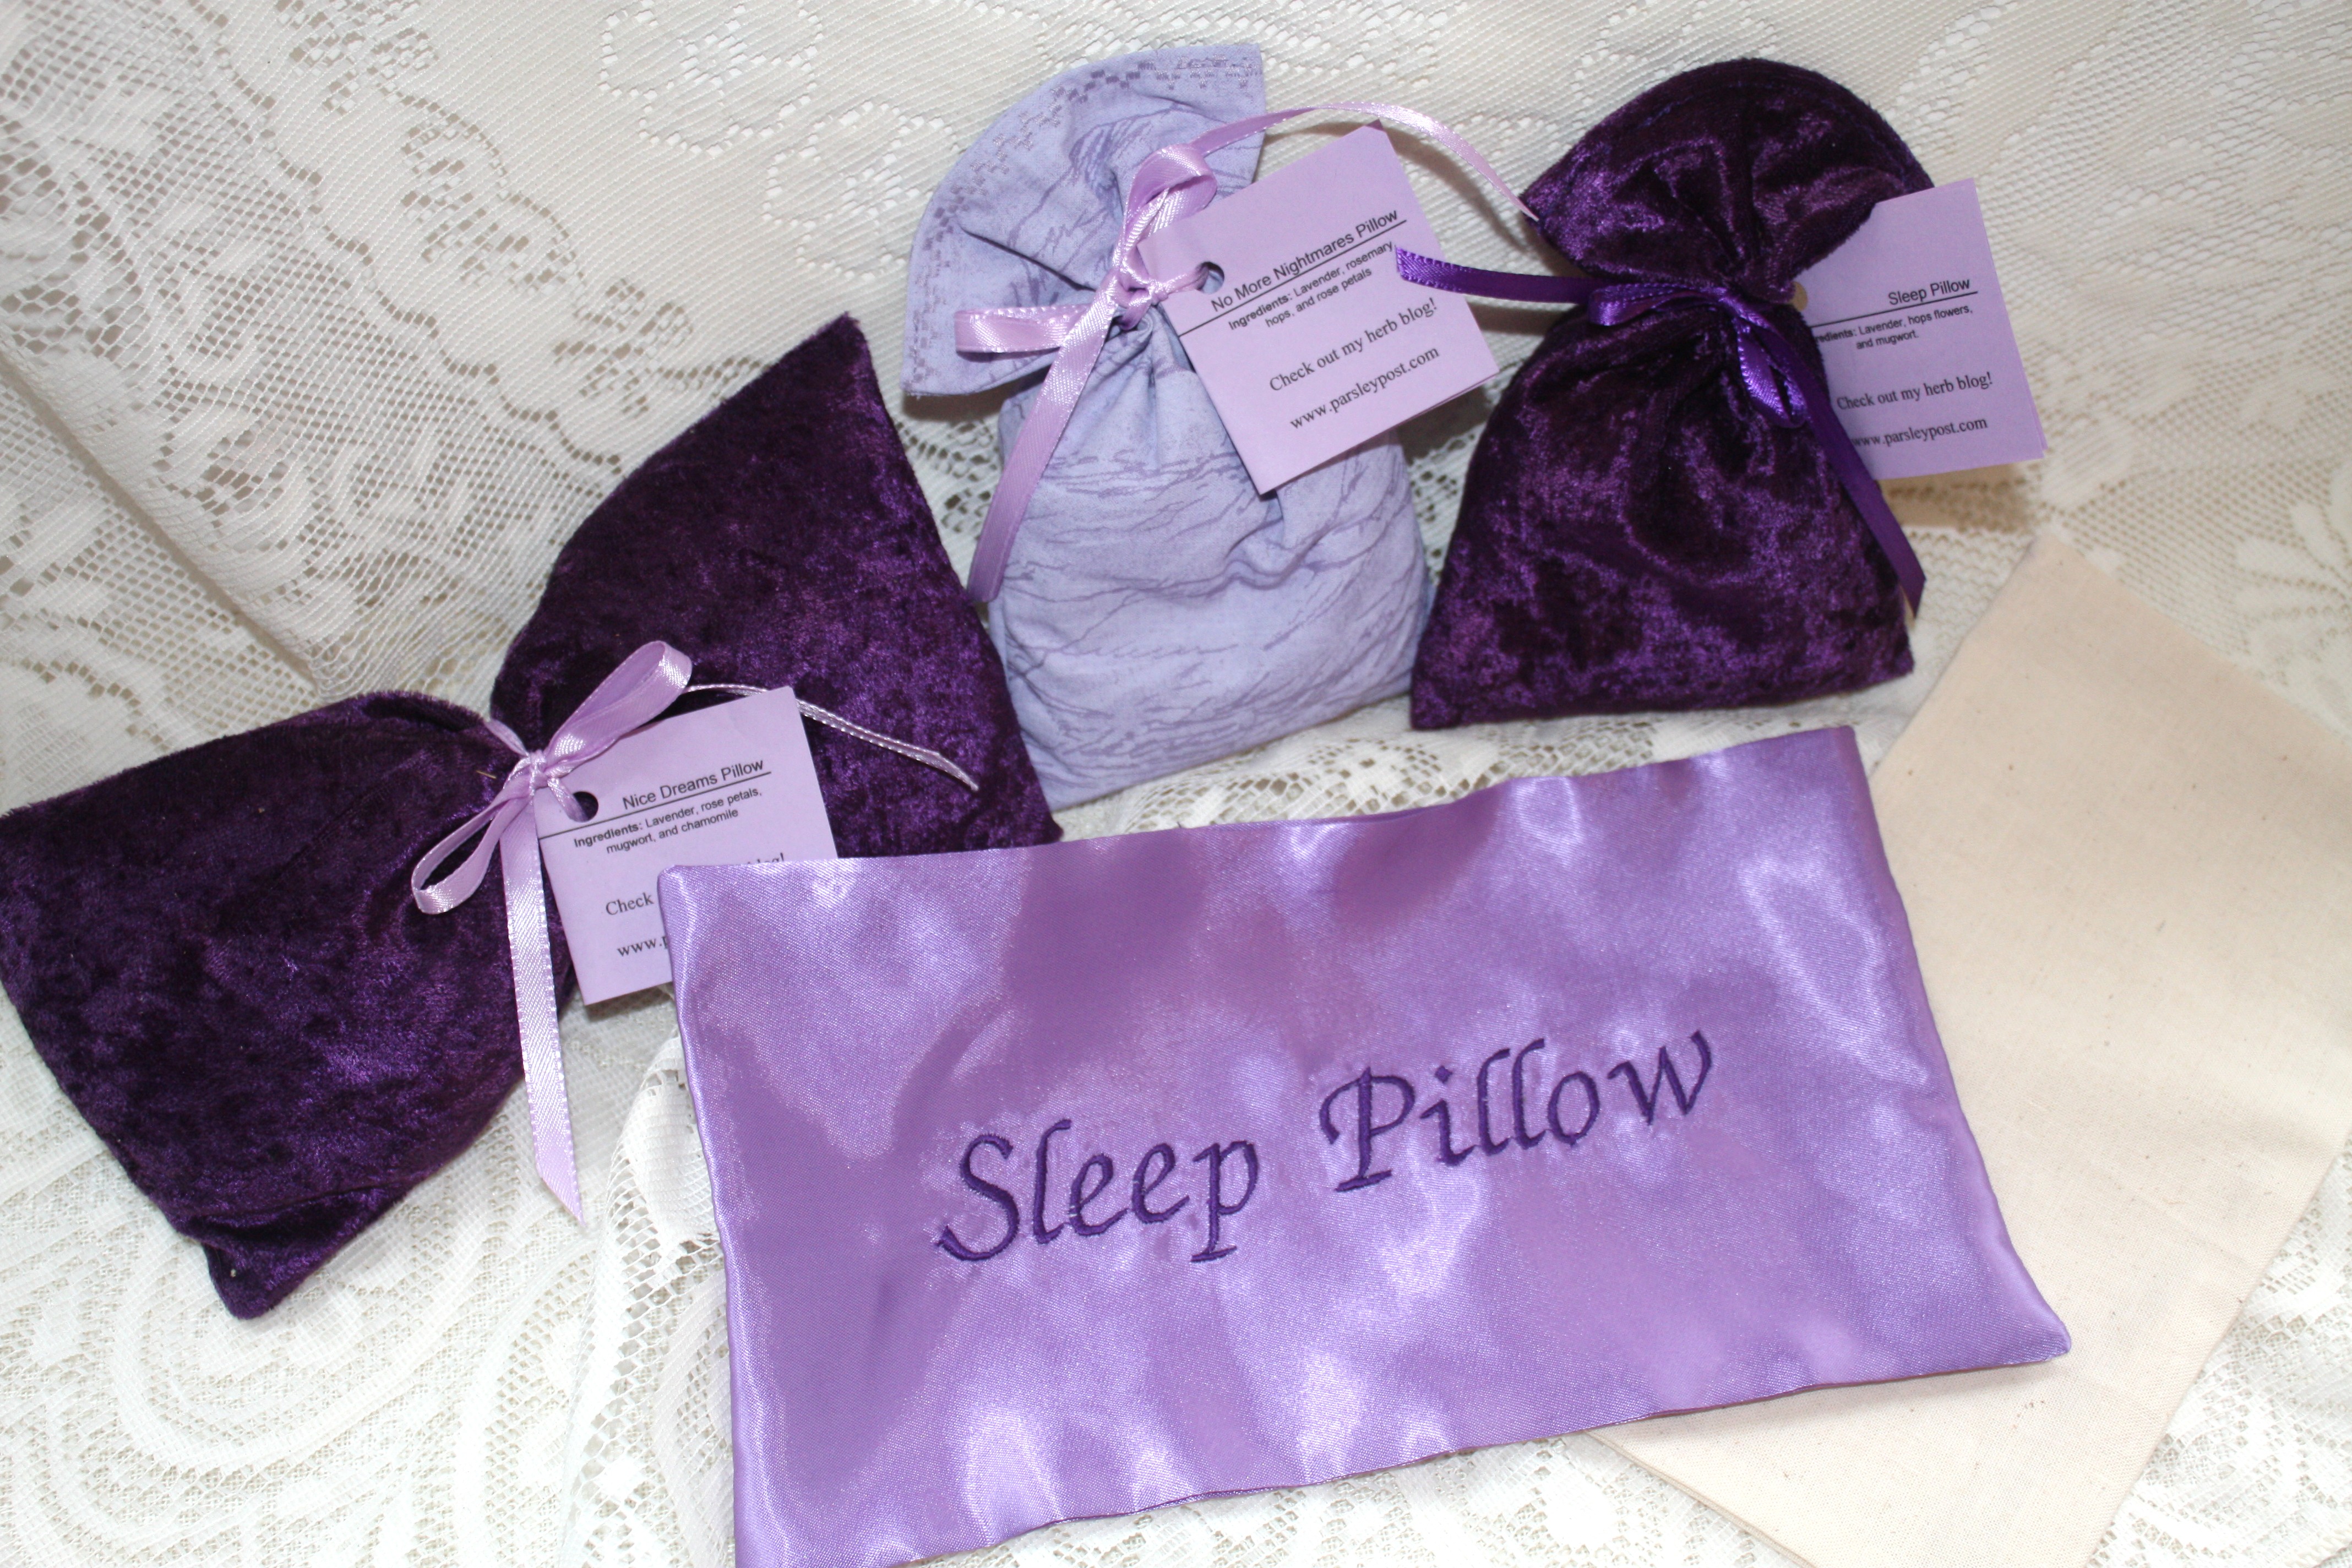
Make dream and sleep pillows from dried herbs.

General instructions:

Simple Dream and Sleep pillows can be made with soft fabric with fairly tight weave. Wash the fabric using natural soap such as borax and do not add any fabric softener or dryer sheets. Washing will wash the sizing and smell out of the fabric.  Some bags may be filled with batting along with the herbs. Use 100% natural fabric.

Dream and Sleep Pillows

Herbal Dream and Sleep Pillows

Cut two pieces of 5” x 8” rectangles or any size you like to use. This is a great project to use up leftover fabric. What’s important is what inside not the shape. Lay wrong size together and sew one long side seam using about ¼” seam allowance. Hem the top of the bag. Sew the other sides of the bag leaving the hem size open. I use a piece of ribbon to tie around the bag to close.

Casing bag: The top of the bag can fold over top for a casing with the seam open just enough to pull a draw sting through.

Fabrics might include: lining fabric, broadcloth, flannel, soft decorative fabric, and cotton.

Place a small amount of fiber fill inside the bag. Add about ½ to ¾ cup of the herbs.

Closed Bag: You can also make a bag with no opening. Just stitch around the four corners of the bag and leave an opening for filling and turning. It is best to use an inner lining of washed muslin for pillows. Just cut two pieces of muslin slightly smaller than the outside fabric.

Be sure you can get you material inside so the opening should be about 4 inches. Turn the bag inside out, iron and fill with herbs. Stitch the opening close. Place the inner bag inside the outer fabric and stitch close. I like to top stitch all around to catch the inner to the outer so the inner pillow does not shift around.

Place either of the bags inside your sleeping pillow or lay beside you head.

A variety of combinations can be used for these little bags. Some are used to help you sleep, or to dream, or help with headaches, or help you recover from an illness.

Dream Pillow may work because the fragrance activities the memory of the brain.

When making these mixtures, use two or three of herbs mentioned.

For example a classic mixture for Nightmare be-gone is equal parts of rose petals, rosemary, lavender, and hops. Sleep mixture is equal parts of lavender, mugwort and hops, or equal parts of lavender, chamomile, hops, mugwort and rose.  Amounts for pillow are about ½ c. herb in each pillow.

Making sleep pillow

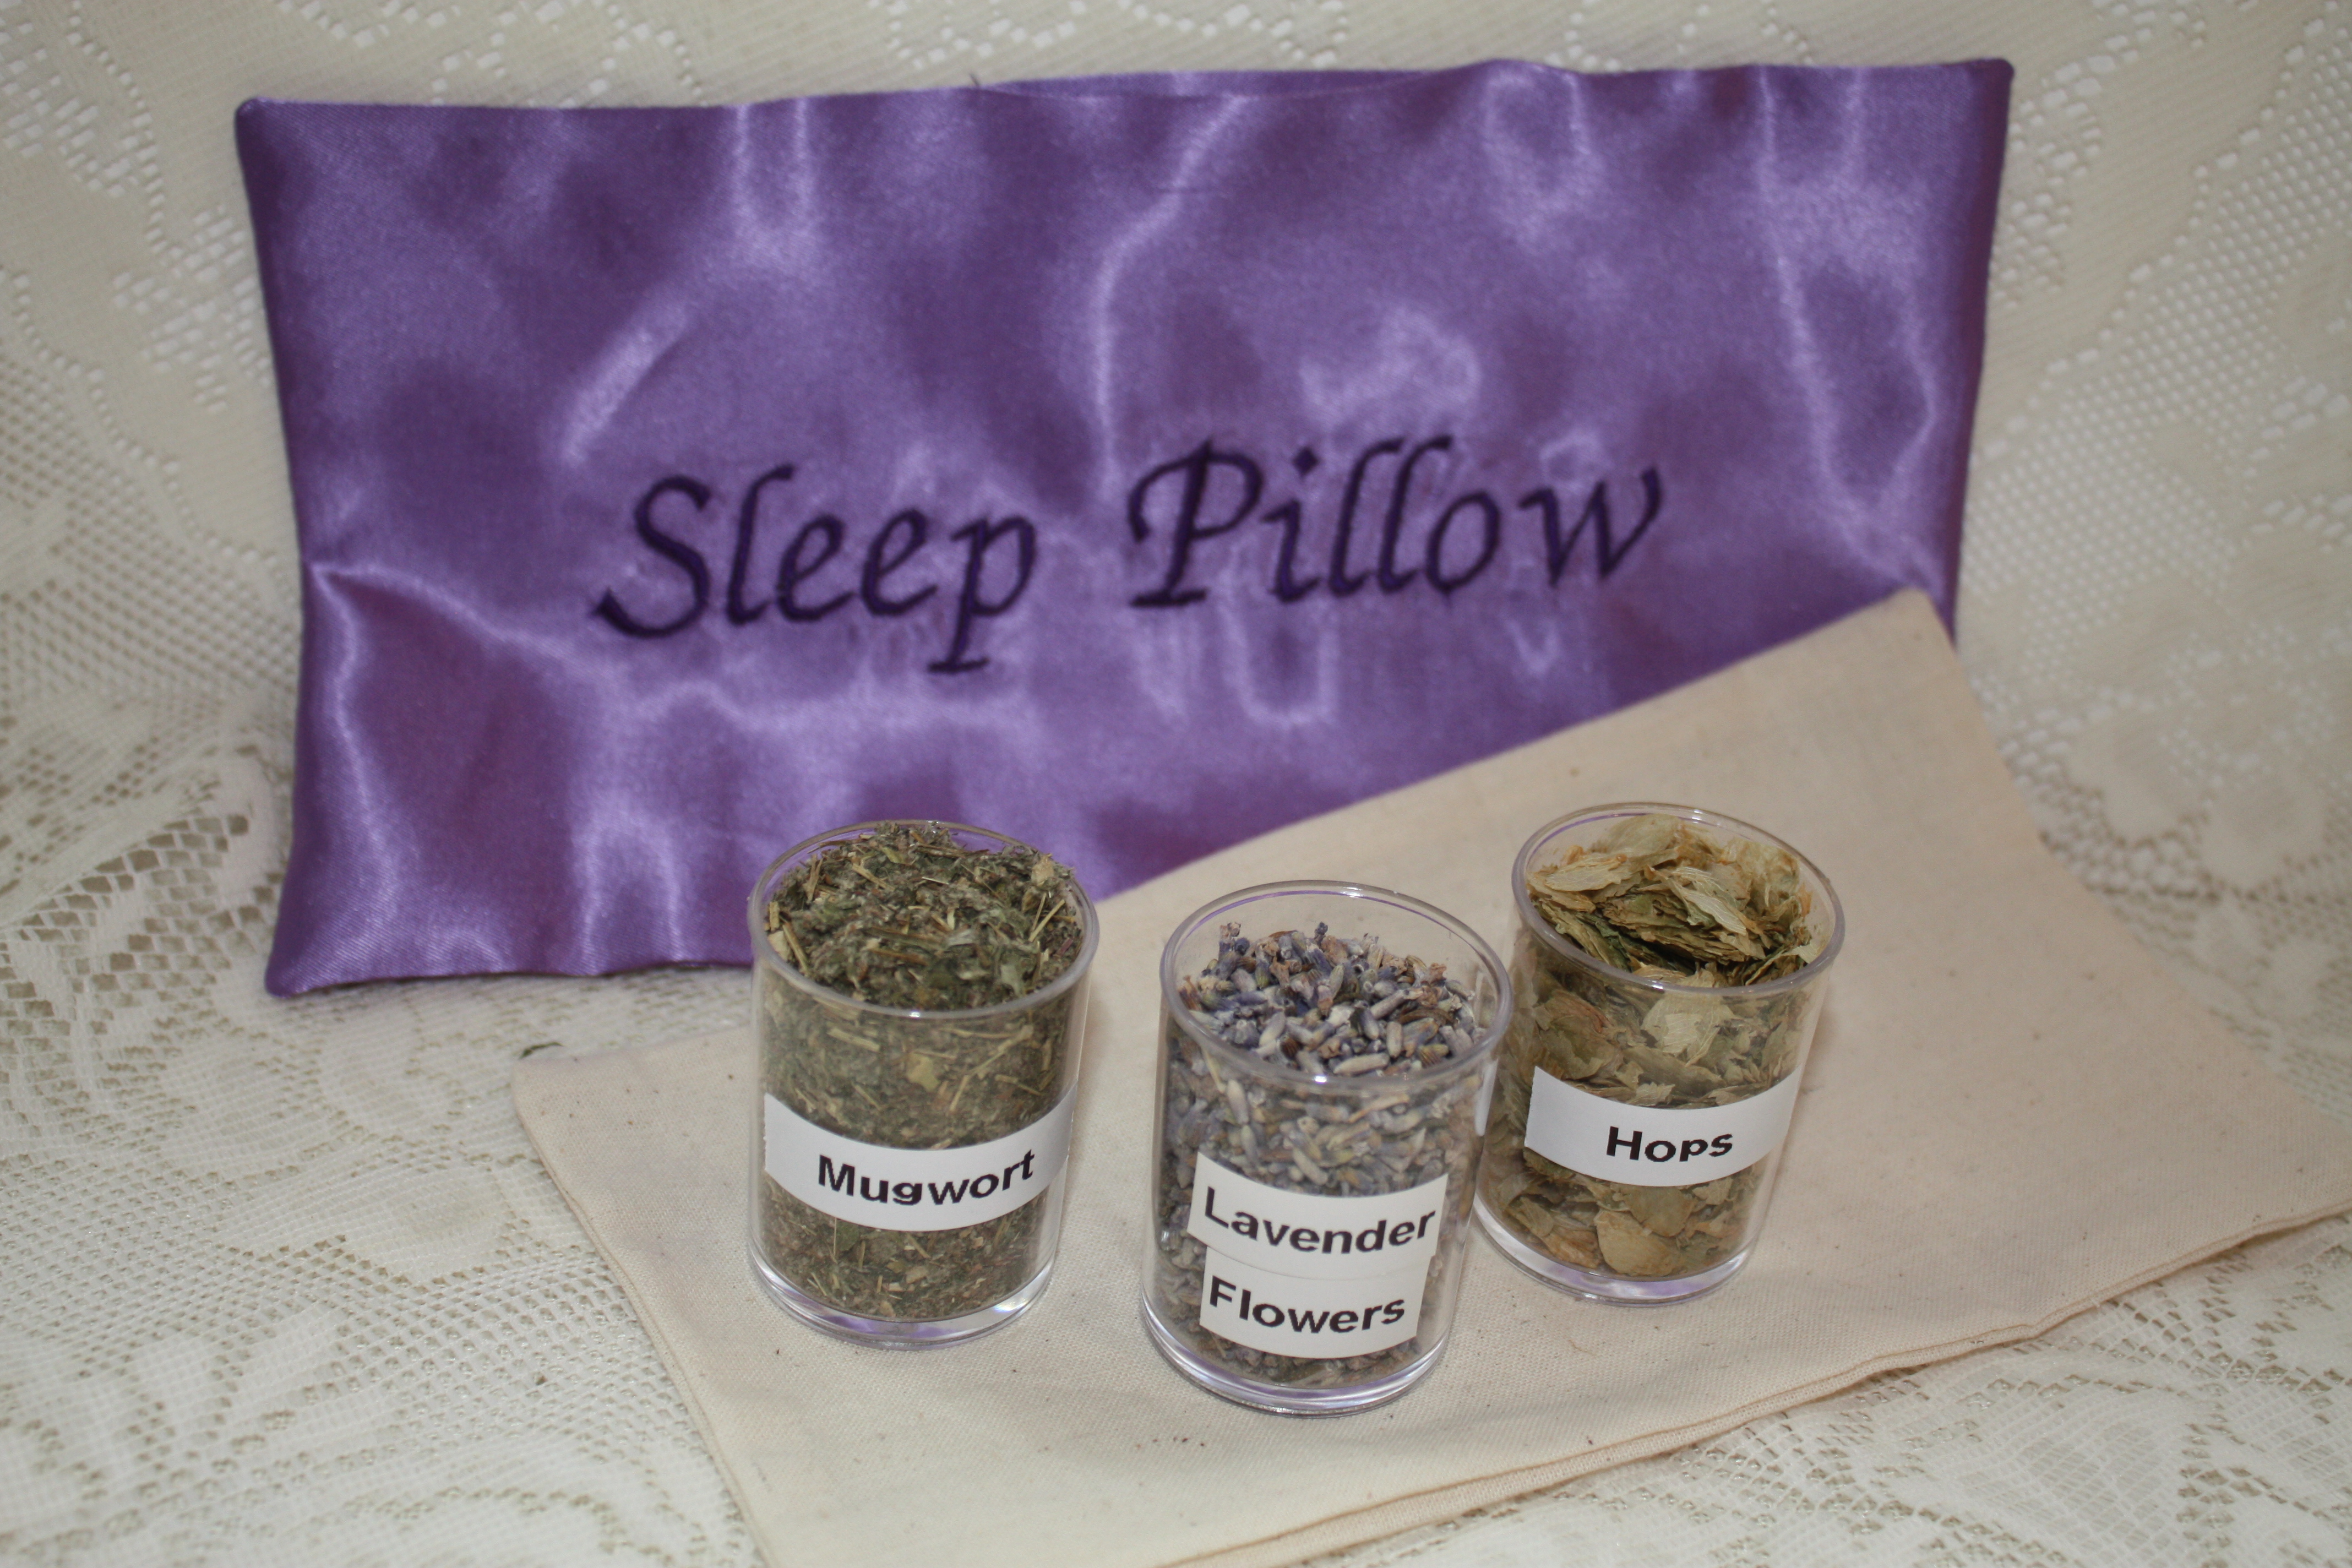
Herbs used in sleep pillow

  • Stress Mixture: Hops, mugwort, sweet marjoram, and lavender
  • Get Well mixture: lavender, catnip,
  • Dream lover pillow: yarrow flowers, dill leaves, basil, and roses
  • Remember dreams: lavender, rosemary, mugwort, catnip, and bay
  • Nightmare be-gone: Rosemary, valerian, lemon balm, rose petals, hops, mullein, or lavender.
  • Headache be-gone: rosemary, mint, betony, or bay, bee balm flower, roses, lavender, nutmeg or cloves, and a small amount of marjoram.

To retain scent, can add some cellulose chips or vetiver root, a little essential oil may be added as well. Orris root which is used in potpourris is usually considered too sensitive for close breathing. Many are allergic to orris root. Also store bag when not in use in a plastic zipper bag.

Herbs used in making dream and sleep pillows:

  • Chamomile: rest, sweet dreams
  • Cloves: repel bad dreams
  • Dill is known to help with cranky babies
  • Hops: restful sleep and healing, sweet dreams
  • Lilac (old fashioned garden variety) good for dreams
  • Lavender: headaches easing, purification, calming
  • Marjoram: relieves depression
  • Mugwort: visions and predictive dreams, aids in remembering dreams
  • Mullein: repel bad dreams
  • Rosemary: avoid nightmares and headaches, folk lore says it retains memory, use sparingly
  • St. Johns Wort: banishes spirits
  • Lemon Grass: predictive dreams
  • Marjoram: relieves depression
  • Mint: vivid dreams, alertness
  • Rose: Clairvoyance, love
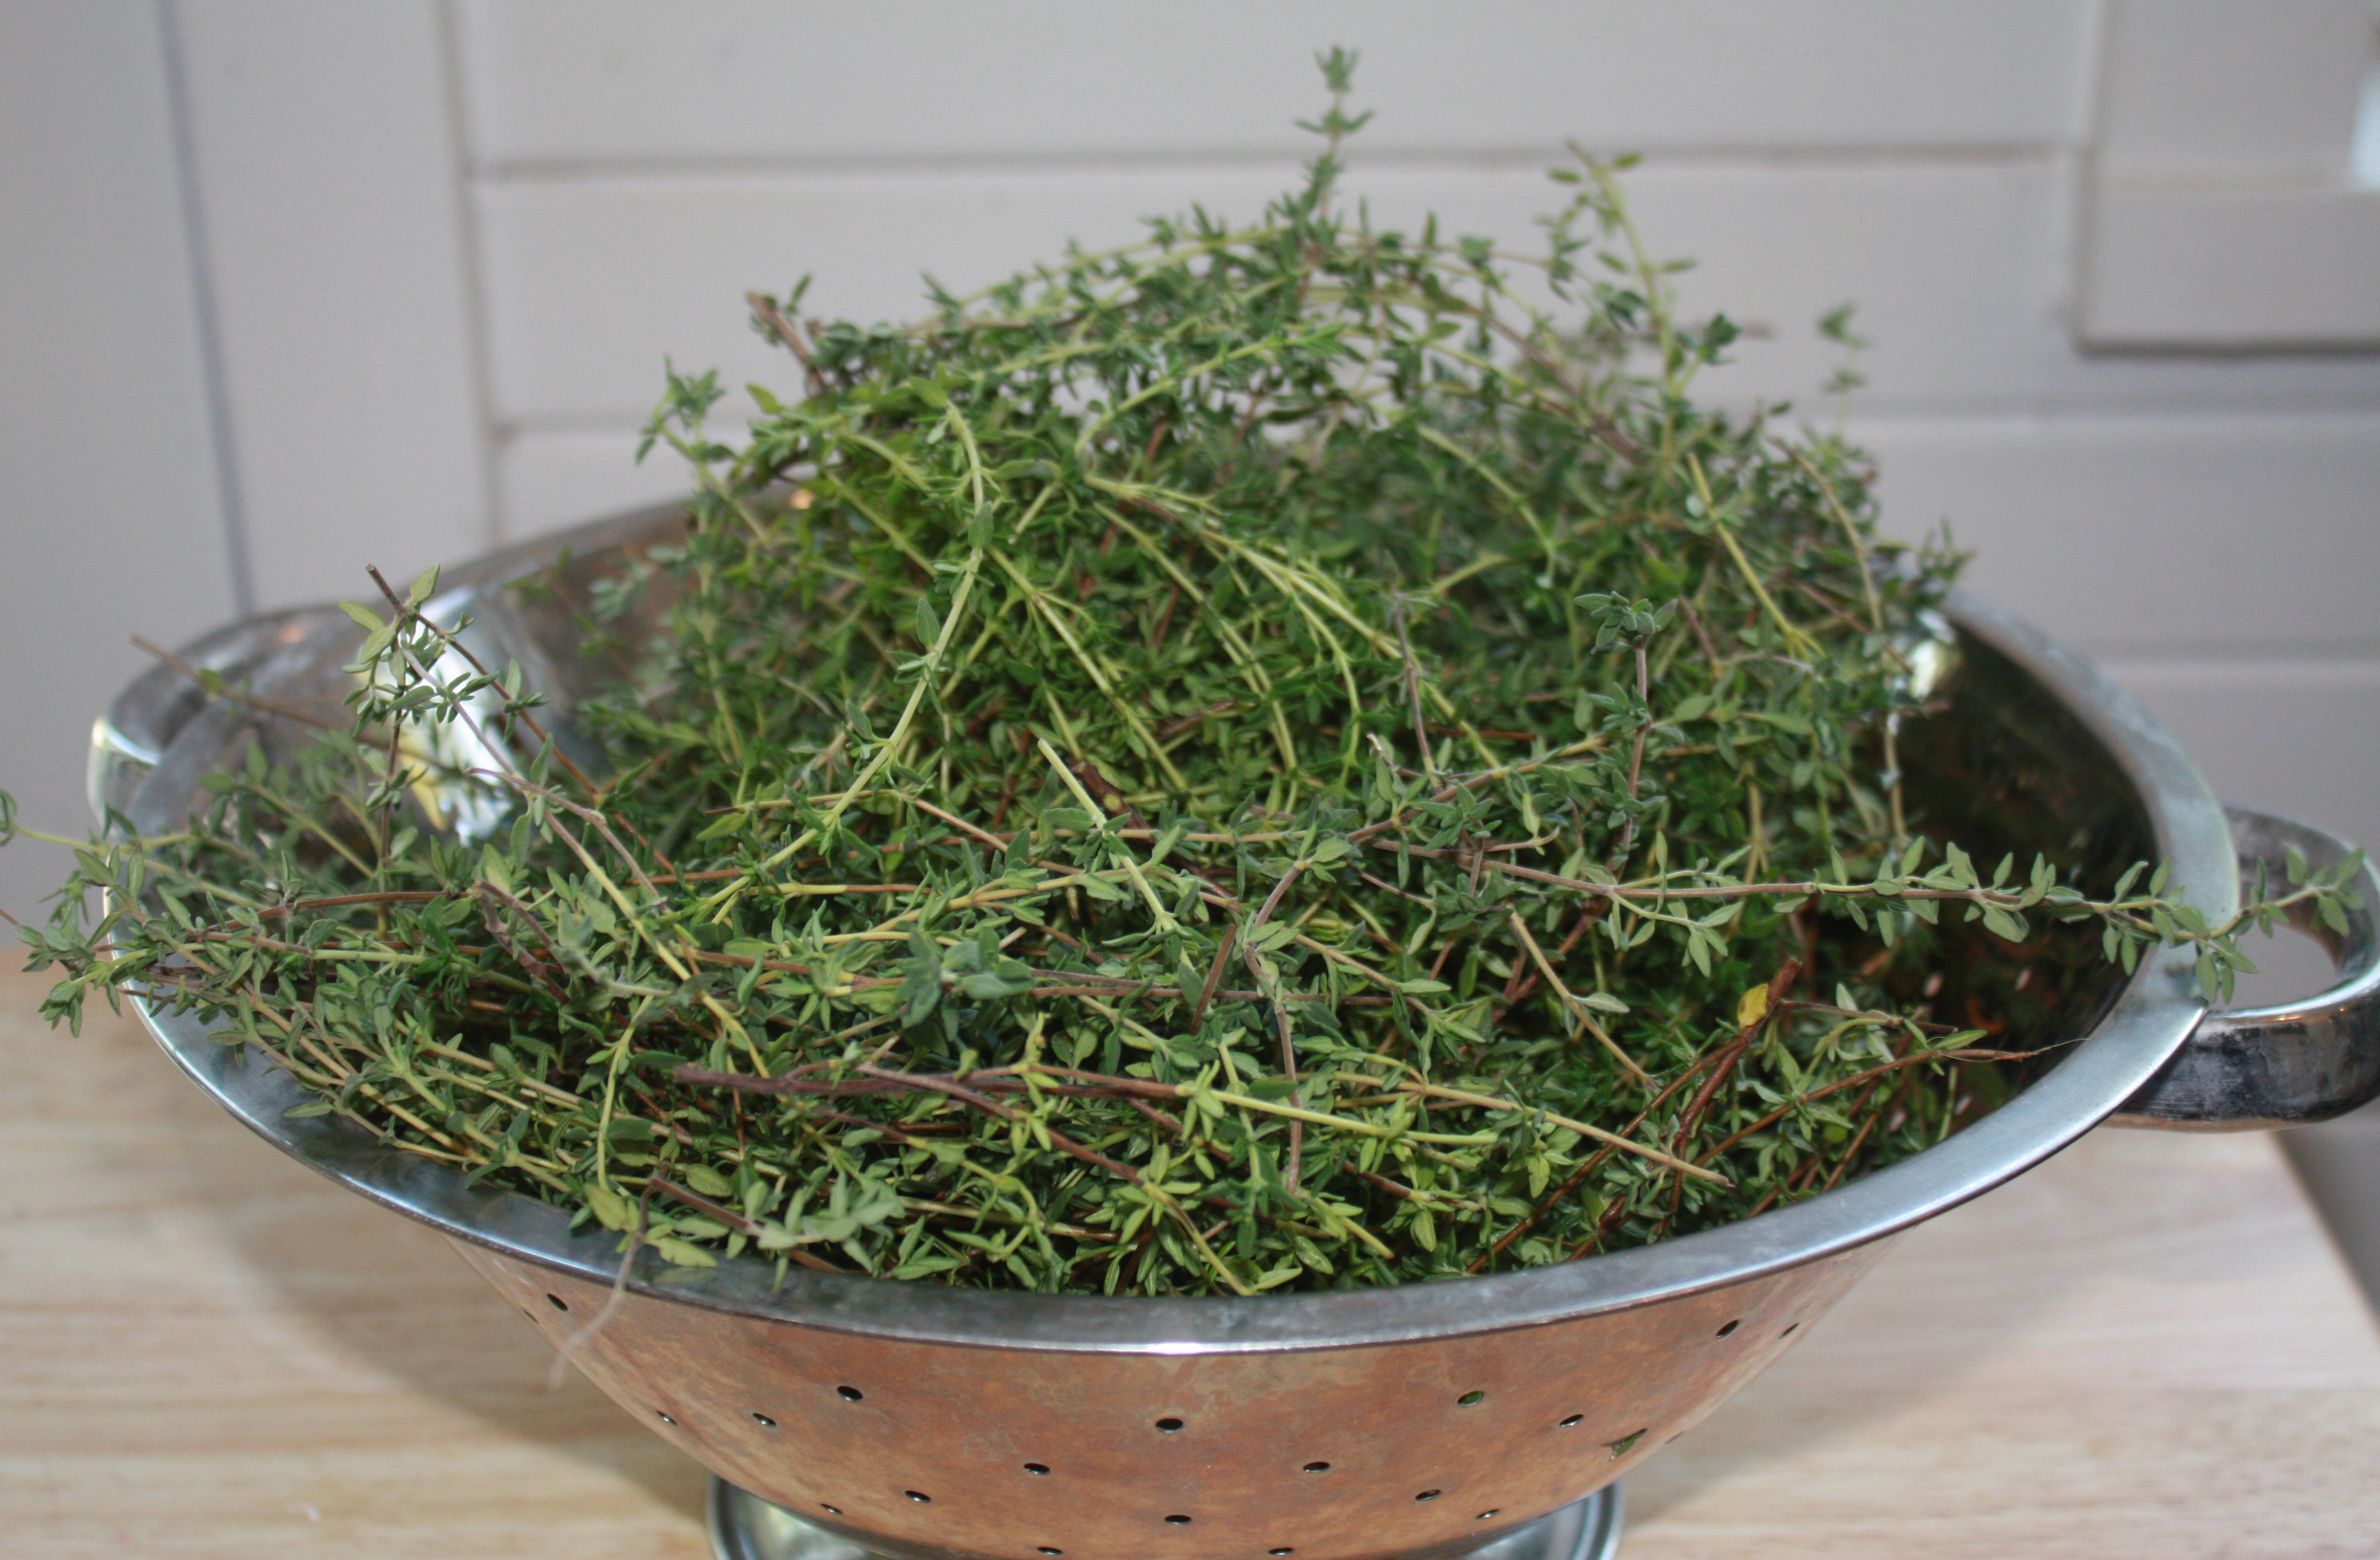
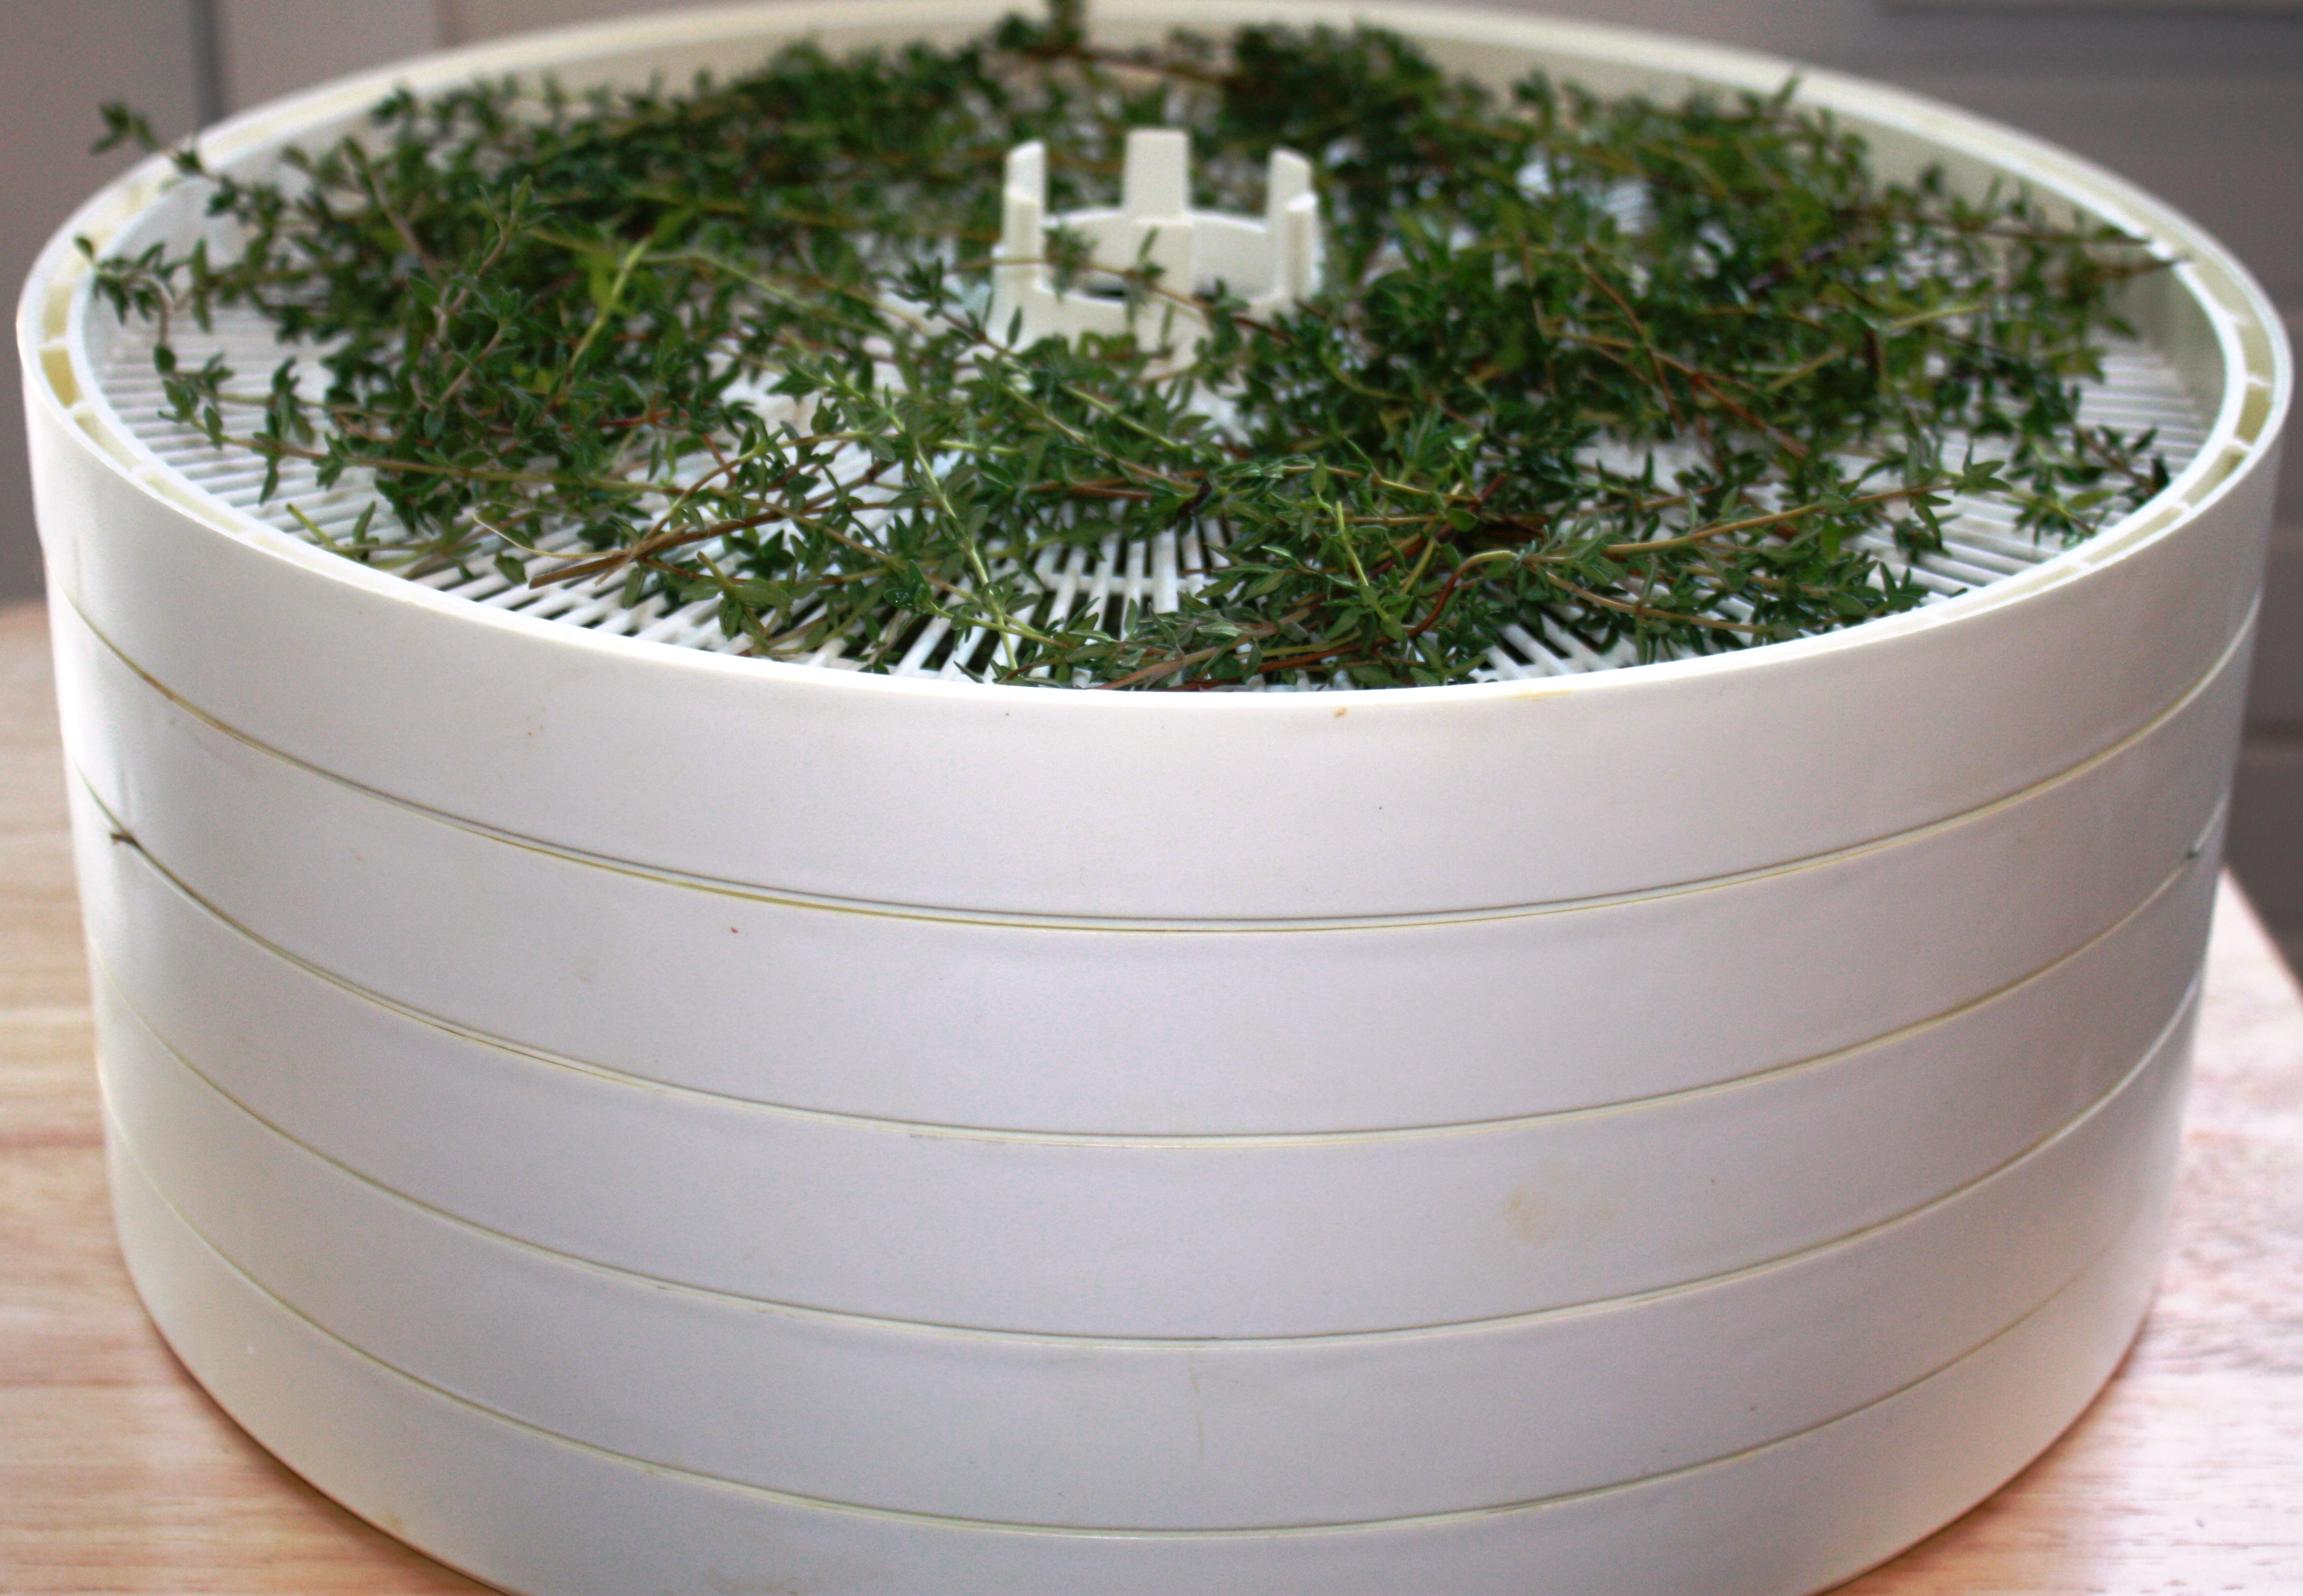
  • Thyme: peaceful sleep
  • Valerian: deep rest

Word of warning: If you allergic to ragweed you may have reactions to chamomile. Common sage and clary have been used in pillows but other sages should be avoided. Avoid tansy and Artemisia such as wormwood.  We do not claim these pillows actually help you sleep or will induce sleep. They are just fun.

Lavender has a strong scent and if strong may not induced sleep, but is used for headaches. Strong herbs such as rosemary and mugwort should be avoided in children pillows. Many pillows are made from hops alone, but hops have an unpleasant smell by itself and smell better with other herbs flowers mixed in equal parts.

These little pillows make great gifts and is a fun way to use many of your dried herbs. If you do not grow all the herbs you can usually purchase them form a good herb store. Just be sure herbs are organic. Always label the pillow with all ingredients. They are not intended as a primary sleeping pillow, but an addition.


Making Herbal Jelly

Making Herbal Jelly is fun and extends the harvest for all those herbs you planted this spring. It also makes a wonderful gifts for teachers, co-workers, and gift exchanges. Herbal jelly are unusual. It great to have these gifts ready when you need them.

Using juice instead of water, the number of flavor combinations is quite numerous.

Gather your basic supplies for jelly making.

  • ½ pint Jars, washed in dishwasher or hand washed
  • New lids
  •  Rings
  • Pectin (dry or liquid)
  • Pots: water bath caner, stock pots, small saucepan
  • Jar lifter
  • Tongs
  • Ladle
  • Juice
  • Herb
  • Sugar
  • Butter

Pick your herbs and thoroughly wash, check out part one of harvesting herbs for washing instructions. Try and pick them around mid morning after the dew has dried but before the sun is too hot. Pat the herbs dry.

To make infusion: Measure out the juice with a little extra and place in stock pot and add the herbs. Cover and heat the juice and herbs to almost boiling, turn off heat and allow the herbs to steep for about 20 minutes. Strain out the herbs and carefully measure out the amount needed for the recipe. Compost the herbs. When straining herbs, they do take up some of the liquid; this is the reason for a little extra.

Making an herb infusion

Herb infusion with apple juice

To Sterilized the jars:  Place the washed jars in a stockpot with a cloth lining the bottom of the pan and bring to a boil and boil for 10 minutes to sterilize the jars. I like to use a clean new dishcloth in the bottom of the pan when sterilizing jars so they don’t rattle around.

Place the lids in a small saucepan and cover with water and heat. Both the jars and the lids should be hot when pouring in the jelly and sealing. Start heating the water in the caner.

Making jelly

Sterilizing jars

Making the jelly: Measure out the sugar and set aside.

Chocolate Mint jelly recipe:  Follow directions for making powdered pectin recipes

Apple mint jelly

Apple mint jelly on toast

  • 4 c. apple juice
  • 4 c. sugar
  • 1 box of powdered pectin
  • 1 c. mint leaves for infusion, follow directions for making infusion
  • 1 Tbsp. lemon juice
  • ½ tsp. butter
  • Food coloring if desired, I do not use

Basic recipe for making jelly using powdered pectin: (Sugar is added last)

  • 3 c. fruit juice or water
  • 1 c. fresh herb
  • 2 Tbsp. fresh lemon juice, can used bottled, or some recipes use vinegar
  • 1 pkg. powdered pectin
  • 4 c. sugar
  • ½ tsp. butter
  • Food coloring if desired

In a large stock pot with about 8 to 10 quarts capacity with a wide flat bottom is great for most jelly recipe, add the infusion, lemon juice or vinegar, butter and dry pectin.  Bring to a rolling boil, stirring constantly. Once the boil cannot be stirred down, add the sugar and bring back to a rolling boil. Once the boil cannot be stirred down, boil for exactly one minute. Use a clock with a minute hand. Remove from heat. Skim off foam using a metal spoon.

Boillng jelly

Bring jelly to rolling boil that cannot be stirred down

Ladle the hot mixture into the hot jars, Wipe off the rim of the jar with a wet cloth, and place lid and ring and tighten. Turn over jar with jelly to coat the lid. Place the sealed jars in the hot water canner and bring to a boil and boil for 5 minutes. Take out of the caner and place on protected surface to allow cooling. The seals should pop as they cool down, if for some reason they do not, plan on using the jelly and storing it in the refrigerator.

Basic recipe for making jelly using liquid pectin, (Pectin is added last)

  • 2 c. fruit juice
  • 3-1/2 c. sugar
  • 2 Tbsp. lemon juice
  • 1 pouch liquid pectin (3 oz)
  • ¼ tsp. butter
  • 1 c. fresh herbs
  • Food coloring if desired

For the liquid recipe mix everything except the liquid pectin. Stirring all the time, bring to a full rolling boil that cannot be stirred down. Add the pectin all at once and return to rolling boil. Stir constantly and boil for exactly one minute. Remove from heat and skim off any foam with metal spoon and pour into jars and seal. Water bath according to directions, most are 5 to 10 minutes.

Note: I have not had good luck using liquid pectin when making my apple mint jelly. I have made it twice with liquid pectin and ended up with apple mint syrup. Not what I originally intended.

Herb jelly recipes:

  • Basil, either purple or sweet with water                with powdered pectin
    • 4 cups water
    • 2 c. packed fresh basil leaves, finely chopped
    • 1 pkg. powdered fruit pectin
    • 5 c. sugar
    • Make according to powdered pectin recipe and water bath for 15 min. (no vinegar)
    • Lemon Verbena with liquid pectin
      • 2 c. torn lemon verbena leaves
      • 2-1/2 c. water
      • ¼ c. cider vinegar
      • 4-1/2 c. sugar
      • 1 liquid pectin (3 oz.)
      • Make according to powdered pectin recipe and water bath for 5 minutes (has vinegar)
      • Thyme jelly
      • Rose Geranium jelly
      • Orange mint jelly
      • Lemon balm jelly
      • Sage jelly
      • Rosemary jelly
      • Chamomile jelly
      • Lavender jelly
      • Parsley  jelly
      • Lime Geranium jelly
      • Fennel

      Jelly recipes contain acid such as vinegar or lemon juice usually require less time in the water bath.

Herb and Fruit Juice Combination’s jelly:

  • Basil with orange juice
  • Lemon balm with red grape juice
  • Lemon thyme with white grape juice or lemonade
  • Lemon Verbena with  lemonade
  • Marjoram with grapefruit juice
  • Rosemary with orange juice
  • Savory with cranberry juice
  • Sage with apple juice or cranberry juice or pineapple juice
  • Scented Geranium with apple juice
  • Sweet woodruff with white wine
  • Thyme with purple grape juice or apple juice or orange juice
  • Rose petals with apple juice
  • Lavender with apple juice or orange juice or strawberries
  • Mint with apple juice
  • Tarragon with grapefruit juice
  • Calendula with grapefruit juice
  • Mint with grapefruit juice
  • Anise hyssop with grapefruit juice
  • Parsley with grapefruit juice or pineapple juice

It is fun to think of all the different combination of juice with herbs. Try one or two and you might find a favorite. These make great and unusual gifts.

Summertime is the best time to make herbal jellies, but I have used frozen mint when I needed to make jelly with good results.

Have fun!


Harvesting and Drying Fresh Herbs Part Two

Part Two:Harvesting and drying fresh herbs
In this part of the drying herbs blog we will address other ways to dry herbs,freezing herbs, and how to dry seeds and roots. In Part one we address using a dehydrator and hanging herbs to dry. And the best way to harvest the herbs to get them ready to dry.

Screen Drying: Herbs with small leaves (leave on the stem) and short stems which do not hang well can be dried on screens.

For larger leaves snip off the stems and lay on screens in a single layer. During drying time, turn over the leaves at least a couple of times for even drying. Lay the screens in a well ventilated area. I like to use a wooden clothes rack and lay the screen on the rack.

Drying herbs

Screen drying comfrey on a nursery plastic tray.

Try using the plastic trays from the nursery that have openings in the tray. If the leaves are small, lay paper towels down first. They should be dry in a little over a week. Be sure and not leave them too long and they will collect dust.

Screens can be constructed with scrap lumber and window screening. Another way is to use canvas stretcher frames which are glued and cover tightly with screening. I use a staple gun to attach the screen.

Microwave drying seems to be latest way to dry herbs; I have not tried this method as I think the microwave would heat the herbs at too high a temperature. The information I found says watch the drying time, as they can start a fire.

Wash the herbs and lay on paper towels to air dry for about an hour. Place herbs on a paper towel in a single layer. Cover with another sheet of paper towel. Heat for one minute on high, turn over stack over and heat for another minute. Depending on your microwave it may take a more or less time. After the initial two minutes, microwave every 30 seconds, until herbs are dry and brittle. Store and label.

Oven drying: This one works pretty well, but again I would not use this method for medical herbs. Set your oven at its lowest setting about 180°F. Leave the door open to allow steam to escape. Wash and air dry herbs. Lay the leaves in a single layer on a cookie sheet. Stir every once in a while to ensure even drying. Dry for about 4 hours. Be sure and work with only one kind of herb. The flavors can actually mix.

Gas oven with constant pilot light drying: Follow the above directions in reference to the preparation of the herbs. Set the temperature at the lowest setting while keeping the door open, and will keep the flame burning. After a few minutes, turn off oven and place the cookies sheets in the oven. Close the door and leave it alone overnight. Check if the herbs are dry before removing.

Salt or sugar: Layer clean and air dry herbs such as mints, anise hyssop, lavender, rose, and scented germanium with sugar. Be sure all parts of the herb are covered. Leave them until they are thoroughly dry. Remove leaves, label and store.

Pick the herbs suited to either salt or sugar. Rosemary, oregano, marjoram, sage, savory, and lovage are best in salt prepared in the same manner as sugar.

Refrigerator drying:  This is one of my favorite ways of drying especially if you don’t have a food dehydrator. Lay the clean and dry to the touch herbs on paper towels on a tray in the refrigerator and allow drying. Do not use the crisper bins. You can also place the herbs in a paper sack and leave in the refrigerator to dry.

Freezer Method:  Some herbs loose there taste when dried, but lend themselves to freezing. Some herbs are delicate and freezing is as close to fresh as possible. Herbs better frozen include basil, chives, dill, fennel, and flat leaf parsley. Herbs should be dry to the touch and place in freezer bags and quickly frozen. Oncefrozen the herbs can easily be stripped from their stems.

Ice cube freezing: Chop the herbs and place in an ice cube tray. Measure a teaspoon or Tbsp. of the herbs for each hole and fill with water. Freeze.

Ice cube freezing of herbs

Freezing herbs in ice cube trays. Mint ready to make into tea.

Another method is to place herbs in a blender and add enough water to fill the trays. Blend and freeze. Once frozen the herbs can be pop out of trays and store in plastic bags. Be sure and label with the amount of the herb. These cubes can be added to soups, sauces, stews or your favorite recipe.

Tea herbs can be added to a pan and covered with water and bring to almost boil and serve as hot tea. Don’t place the frozen cube in a glass mug and hot water added. The mug might break.

Drying Roots and rhizomes: Roots should be dug in the fall and allow to air dry. Annuals can be dug the first year, but perennials should be allowed to mature for at least two or three years. Annuals roots should be dug up at the end of their growing cycle.

Ginseng is reported to need at least seven years before roots reach their peak. Echinacea needs about three years for their roots to reach any size.

Arrange the roots in front of a fan to speed up drying. Wash quickly and pat dry immediately. If the top of the plant will not be used, compost. You can replant some of the roots of most herbs and they will grow just fine.

The fall is when the greatest concentration of medicinal compounds is stored in the root. Some herbs such as comfrey or horseradish can have their roots cleaned and the hairs remove, but other such as valerian contains most of the compounds is on the surface or skin.

Some roots can be sliced and place on a baking sheet and dried in the oven.

Before digging any roots make sure you are on your own land or you have permission from the land owner. Along the side or the road is not the place to dig, not only is it illegal in most parts, the roots have absorbed car exhaust which we don’t want in our medicine.

Drying and storing Seeds: Harvest seeds on a nice warm day when they have ripen but have not begun to fall. This is usually when the seeds have lost their green and the pods are hard, crinkle dry, and brown or black. Cut the seed heads from the herbs such as dill, lovage, coriander, fennel, and chervil.

Tie the plant inside a paper bag and dry upside down. As they herb begin to dry the seeds will drop into the bags. Carry the bags to the garden, so you do not lose the seed as you walk back to the

Dry seeds

Dry basil seeds ready to plant next year. Laid on paper towels to dry

house. If you carry them back without securing the seeds, you may have plants in places you do not want. Keep each variety in its own bag and be sure and label. Seeds should be dry within two weeks.

Store seeds in jars or I like to keep mine in paper envelopes in a cool, dark place such as the refrigerator.  Some seeds need the cold to stratify, but others may not like to be kept in the cold. This may take some experimentation and research on your part.

Just a few final notes: Harvesting and drying fresh herbs will be appreciated this winter when you have herbs ready to use. Lay a white towel on the table before drying your herbs. This allows you to find any insects and to inspect your herbs before drying.

Humidity will affect your drying time and the quality of the herbs. The dryer the better, avoid drying on rainy days.

Herbs while drying should be protected from direct sunlight, and good circulation. Once dry the herbs should be used in about a year, just in time to dry a new batch the following year. It is important to keep moisture out of the jars used for storing. Who wants to open their cupboard and find a moldy mess?

When drying seeds, be sure they are ripe and ready. Once dry, remove any excess material by blowing across the seeds. Some who save in bulk use a box fan place in front of the seeds to blow away the excess material. Do this outside.

Gather only as much as you can handle at one time. Gather only one variety at a time, and keep in your gathering basket. After you have place one variety in your tub, now go back and gather another and place in another tub. Herbs should be gathered in the morning before it turns hot. If you don’t gather the entire herb you want, and it is not close to frost date, there will be another day.

Try one of these methods and you will be glad this winter when you want to use your dried herbs. Don’t forget to label with date, variety and drying method.

Happy Gardening!

Harvesting and Drying Fresh Herbs and Flowers part one

Harvesting and Drying Fresh Herbs and Flowers is an easy way to extend the harvest of your herbs and flowers. Basically it is providing an environment for your herbs to remove the excess water and easy to store for future use. The herbs should be dried in a way that allows the herb to retains its flavor, fragrances, and shapes as much as possible.

Several methods can be used to preserve the herbs which include:

  • Drying using a food dehydrator
  • Drying in the refrigerator
  • Air drying
  • Hanging to dry
  • Drying using the microwave
  • Drying use the oven
  • Freezing the herbs
  • Making herbal vinegars
  • Freezing in oil

When to Cut: Cut the herbs just before flowering on warm, dry morning after the dew has dried and the sun has warmed the herbs which help to bring the essential oils to the top but before they began to evaporate.

It is best to stick to one variety at a time to keep the flavors from mixing and well– keep it organized. Almost every herb can be dried but some herbs have better flavor if frozen. This blog will give you lots of advice on which herbs to dry and which to freeze, but sometimes it takes experimentation. Drying herbs will react in different ways in different parts of the country. In humid areas it takes longer for the herbs to dry and in dry areas the drying time will be shorter but may result in unattractive herbs.

Some herbs will change their color dramatically, or their shape while others will retain their original color and/or shape. Keeping an accurate notebook will help the harvest in the following seasons. Notes should include the date, weather conditions, the harvest methods and the results.

Start with harvesting the herbs. If the herb has a small leaves such as thyme or marjoram, the stems and leaves should be left intact. With medium to large leaves, I cut the stems and place gently in a gathering basket or tub and as I pick over the leaves, I cut them away from any thick stems, depending on your drying method.

The herbs can be cut back about once a month. Perennials should only be cut back about a third, and annuals can be cut back about half and cut back completely at the end of the season. The last cutting should allow the perennials to recover before the winter.

Avoid picking damage leaves or leaves chew up by insects, avoid leaves with powdery mildew or mold. Be sure and pick more than you expect using, the herb will shrink.

Washing: There are two schools of thought when it comes to washing your herbs before drying. Some books say don’t wash, other say do wash. I always wash, because I see what is left in my tub when I am through washing.  Herbs with small leaves leave on the stem for drying.

I use two clear tubs and wash from one tub to the other until the water runs clean. As I wash I pick over the leaves, cut off large leaves from the stems and check for any foreign objects.

I always wash the herbs the same whether I am using them as culinary, medical or crafts. I like to know I can use them however I want without worrying about how they were cleaned.

Drying herbs

Thyme is air dry in a colander for a couple of hours

Dehydrator Drying: Place the herbs in a colander and allow airing dry for a couple of hours. Once most of the water has been removed I place the leaves in a single layer in a food dehydrator with a temperature setting between 90° and 110° F. To maximize the essential oils in the herbs, they should not be dried above 110° F. Allow the leaves to dry until crispy and store in a glass jar with tight fitting lid. I have been using my dehydrator for many years and it is my favorite method.

drying herbs

Dehydrator used to dry thyme

Check after a couple of days to make sure there is no condensations in the jar, if it has only been a couple of days re-dry and if it has been longer, start over.

The next two pictures show a rack before drying and after drying.

Drying plantain

Plantain ready for drying at 100 ° F

After drying is complete

Rack after drying is complete. Plantain

Air-Hang Drying: For smaller plants, gather a few sprigs together about 6 to 8” long and place inside of a brown paper bag that holes have been cut into to allow air drying. Gather the stems together and tie the bag close with a rubber band, catching the stems with the rubber band.

Hang the bag either on a metal clothes hanger or hook and hang up to dry in a cool, well ventilated area.  It may take about 2 weeks. Check every couple of days for crispness and to turn the sack around.Once dry place the jar in a dark cupboard to retain freshness. Use within one year.

hang air drying herbs

Herbs bunch to place inside paper bag

Herbs with larger leaves can be hung to dry but they take a lot of room and a large grocery paper bag. For years herbs were hung in the rafters, but most people leave them too long and they become dusty and unusable. Herbs such as bronze fennel look wonderful hanging in the rafters but this is used mostly as decoration.

Drying herbs

Herbs hung on hooks for air drying

Air-drying: Lay the single layer of herbs flat on either a plastic tray with holes in the tray (such as those sometimes used as nurseries) or flat baskets or screens. Place these trays on rack used for drying clothes or on shelves with circulation all around. Check every day and once dry place in jars.

Try not to crush the herbs until they are ready to use, because the essential oils and aroma are release when crushed. The inside of your jar does not need the flavor of the herb, your food or medicine does.

Check out part two for information on Harvesting and drying fresh herbs and flowers for drying seeds, flowers, roots and other methods of drying and harvesting herbs.